The University of Tennessee, Knoxville

An issue affecting many users has been reported. For updates, click the image above to visit the IT System Status page.
OpenOnDemand is a web-based portal/interface that provides access to the cluster’s HPC resources. You can manage files, jobs, and access graphical interfaces all through Open OnDemand. This document describes how to access and use Open OnDemand and its related services in the Secure Enclave.
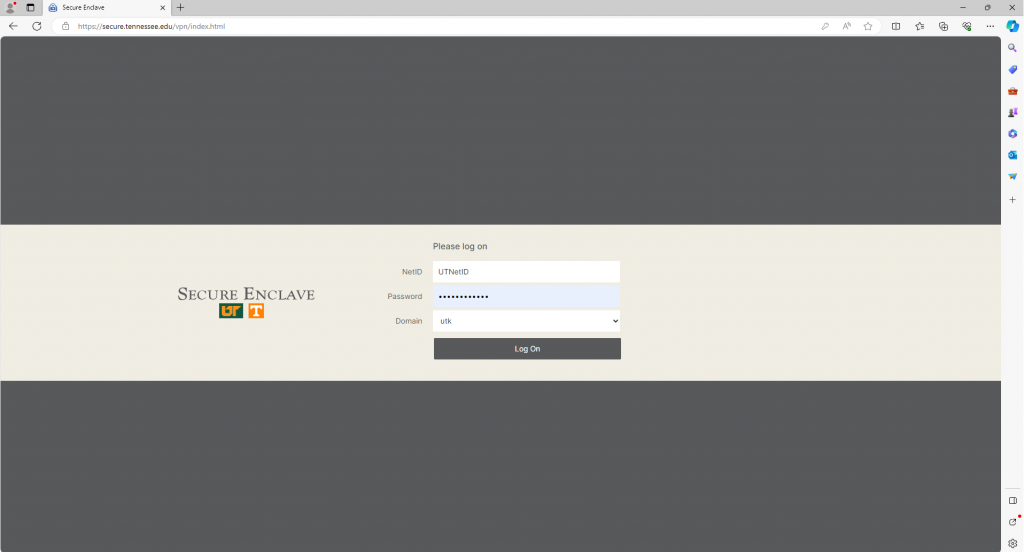
Please follow the below steps to successfully log in to the web based graphical interface of ISAAC Secure Enclave cluster.

sip-login1-se.utk.tennessee.edu or sip-login2-se.utk.tennessee.edu in the address bar as shown in Figure 4 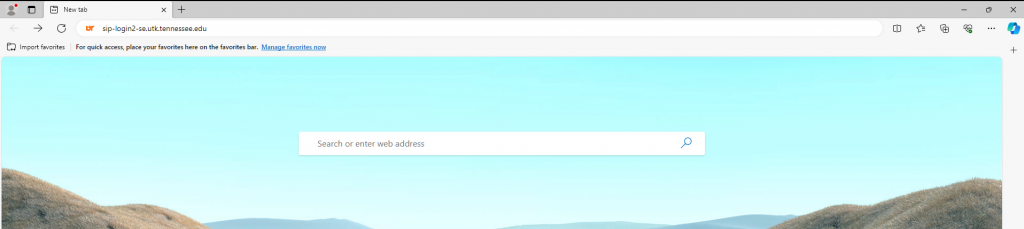
Upon successful authentication, you will see the Open OnDemand dashboard. The top dark gray ribbon of the dashboard contains several menus that grant access to files, jobs, and your current interactive sessions as shown in Figure 6.
The “Files” menu in the top-left of the Open OnDemand dashboard gives you access to your files on the ISAAC Secure Enclave HPSC cluster from within a browser. Initially, the File Explorer shows your home directory and all its contents. Figure 7 shows the File Explorer interface.

To navigate through directories, click on the directory you wish to enter. To return to your former directory, click on the uparrow highlighted with a red box shown in Figure 7. If you are unsure where you are located within the directory tree, look above the directory listing pane (next to the red box marked in Figure 7). You will see several names and letters separated by forward slashes (/). This indicates the absolute pathname of your current location. Please note that the default directory of the user is his/her home directory, this is where user end up when logging in to the OOD.
In the left most pane of the File Explorer, you see the button for your home directory. If at any time you wish to return to the top-level of your home directory, click on Home Directory. You may also navigate to directories within your home directory using central pane.
To quickly navigate to a specific directory, click on the Change directory button highlighted with a red box as shown in Figure 8. A new window similar to below will appear.
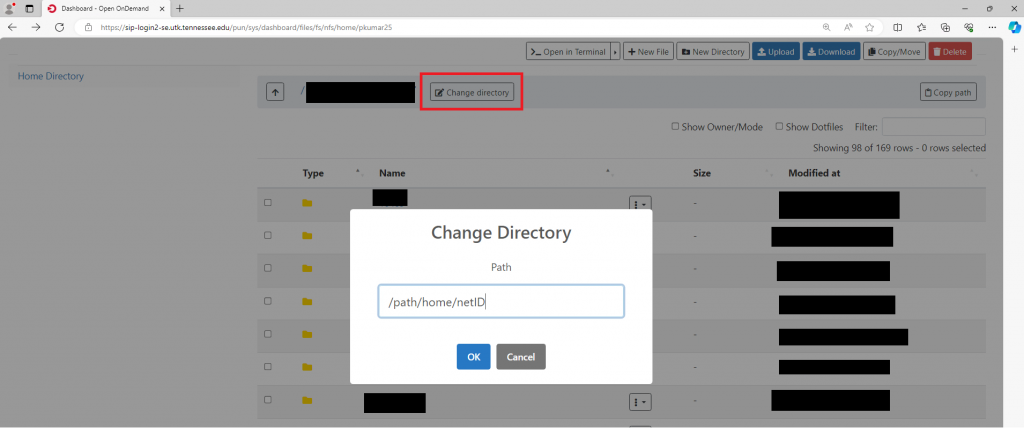
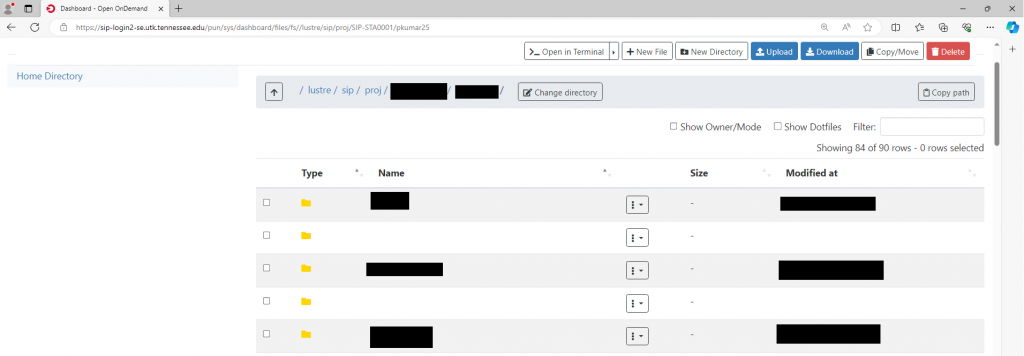
Enter the absolute path of the directory to which you wish to change and click OK. For example, to navigate to your Lustre directory, type /lustre/sip/proj/<project-name>/<netID> where <netID> is your University NetID. The file explorer will then place you in the specified directory and display its contents as shown in Figure 9.
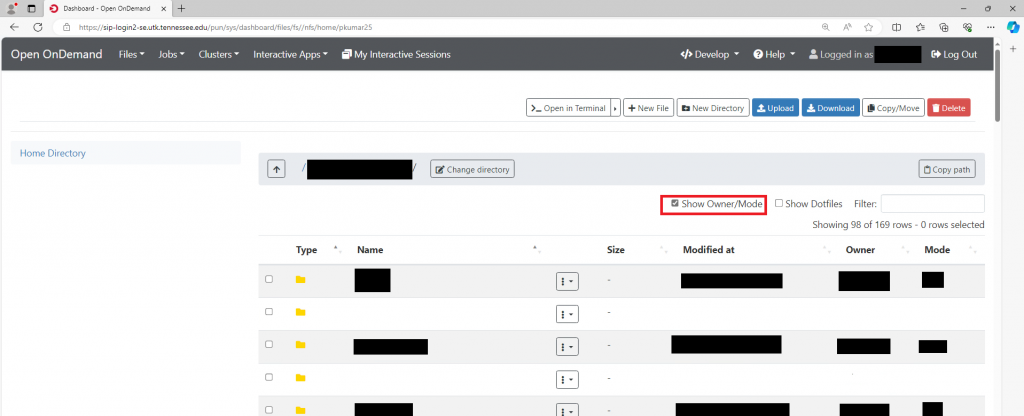
Open OnDemand’s file explorer can also show permissions, ownership, and hidden files. In the top-right of the explorer window, check the boxes for “Show Dotfiles” and “Show Owner/Mode” to enable these views. Figure 10 shows the directory listing pane with the Show Owner/Mode option enabled. Permissions and ownership cannot be modified from within this interface. Hidden files are prefaced with a dot (.) and are usually user configuration files.
To view a specific file, click on the three dots next to file, a drop-down menu will appear as shown in Figure 11. Choose the appropriate option and click on it, the plaintext contents of the file will appear in a new window. To edit the file select the Edit option below View in the drop-down menu.
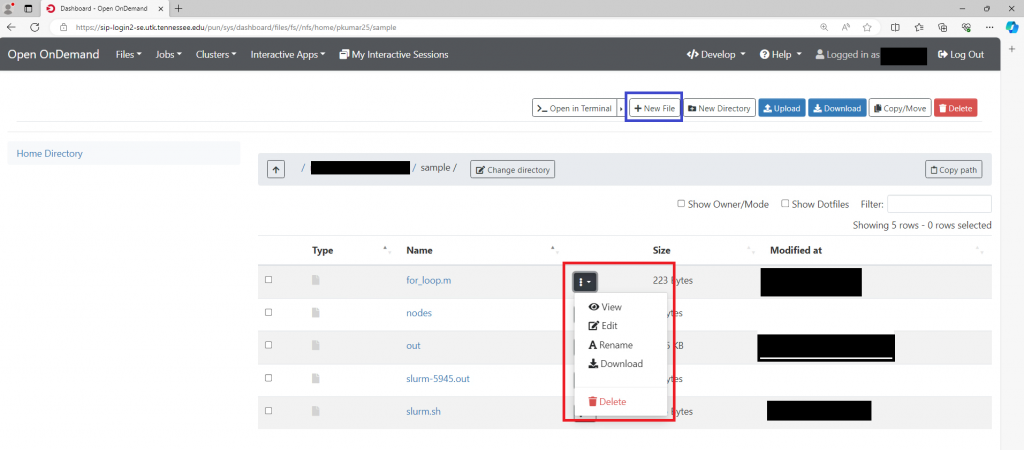
To create a new file in the File Explorer, select the option labeled New File as shown in Figure 11 on the top right above the central pane highlighted with blue box. You will be prompted to give the file a new name and press OK. After you name the file and confirm its creation, it will be placed within your current directory.
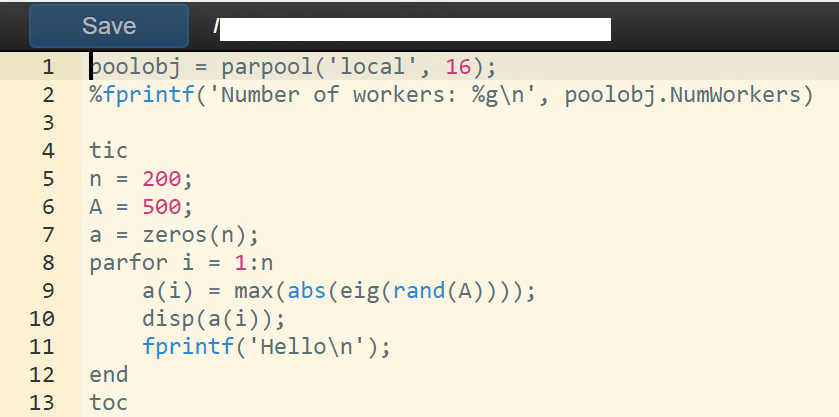
To modify the file, select the file in the directory listing pane, then select the option labeled Edit as discussed above Figure 11. The Open OnDemand editor will open. You can then type the information you wish to put in the file. The editor features several customization options, such as the editor’s theme and text mode. When you finish editing the file, click “Save” in the top-left of the editor. When you return to the File Explorer and view the file, you can view the changes you made.
The File Explorer also allows you to rename existing files and directories. To rename a file or directory, select the item you wish to rename in the directory listing pane, click on the three dots next to the file. In the drop-down menu, there is a Rename button, click it. The File Explorer will prompt you for the new name, and once you confirm it, your changes will take immediate effect.
Files and directories can be copied and pasted within the File Explorer. To copy or move a file or directory, select the item in the directory listing pane, then select the option labeled Copy/Move next to blue colored Download button on the right side of the image (refer to Figure 13).
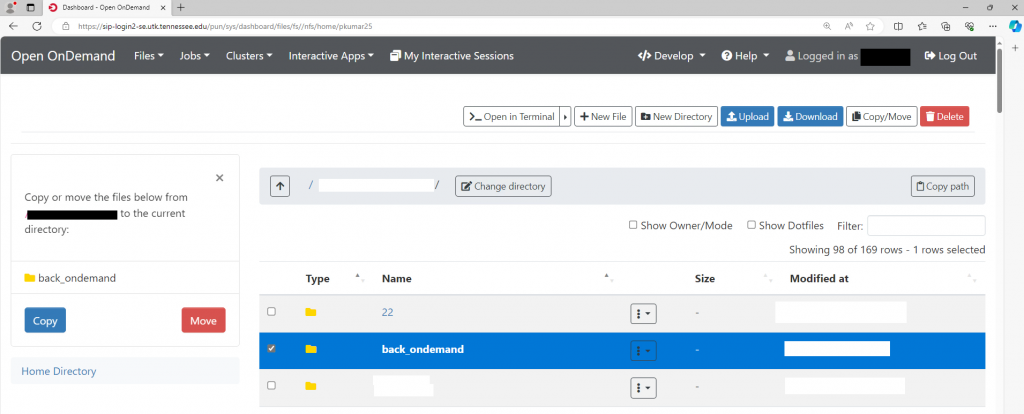
Once the item has been copied to your clipboard, a small widget will prompt as shown on the left side of the Figure 13. The widget has two options Copy or Move. Select the directory where you would like to copy/move the selected directory or file and choose one of the two presented options in the widget. The copied item will then appear in the directory of your choice.
If you wish to delete a file or directory, select the item in the directory listing pane, then click the Delete button (red) on the right-hand side of the explorer window (refer to Figure 13). You will be prompted to confirm the deletion. Once confirmed, the item will be permanently deleted.
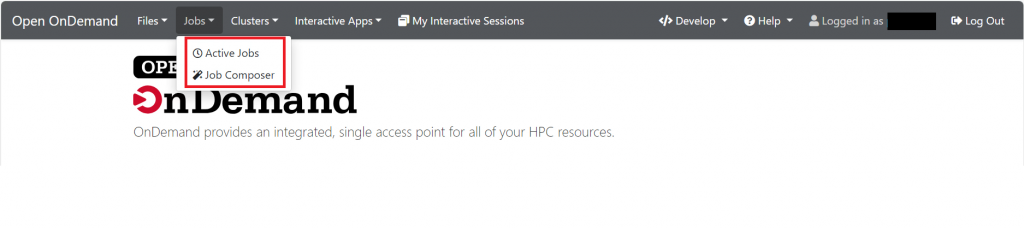
Under the Jobs drop-down menu next to Files menu in the OOD dashboard (Figure 14), you have two options: Active Jobs and Job Composer. Both options provide advanced job management from within a web browser.
In the Active Jobs section, you will see an organized list of your queued and running batch jobs on the cluster. Figure 15 shows the Active Jobs interface. You can filter through jobs to see particular entries, in addition to sorting by the attributes of your choice. To do this, click on the arrows next to the attributes until the list is sorted as you desire.
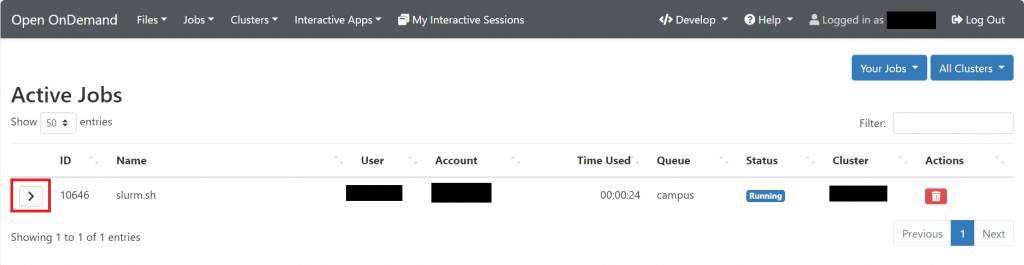
When a job is queued or running on the cluster, you can view detailed information on the job from within the Active Jobs interface.
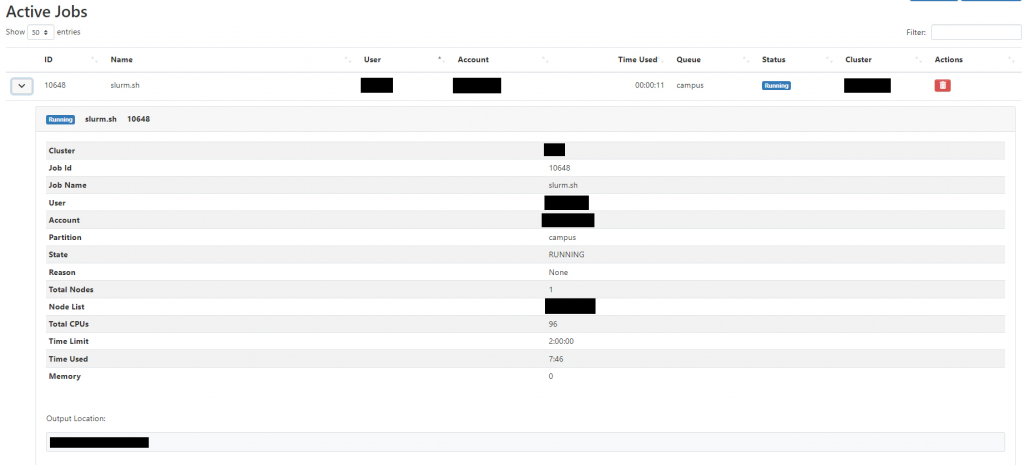
To access this view on a queued or running job, click the right-facing arrow on the far-left of the job’s row (as shown in Figure 15, highlighted with red box). You will then see statistics and information about the selected job as shown in Figure 16 for an example case. Output Location is the location of the job where the job script and the files are located. Each job you create and start through OpenOnDemand is placed within your /home/ondemand directory, so when you wish to retrieve the job’s data, remember to navigate to your ondemand directory. You can specify another output location when you create the job through Open OnDemand or edit the job script to supply another location.
In the Job Composer section, you can create new batch jobs to run on the cluster based upon several criteria. Figure 17 shows the Job Composer interface. When you initially open the Job Composer, the system will briefly explain each option available to you. Once you click through these prompts, you may then click “New Job,” then select the template, path, or job you wish to add. Note that if you close the initial information menu, you will not need to click through each prompt.
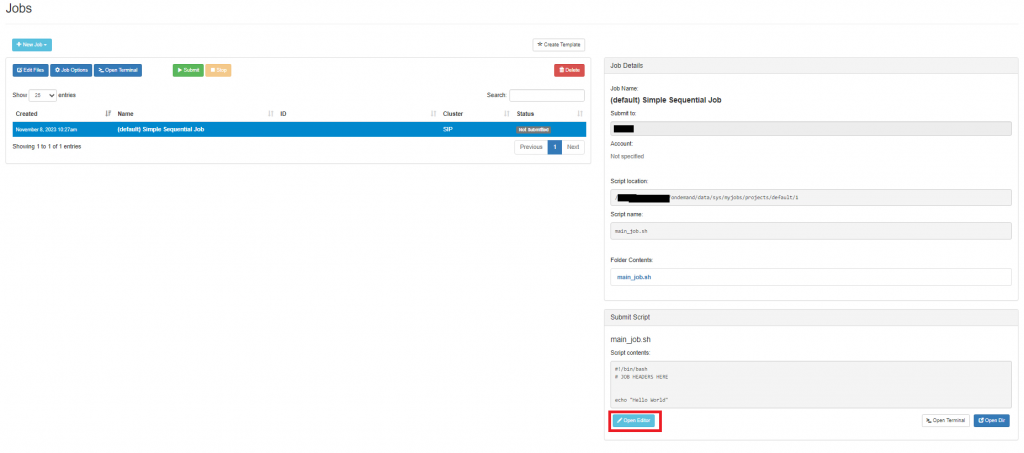
When you add a new job from the default template, the Job Composer will create a Simple Sequential Job. Note that you may have to add all the SLURM directives in the job script. In addition to the job, it will create a job script and a job directory. Figure 17 shows the Job Composer interface when a job is created with the default template. To modify the job’s options, select Job Options. You can specify the job’s name, cluster, script, and account. To edit the job script, highlight the job and select the Edit Files option in the Job Composer interface. Select the job script, then select Edit. You may also rename the job script if necessary. Additional files can also be uploaded or created in the job’s directory from the File Explorer.
Jobs may also be created with other templates. These can be the default templates or templates that you build within the Job Composer and can be found under the dropdown menu +New Job (see the option in the left side of the Figure 17).
In addition to template-based job creation, you may also create jobs based upon a specified path or an existing job. To do that click on New Job drop-down menu (Figure 17) and choose From Specified Path With a specified path, you create a job based upon a directory that already exists. The path will either be to your home or project directory. Once you specify the path, you then modify the typical attributes of the job.
Beyond job creation, the Job Composer allows you to submit, stop, and delete your existing jobs. Like the Active Jobs menu, you can filter and sort the available jobs.
noVNC allows users to interact with the cluster in a graphical desktop environment from within a web browser. noVNC is particularly useful when you require a graphical X11 application.
To launch a noVNC session, log in to Open OnDemand. In the dashboard, select “Interactive Apps” from the top-left of the window as shown in Figure 18.

In the dropdown menu, select SIP Desktop. This will open the session submission form depicted in Figures 19 below.
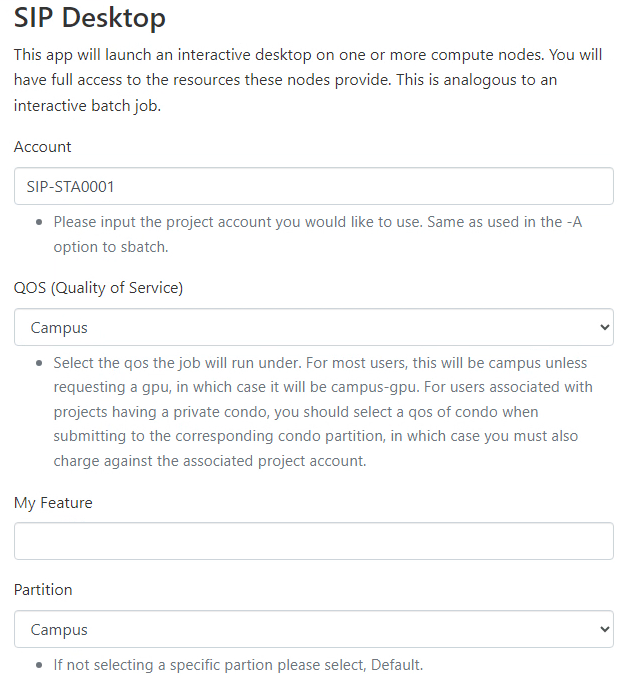
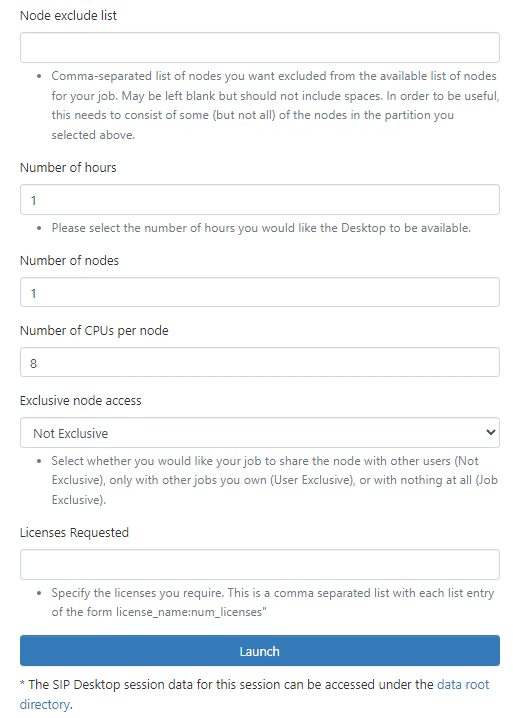
In this form, specify the resources your application(s) require. All the available options map to sbatch options for interactive jobs. To learn the meaning behind these options, please review the Interactive Jobs section of the Running Jobs document. For most situations, a single node with one core is sufficient. If your application requires GPUs, please specify campus-gpu as the partition. Please be aware that the number of cores per node you request directly influences the memory your job receives. Therefore, make sure to request enough cores for your job so that your job does not run out of memory leading to the termination of the job.
It is also important to note that you can request node-exclusivity for your session. With node-exclusivity, no other session will run on the node your session receives. In cases where the application you will use in the session is resource-intensive, setting this option to “Yes” may be beneficial. Otherwise, leave this option as “No.”
Submit the noVNC session to the scheduler by clicking on the Launch button in Figure 19. For most single-node, single-core jobs, the session should begin within five minutes; however, this is dependent on the current resource utilization of the cluster. If you requested multiple nodes, it could take longer for the session to start. When the session is ready, access it by clicking the Launch SIP Desktop in New Tab button. Figure 4.13 highlights this button.
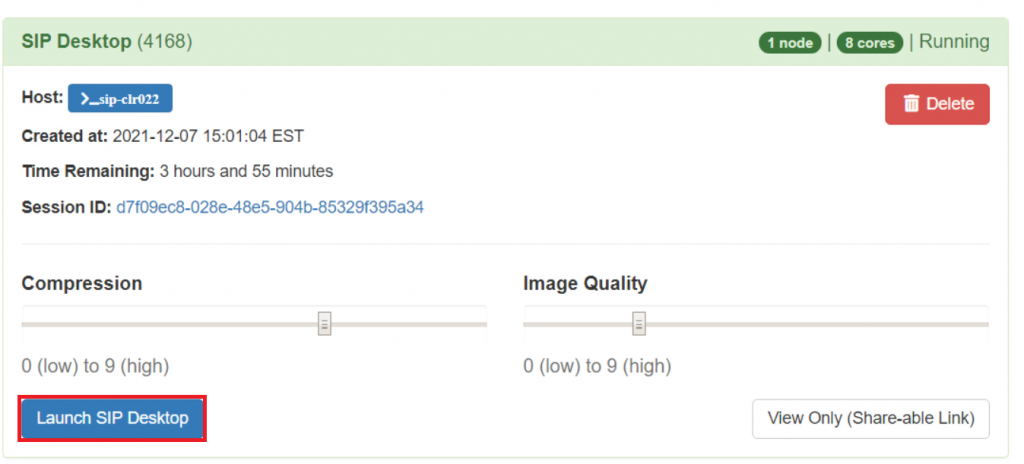
You will see a standard Linux XFCE desktop environment when you access the session. The applications menu contains links to several useful packages in the top-left of the GUI. You can open your home directory in the bottom middle of the GUI with the file cabinet icon. The black icon with a greater-than (>) symbol opens a terminal. From this terminal, you can perform any task you would get from a standard terminal, such as accessing files, loading modules, and running applications.
If you wish to manually terminate the noVNC session, click on your username in the top-right of the GUI and select “Log Out.” Then, delete the session in Open OnDemand.
Jupyter Notebook is a web-based application that enables you to intuitively create and manipulate data on the cluster. It features a fully-functional Python 3 IDE (integrated development environment), a text editor, and a file manager. The sections below outline how to access and set up Jupyter Notebooks on the cluster.
To access Jupyter Notebook, navigate to Interactive Apps on the OpenOnDemand dashboard. Select Jupyter Notebook from the dropdown menu. The Jupyter Notebook session submission form will appear as shown in Figure 21.
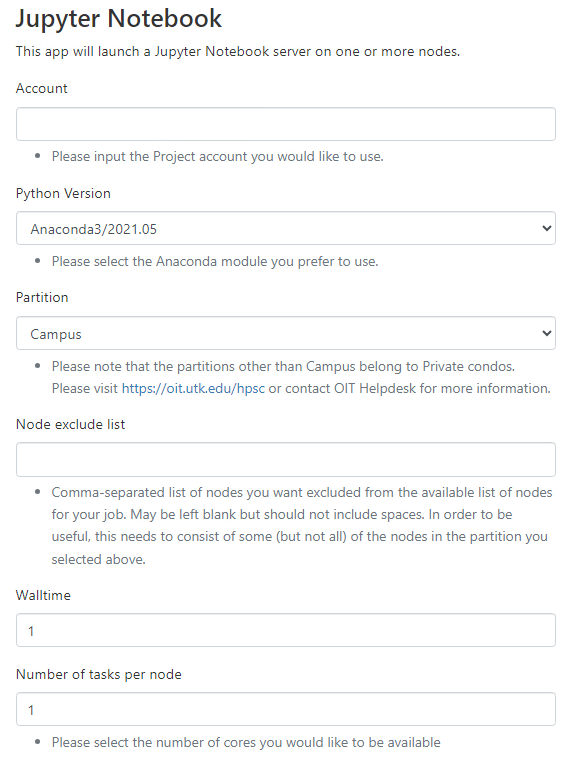
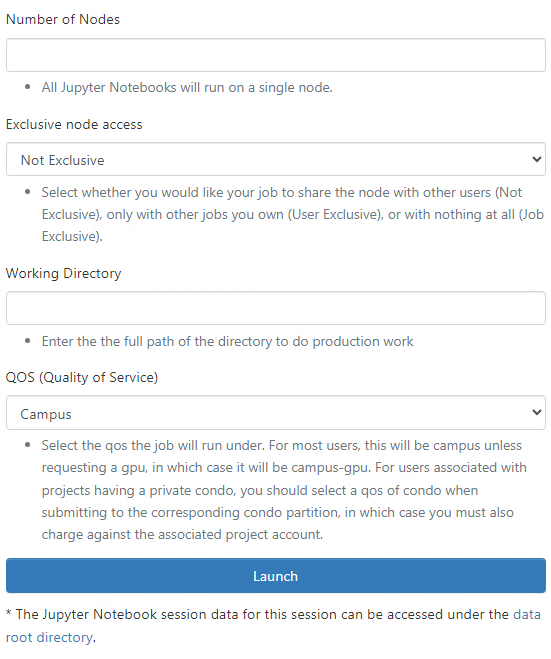
The Jupyter notebook in Open OnDemand is configured with Anacond3. We have provided two different versions of Anaconda. In this form, specify one of Anaconda versions to use the associated Jupyter Notebook, the account under which the job should run, the partition, the number of hours the job will run, and the number of cores your job requires. If you require the use of GPUs in your Jupyter Notebook session, select the campus-gpu partition. Please review the Running Jobs document for more information on these fields.
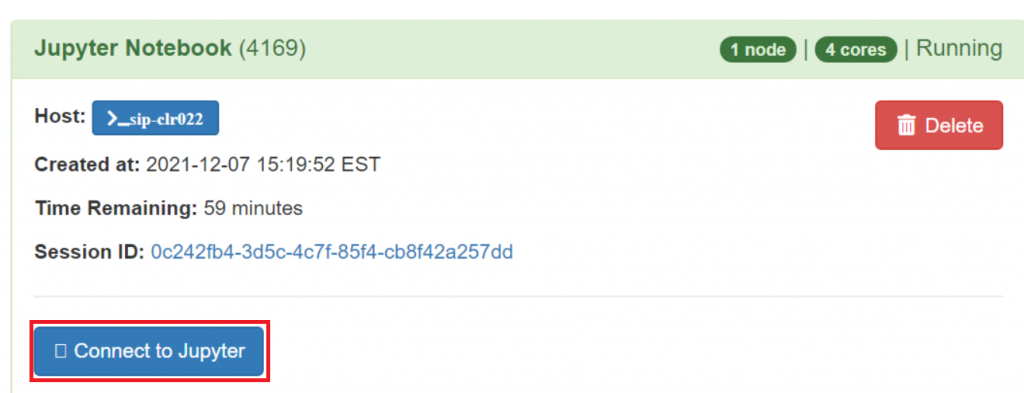
When you specify the necessary options in the form and select Launch, the request will get submitted to the SLURM scheduler. If the resources are available, a Jupyter Notebook session will be allocated to you. When the session is ready, you will see the similar interface that appears in Figure 20. The “Connect to” option will open a new Jupyter Notebook tab in your browser. Figure 22 highlights this option.
RStudio is an integrated development environment (IDE) for the R programming language. It provides a user-friendly interface for writing, debugging, and testing R codes, as well as tools for data visualization and analysis.
To launch RStudio Desktop, refer to Figure 18 and navigate to the Interactive Apps drop-down menu. Click on the RStudio Desktop application, you will be presented with a form as shown in Figure 22 below:

The RStudio interactive app on ISAAC Secure Enclave cluster is configured with vertsion 2022.12 and R programming language version 4.2.0. Users do not have the permission to change the version of R programming language.
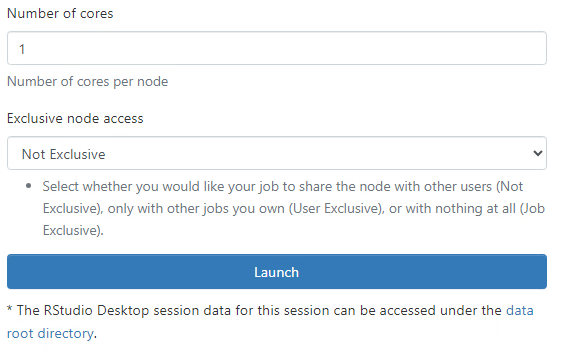
In the form (Figure 23), choose the RStudio version from the drop-down (at present, there is only one version available), the account under which the job should run, the partition, the number of hours the job will run, and the number of cores your job requires. Please review the Running Jobs document for more information on these fields.
When you specify the necessary options in the form and select Launch, the request will get submitted to the SLURM scheduler. If the resources are available, an RStudio Desktop session will be allocated to you. When the session is ready, you will see the similar interface that appears in Figure 24.
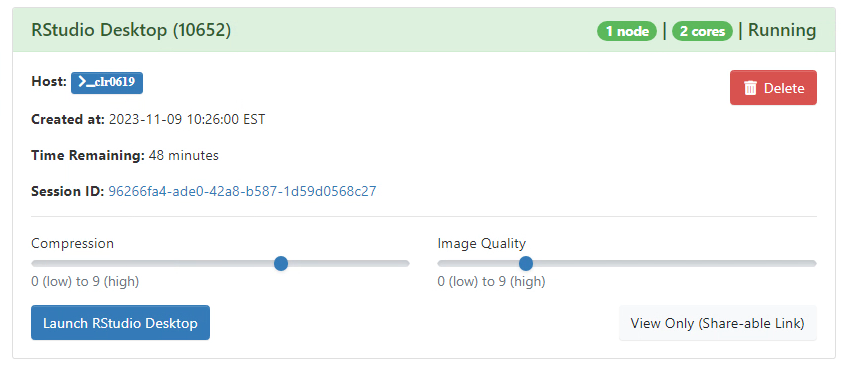
Click on Launch RStudio Desktop, a new RStudio window will open in your browser. Figure 24 highlights this option.
 Explore
 Write
Write Chat
Chat Call
Call