
 Explore
 Write
Write Chat
Chat Call
Call
High Performance & Scientific Computing
Data Transfer on ISAAC-NG
Service navigation
INTRODUCTION
The ISAAC-NG computing cluster provides several ways for users to transfer files to/from various file system locations on the ISAAC-NG computing cluster, such as: NFS home directories, NFS project directories, Lustre project directories, and Lustre scratch directories. DTNs (Data Transfer Nodes) furnish this capability.
At the time of this writing, there is one Data Transfer Node (DTN) available to ISAAC-NG users to utilize for the purpose of data transfer.
| Data Transfer Node | Hostname (for SCP) | Globus Endpoint |
|---|---|---|
| dtn1 | dtn1.isaac.utk.edu | UTK ISAAC-NG DTN1 |
| dtn2 | dtn2.isaac.utk.edu | UTK ISAAC-NG DTN2 UTK Google Drive |
This Data Transfer Node is setup for NetID authentication, Duo multi-factor authentication (MFA), and authentication through an InCommon Credential. Using these means, ISAAC-NG users can login to this node and perform data transfer functions (e.g., moving project data to or from ISAAC-NG directories, moving data to a project’s backup storage medium, moving project data from a project’s data storage to an ISAAC-NG directory for data processing, etc.).
To connect to this DTN, users may use ssh (Secure Shell) in a command-line terminal. More information on how users can use the ssh protocol to access ISAAC-NG computational resources can be found on the Access and Login ISAAC-NG webpage. When using ssh, users may simply replace the hostname of an ISAAC-NG login node (login.isaac.utk.edu) with the hostname of the DTN to which they wish to connect (dtn1.isaac.utk.edu or dtn2.isaac.utk.edu), then authenticate with their UT NetID, their password, and a Duo multi-factor authentication code (MFA).
ISAAC-NG supports several data transfer protocols including SCP, SFTP, and Globus. SCP and SFTP are both ssh utilities available for transferring files but tend to perform slower than Globus. At the time of this writing, Globus offers the fastest data transfers on ISAAC-NG. Still, SCP and SFTP are useful methods for users who are performing small transfers. Finally, the ISAAC-NG DTN remotely mounts the haven lustre file system in addition to its native ISAAC NG Lustre filesystem, allowing transfers between ISAAC Legacy and ISAAC NG to be performed in the local filesystem.
SCP and SFTP
SCP and SFTP are both SSH commands available for transferring files to/from ISAAC NG using these SSH client commands. Note SSH transfers are slower than Globus transfers. From our performance testing, Globus offers the fastest data transfers to/from ISAAC NG DTNs. Still, SCP and SFTP can be useful for quick, small transfers. For larger file transfers, we recommend you use Globus.
SCP and SFTP are available to Linux and MacOS systems by default. Windows 10 users with the most recent updates can use these utilities within Command Prompt or PowerShell. Windows 7 and 8 users must use a third-party utility to use SCP and SFTP. For more information on SSH in Windows, see the Access and Login document. For Windows 7 and 8 users, the third-party utilities FileZilla and WinSCP are reviewed later in this document.
The general syntax of SCP is given below. In general, SCP is useful when transferring a file on your system to a DTN in ISAAC NG. The <source> argument is the pathname of the file on your system that you wish to copy. The <destination> (in this case, dtn1) argument is the hostname of the DTN you wish to use. Additionally, the <directory> argument specifies the absolute pathname within the destination to place the file.
scp <source> <NetID>@dtn1.isaac.utk.edu:<directory>
If you wanted to copy a file from your system and place it on the ISAAC-NG, you could use scp ~/<filename> <NetID>@dtn1.isaac.utk.edu:~/Documents
For SFTP, you specify the hostname of the system to which you intend to connect. For example, to securely transfer files between your local system and a DTN in ISAAC NG, use the syntax below in a terminal on your local system. Ensure that you enter SFTP from the directory that contains the file(s) you wish to copy to a DTN in ISAAC NG. You can use the pwd command to determine your current directory before entering SFTP.
sftp <NetID>@dtn1.isaac.utk.edu
Once you authenticate with your UT NetID, password, and Duo TFA, you will enter SFTP’s interactive mode. Use the put <file> command to upload a file to ISAAC NG. For example, to upload a file named JobScript.sh to the DTN from your local machine, use put JobScript.sh. This syntax assumes that the JobScript.sh file is in the directory from which you entered SFTP.
To retrieve files from DTN, use the get <file> command. To download a file named ResearchResults.txt from the DTN to your local machine, use get ResearchResults.txt. SFTP will place the file in the directory from which you entered the utility. To change directories on the DTN, use the cd <directory> command. Use the lcd <directory> command to change the directory on your local system. Once you are done with SFTP, use the bye or exit commands to exit it. Other commands are available with the SFTP utility. Type help within SFTP to read more about them.
Globus Overview
The Globus web interface allows you to perform data transfers to and from ISAAC-NG resources conveniently. Globus is the fastest and most efficient data transfer method available on the ISAAC-NG computing cluster, except for LNET transfers described elsewhere in this document, which can only be used for transfers from Haven.
In addition, the High Performance & Scientific Computing group provides quick Globus tutorials on our workshops and tutorials webpage under Overview on the left menu. Please visit the link for Workshops and Tutorials and read the introduction about Installation Globus Connect Personal guide and transfer files.
Users should also review the official Globus documentation for more information on how to use the Globus tool.
Note: The ISAAC-NG data transfer node runs Globus Connect Server version 5 (GCSv5). The InCommon Credential system is now not required for using the Globus Web interface.
Using the Globus Web-based Interface to Transfer
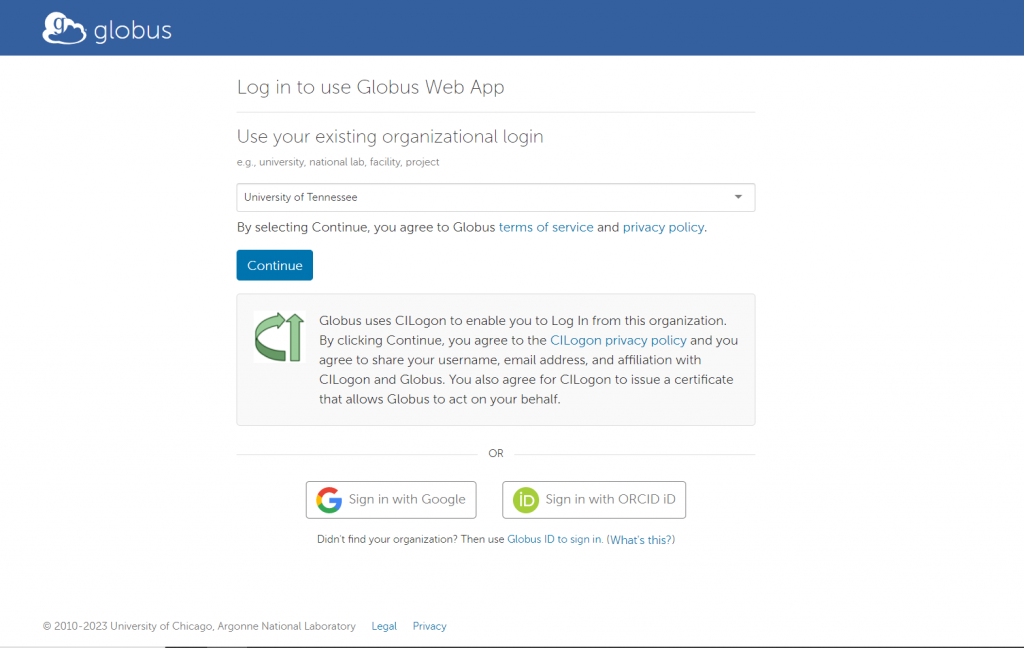
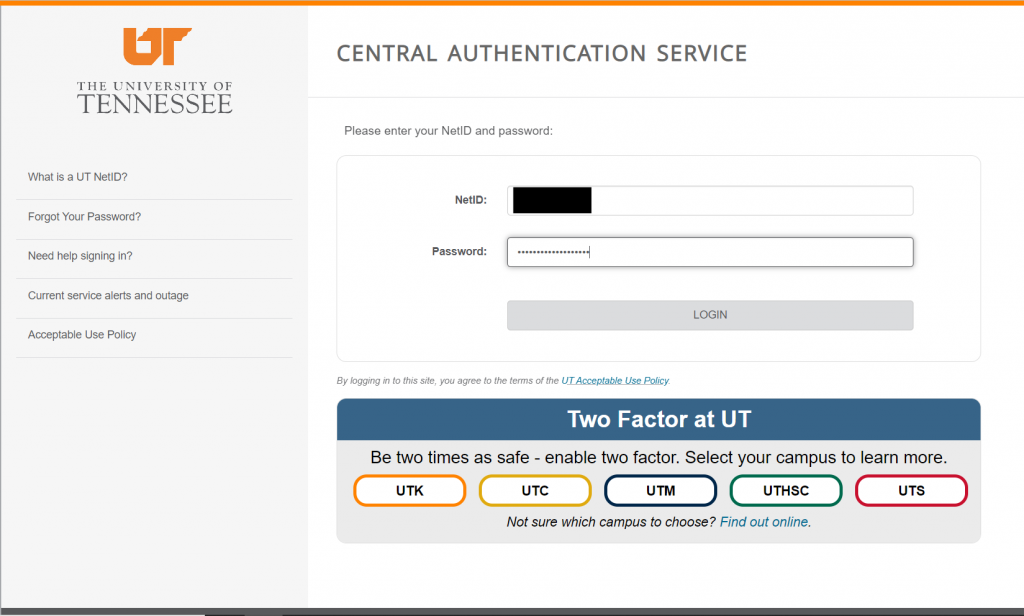
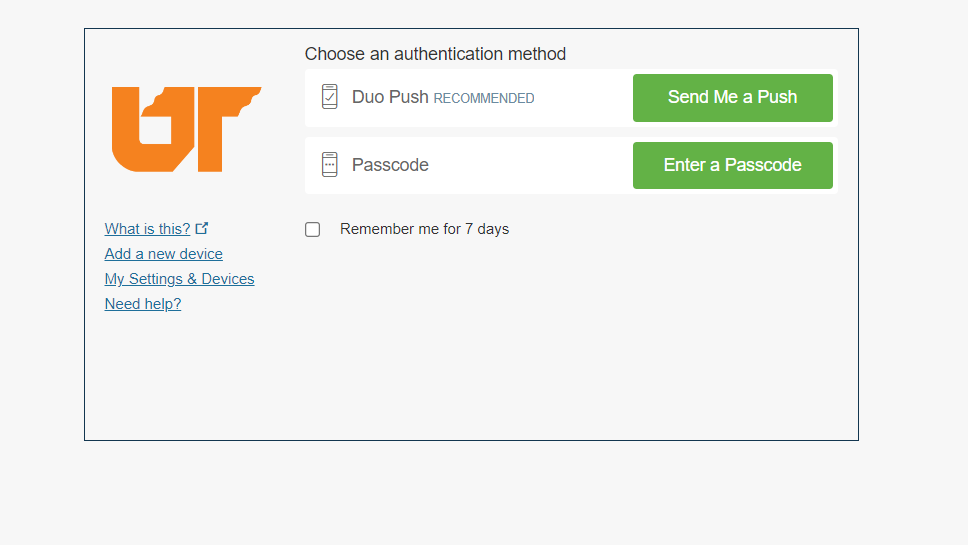
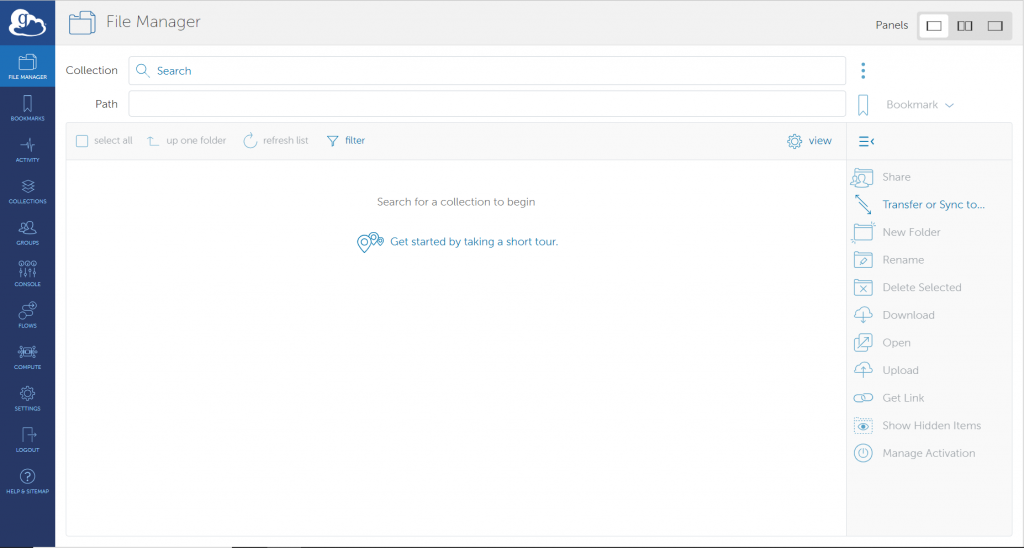
To access the Globus interface in your browser, navigate to the Globus website. Login using the existing organizational login option. Verify that the University of Tennessee is selected, then select “Continue.” Authenticate with your UT NetID, password, and Duo MFA code. You will then see the interface depicted in Figure 3.4
You must configure endpoints before initiating file transfers between your local machine and the DTN. One endpoint will reference the user’s local system while the other endpoint will reference one of the ISAAC NG DTNs (dtn1.isaac.utk.edu or dtn2.isaac.utk.edu). Further instructions regarding these endpoints will be provided below.
Key Concept: Endpoint
An endpoint is a server that hosts collections. If you want to be able to access, share, transfer, or manage data using Globus, the first step is to create an endpoint on the system where the data is (or will be) stored.
Globus Connect is used to create endpoints. An endpoint can be a laptop, a personal desktop system, a laboratory server, a campus data storage service, a cloud service, or an HPC cluster. As explained below, it’s easy to set up your own Globus endpoint on a laptop or other personal system using Globus Connect Personal. Administrators of shared services (like campus storage servers) can set up multi-user endpoints using Globus Connect Server. You can use endpoints set up by others as long as authorized by the endpoint administrator or a collection manager.
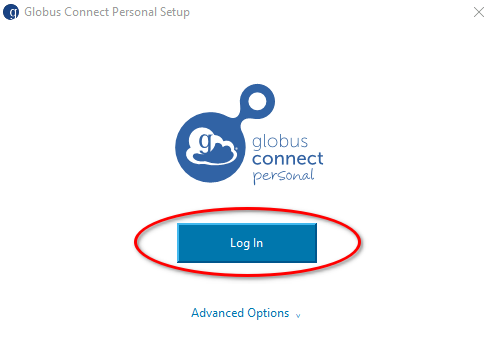
After installation has been completed, GCP will launch. Click on ‘Log In’ to authenticate with Globus and begin the Collection Setup process.
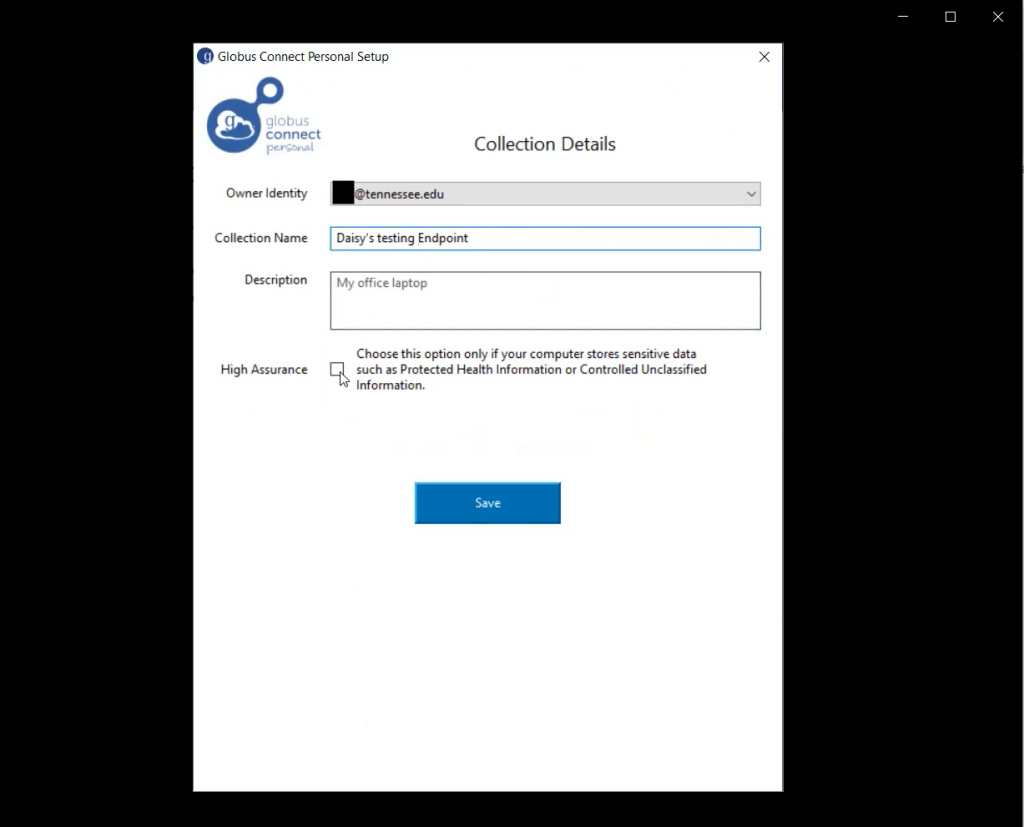
If the endpoint for the computer is not already set up, users will see the window as shown in Figure 3.8. Enter the collection Name. This name will be the user’s local machine name. The name users choose unimportantly; however, it should be memorable (e.g., JaneSmithLocalEndpoint, etc.). Exit the setup upon successful completion.

At the end of the installation, you will see an icon in the menu bar at the bottom of your screen, indicating that Globus Connect Personal is running and your new collection is ready to be used.
Once you configure your local machine as a Globus endpoint, return to the “File Manager” tab on the page’s left side. Make sure you select the double panels option in the top-right of the page (Figure 3.12 highlights this option). This will display the user’s local machine’s filesystem and the ISAAC-NG DTN’s filesystem.
After selecting the desired endpoint, the user should return to the File Manager page. In the right panel, click on “Collection,” and then search for the Data Transfer Node (DTN) associated with ISAAC-NG, which is named:
- UTK ISAAC-NG DTN1
- UTK ISAAC-NG DTN2 (cannot be used for transfers to or from endpoints for the Secure Enclave)
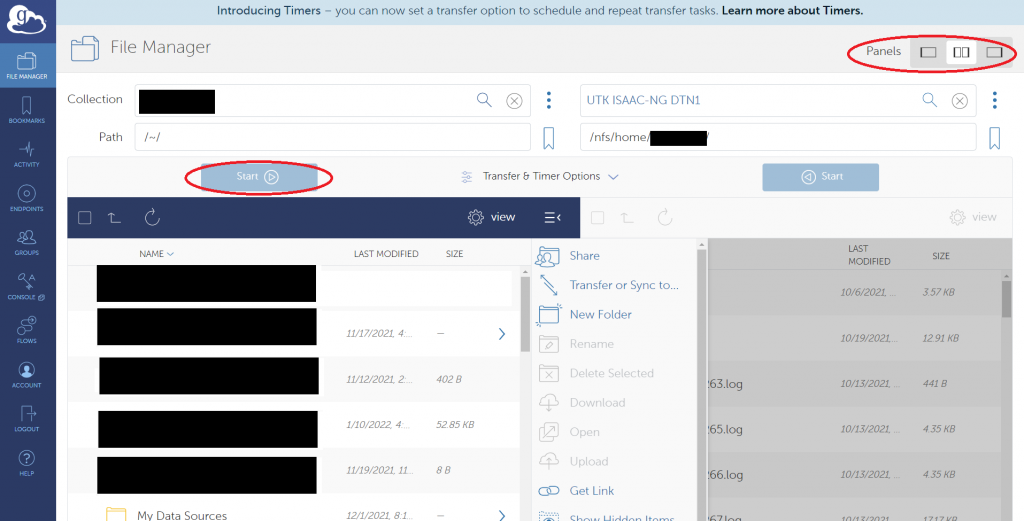
Once both endpoints are configured, you can transfer data between the two. You can select individual files and directories for these transfers. When you choose the data you wish to transfer, press the “Start” button below the endpoint from which you will transfer data. You can also navigate the filesystem hierarchy in either endpoint using the Globus interface. Other options are available for your transfers but are usually unnecessary for most transfers. Figure 3.12 shows what the Globus interface should look like when both endpoints are selected.
USING GLOBUS FOR UTK GOOGLE DRIVE
It is possible to transfer data between your UTK Google Drive and most other Globus endpoints using the Globus file transfer interface by selecting “UTK Google Drive” as one of the end points. This allows you to transfer files between your UTK Google Drive and endpoints for ISAAC-NG or endpoints for ISAAC Legacy, but not endpoints for the Secure Enclave. The Globus endpoint for your UTK Google Drive resides on dtn2.isaac.utk.edu and automatically tunnels data through DTN2 from Google to another Globus endpoint. The UTK Google Drive endpoint uses an application credential to access your Google Drive, so you will need to login to both your Globus account and your UTK Google Drive account and click through several consent screens to give the two accounts permission to work together the first time you connect. Your Google Drive contents will be located in the “My Drive” folder of the endpoint.
Note that by default you can only use the UTK Google Drive endpoint to connect to your own UTK Google Drive. Without additional configuration, you cannot use the endpoint to connect to a Google Drive associated with any Google account not sponsored by UTK, and you cannot use it to connect to the Google Drive for any other user’s UTK account. Performing such transfers will require an additional step in which the owner of the other account uses the Google Drive interface to share the files with your UTK Google account. Once you have done this, you should be able to find the files in the “Shared With Me” folder of the endpoint.
USING GLOBUS COMMAND LINE INTERFACE (CLI)
Globus CLI is a tool developed by Globus which provides an interface to interact with different Globus services using the command prompt or terminal. Using CLI, users can orchestrate data transfer between two endpoints, sync directories, or manipulate directory structure in their account on ISAAC cluster without using the Globus web interface. One of the interesting points about Globus CLI is that users do not need to have CLI installed on each of the computers or clusters to use its features. Learn more about working with Globus CLI to transfer data.
USING FILEZILLA TO TRANSFER FILES (FIGURES 5.1- 5.5)
FileZilla will work with file transfers to ISAAC-NG. Please only use the ISAAC-NG DTNs, dtn1.isaac.utk.edu or dtn2.isaac.utk.edu.
To use the FileZilla client with your NetID, password, and Duo MFA, follow these steps.
- Open the FileZilla client after downloading the client from the official filezilla-project.org website.
- Select File, then Site Manager.
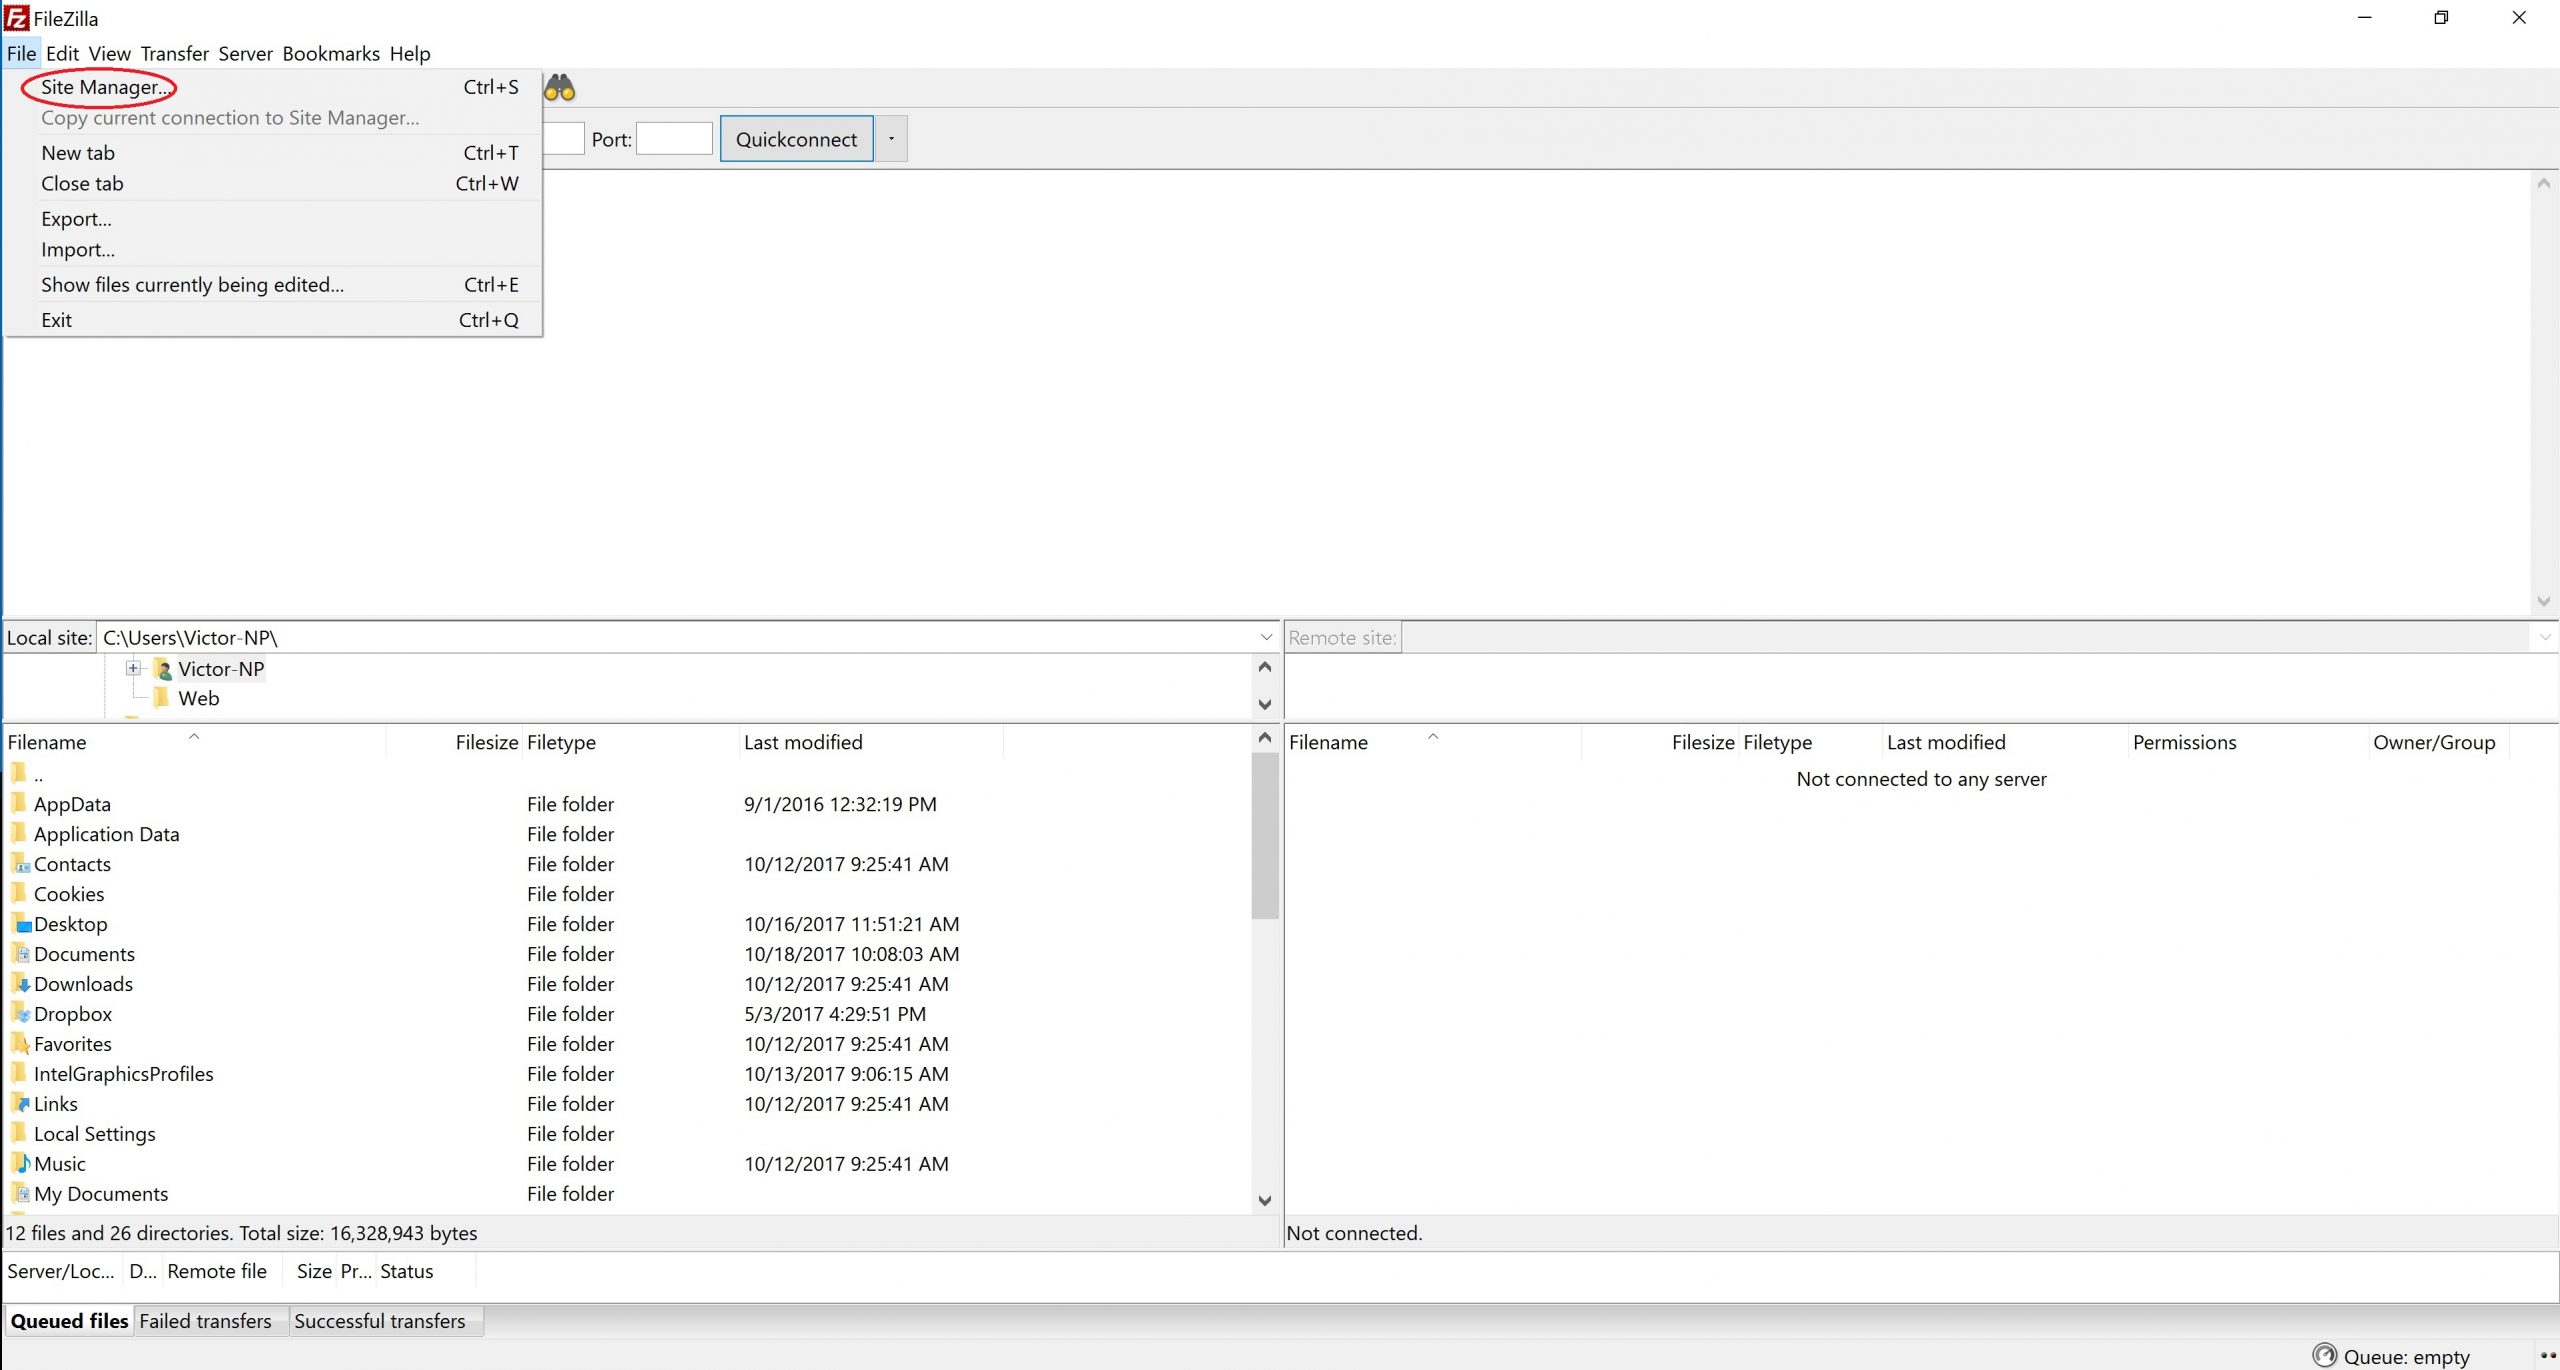
Figure 5.1: FileZilla’s Site Manager Option - Select “New Site,” then provide the required information when prompted. For the host, select one of the ISAAC-NG DTNs, dtn1.isaac.utk.edu or dtn2.isaac.utk.edu. For protocol, select SFTP – SSH File Transfer Protocol. For Logon Type, select Interactive. For User, type your UT NetID. Finally, rename the entry under sites from “New Site” to something more memorable, such as the name of the ISAAC-NG DTN. Refer to Figures 5.2 and 5.3 to identify where to find these options.
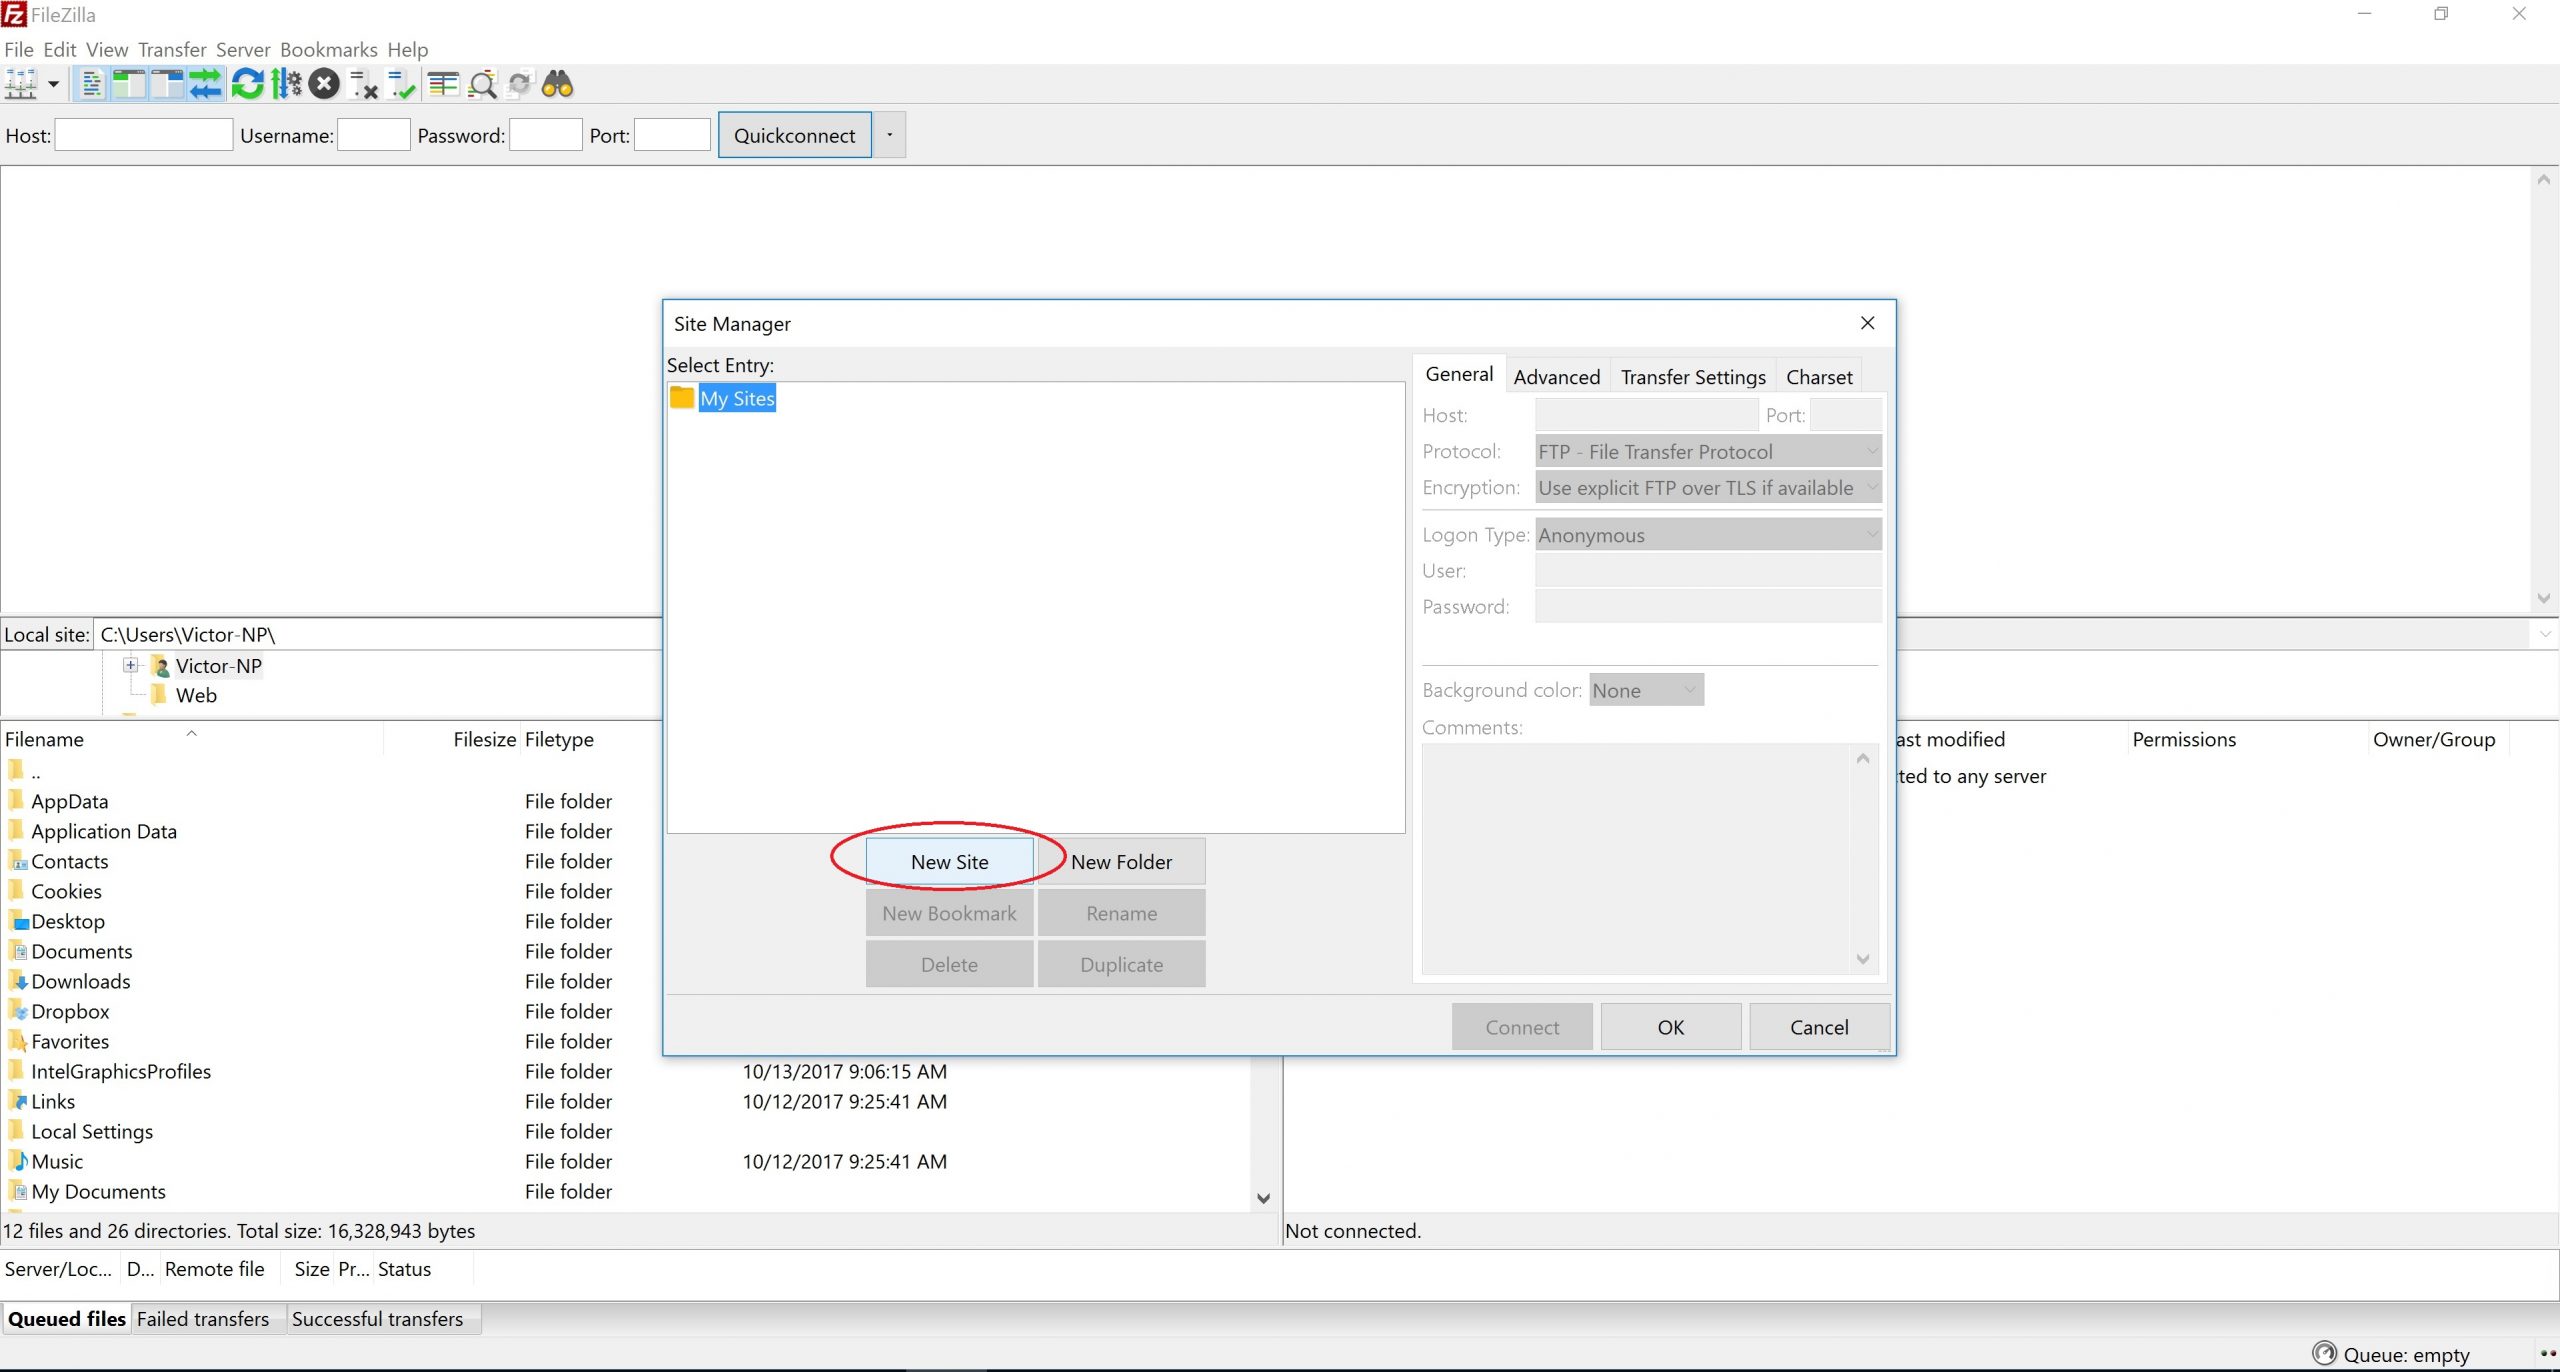
Figure 5.2: New Site in FileZilla

Figure 5.3: FileZilla Site Options - Select Transfer Settings, then check the box for Limit the number of simultaneous connections. Make sure the value beneath this checkbox is 1.
- Select “Connect” in the Site Manager window.
- When prompted, enter your password.
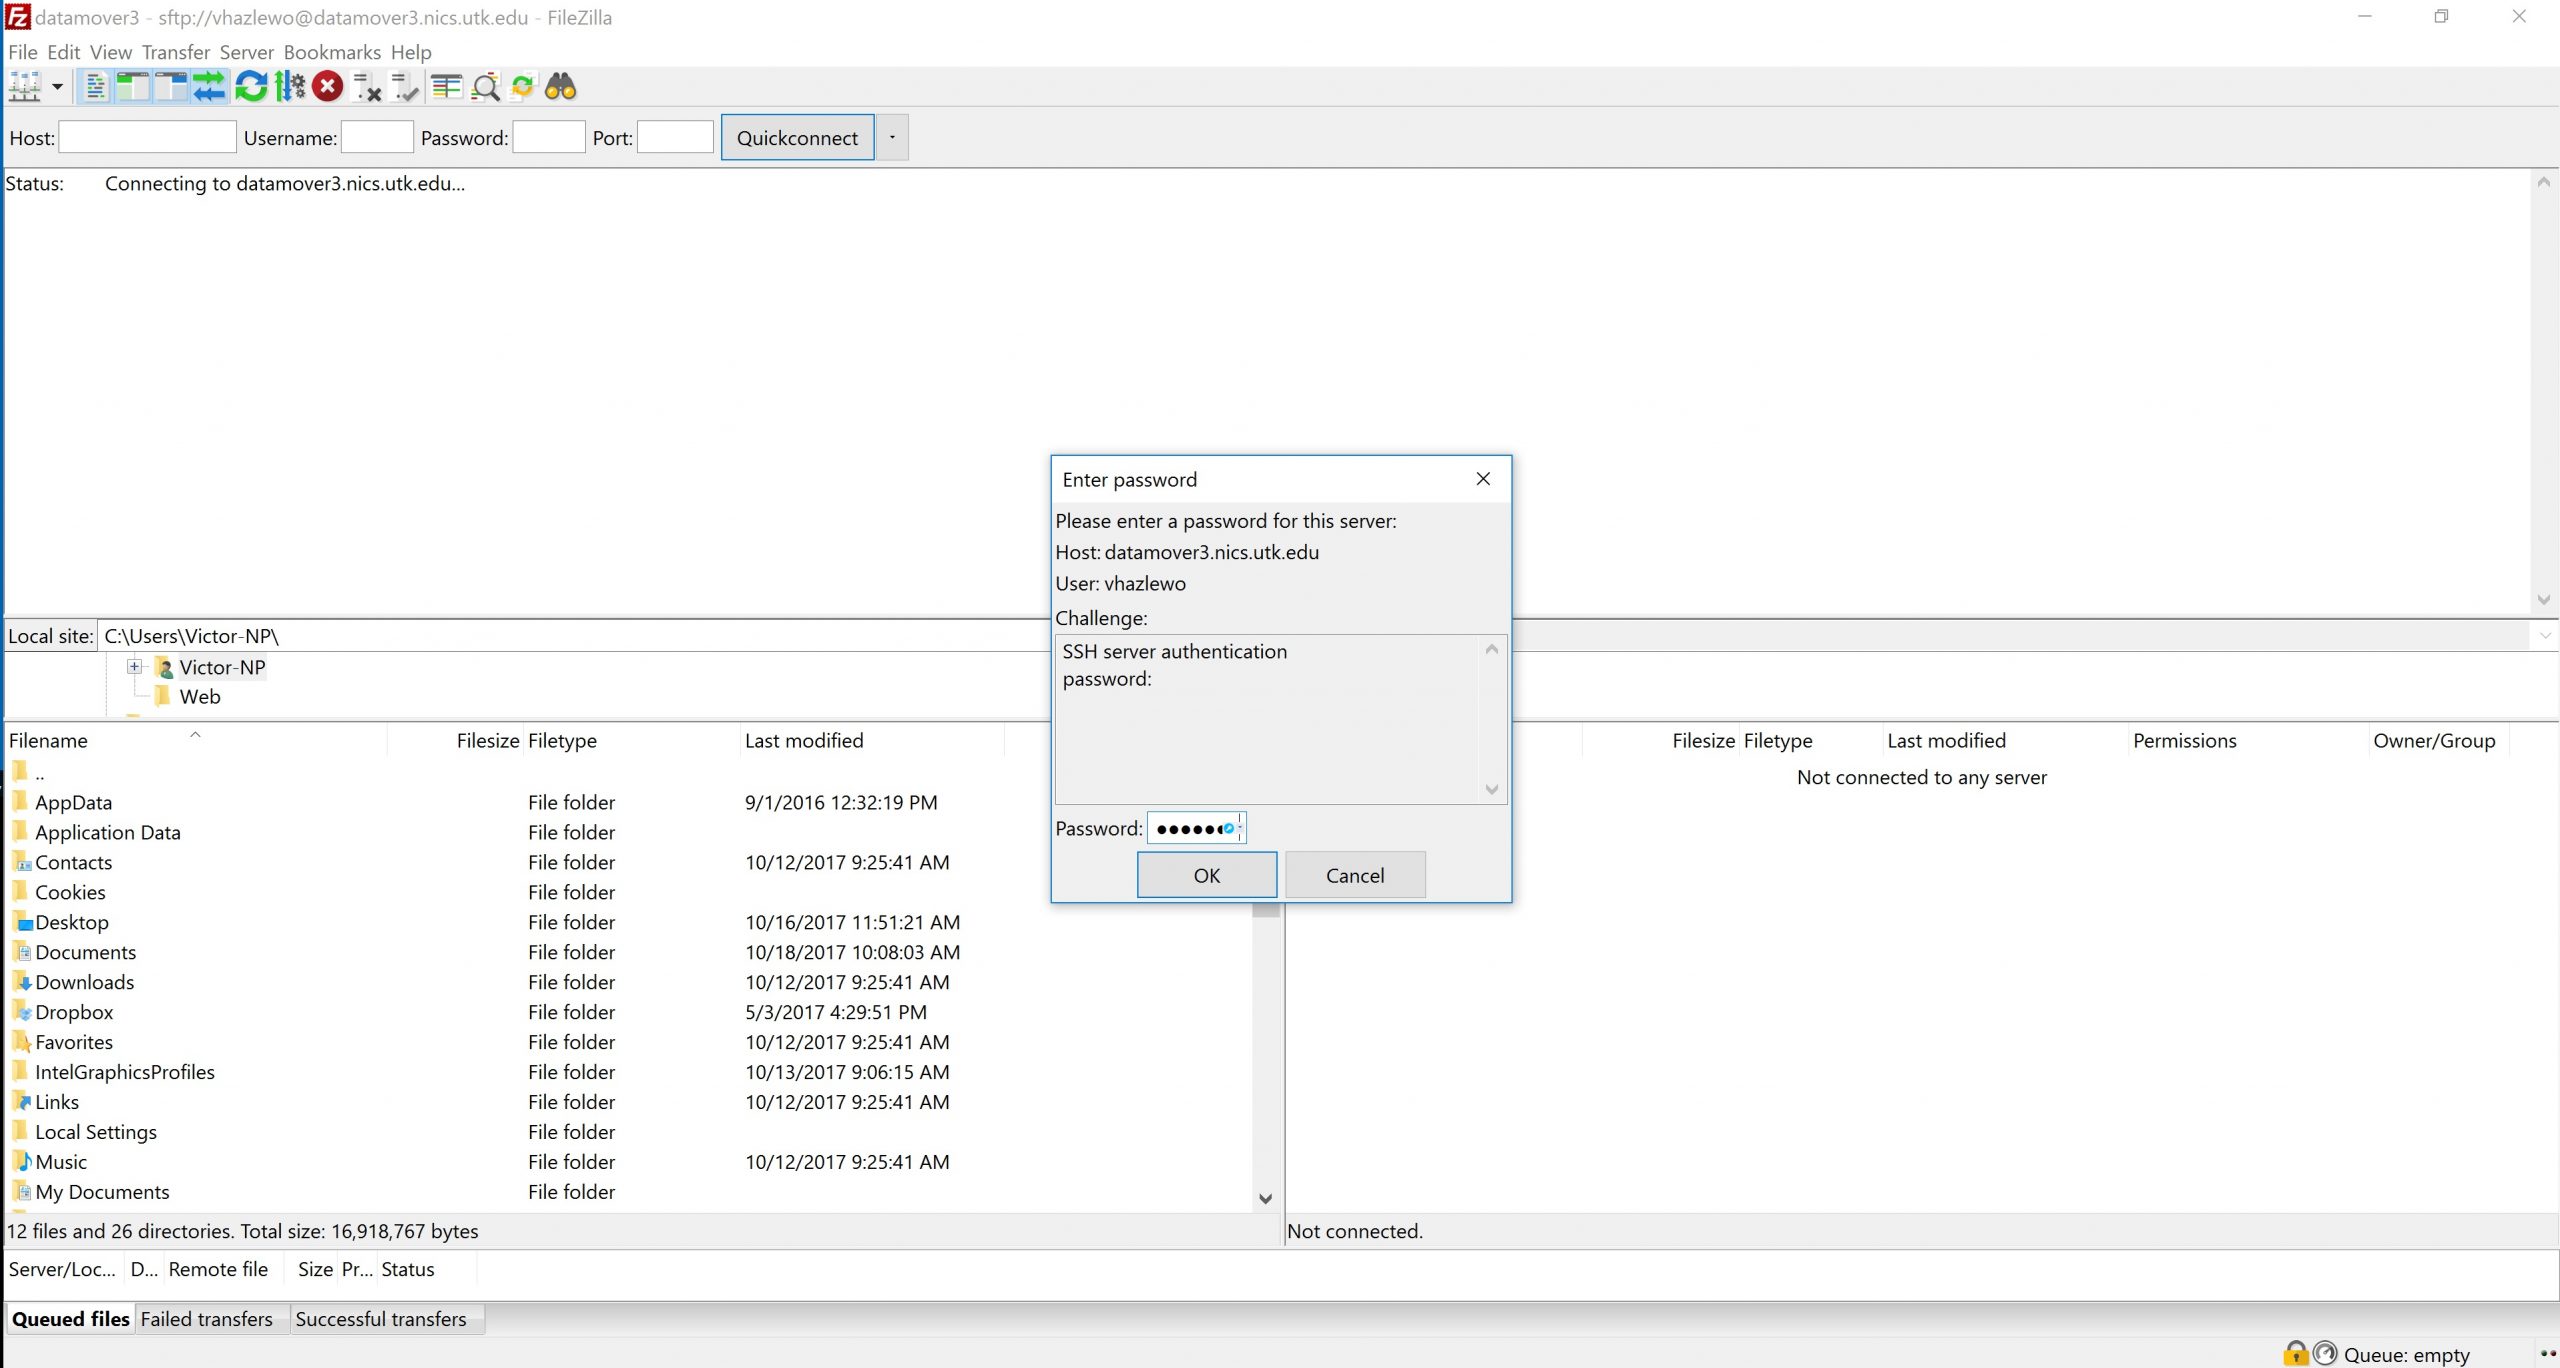 Figure 5.4: FileZilla Password Prompt
 - When prompted, type a “1” to send a Duo Push to your mobile device, then authenticate with Duo MFA. Upon successful authentication, you will be logged in to the ISAAC-NG DTN through FileZilla.

Figure 5.5: FileZilla Duo Prompt
USING WINSCP TO TRANSFER FILES (Figures 6.1 – 6.4)
WinSCP can perform file transfers to and from ISAAC-NG. Please use one of the ISAAC-NG DTNs: dtn1.isaac.utk.edu or dtn2.isaac.utk.edu.
To use the WinSCP client with your NetID, your password, and a Duo MFA code, please follow these steps.
- After downloading WinSCP from the official website (winscp.net), open WinSCP, then click on “New Site.”
- Provide the hostname of the ISAAC-NG DTN, dtn1.isaac.utk.edu or dtn2.isaac.utk.edu, for “Host name,” your UT NetID for “User name,” and your password. Leave the port number as 22.
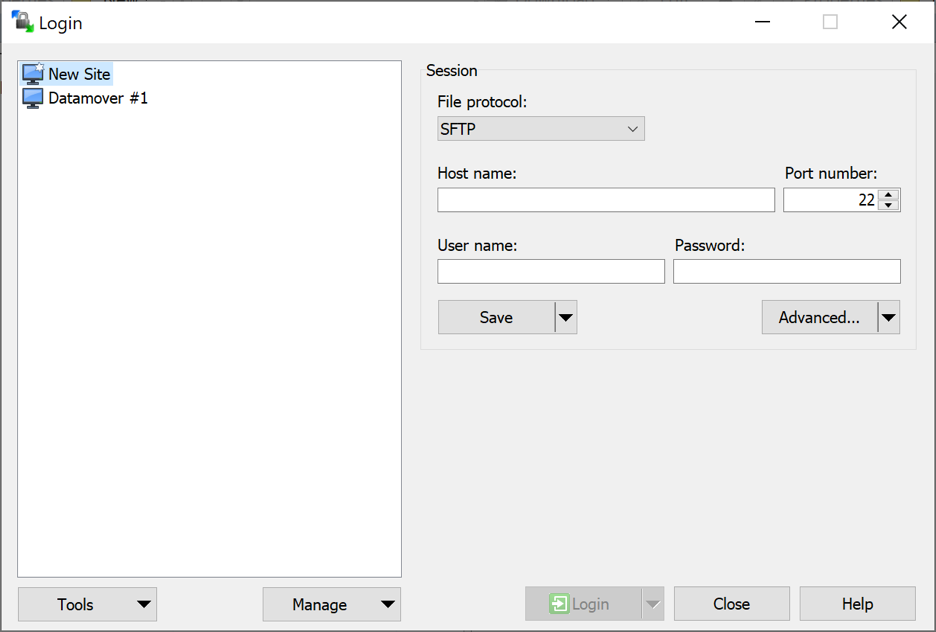
Figure 6.1: WinSCP New Site Creation - When warned about an unknown server, select “Yes.”
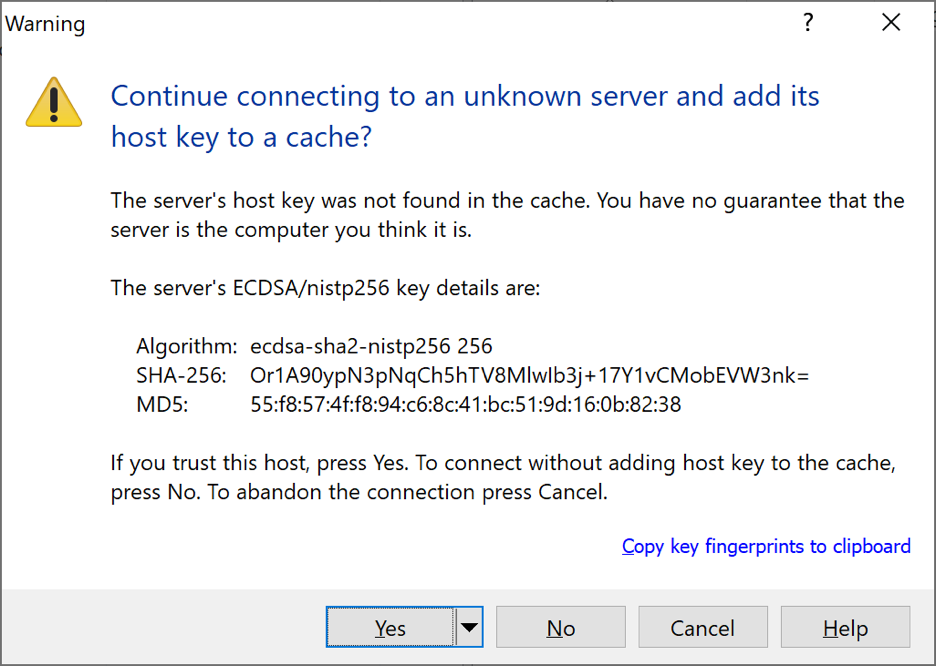
Figure 6.2: Initial WinSCP Key Warning - The authentication banner will appear. Select “Continue.”
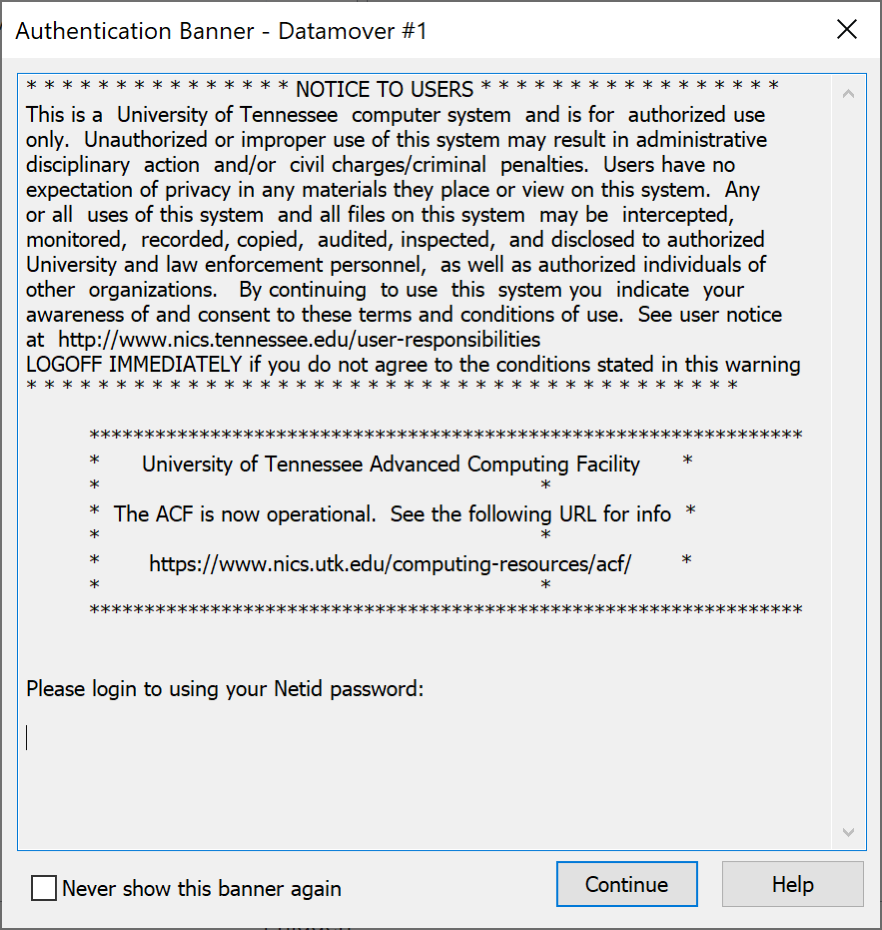
Figure 6.3: WinSCP Authentication Banner - When prompted, type “1” to receive a Duo Push on your mobile device. Authenticate with Duo. You will then be logged in.

Figure 6.4: Duo Prompt in WinSCP - Once you authenticate, you will get the WinSCP application screen. On the left side of the screen, you see your local machine. On the right side of the screen, you see the remote system into which you are logged.
PREPARING DATA FOR TRANSFER
- Before users initiate any data transfers from the Open Enclave to another storage resource, they should consider preparing the data they wish to transfer by archiving and compressing it.
- When a user archives data, several files and directories can be added to the same location.
- When a user compresses data, they can reduce the data’s total size.
- Both methods reduce the total amount of data that must be sent across the network and makes it easier for users to organize the data they wish to transfer.
- At the time of this writing, the tar and zip utilities are the best methods for data archiving and compression for ISAAC-NG users who use machines running Linux, MacOS, and Windows.
Using the tar Utility (Figure 7.1)
The tar (tape archiver) utility uses simple command syntax and allows large amounts of data to be aggregated into the same archive. Linux, MacOS, and updated Windows 10 systems can use tar. Older Windows systems will be limited to the zip utility.
To create a tar archive, execute tar czvf <archive-name> <dir-to-archive>. Replace the <archive-name> argument with the name of the new archive you wish to create. Be sure to follow the name with the .tar.gz extension, as in “my_archive.tar.gz.” Replace the <dir-to-archive> argument with the name of the directory into which you wish to place the new archive. If the directory you intend to archive is not within your working directory, YOU MUST specify the relative or absolute path to the archive. By default, tar will recursively place the directory and its contents into the new archive. Figure 7.1 shows the successful creation of a tar archive.
[user@login1 ~]$ tar czvf new_archive.tar.gz Documents
Documents/
Documents/IntroUnix.pdf
Documents/JobSubData.zip
Documents/MATLAB/
Documents/Scripts.zip
Documents/PyLists.py
Figure 7.1: Creating a tar Archive
After the archive is created, execute ls -l to verify that the archive exists. You can view its contents with the tar tvf <archive-name> command.
You may then transfer the archive using one of the data transfer methods described in this document. In general, Globus is the best method. Please refer to the Globus section to learn how to configure it for your system. On the remote system, execute tar xvf <archive-name> to extract the contents of the archive. The files will be extracted into your ISAAC-NG working directory.
Using the zip Utility (Figures 7.2 – 7.3)
When working with older Windows systems, the zip utility should be used to archive and compress your data from ISAAC-NG.
To create a zip archive on ISAAC-NG, execute zip -r <archive-name>.zip <dir-to-archive>.
Be sure that the directory that you wish to archive is in your working directory. Otherwise, you MUST specify the relative or absolute path to the directory you wish to archive.
Replace the <archive-name> argument with the name of the new zip archive. You may or may not choose to include the .zip file extension in the new archive’s name at this time; if you do not include the .zip file extension in the new archive’s name, the zip utility will add it to the new archive’s name automatically. Replace the <dir-to-archive> argument with the directory you wish to place in the zip archive. The -r option ensures that the directory and its contents are archived and compressed. Figure 7.2 shows the successful creation of a zip archive.
[user@login1 ~]$ zip -r Documents Documents
  adding: Documents/ (stored 0%)
  adding: Documents/IntroUnix.pdf (deflated 4%)
  adding: Documents/MATLAB/ (stored 0%)
  adding: Documents/PyLists.py (deflated 61%)
Figure 7.2: Creating a zip Archive
After the zip archive has been created, execute ls -l in the directory from which you created the archive to ensure the archive exists. The new archive that has been created will appear with the name you gave to the new archive followed by the .zip extension.
With the zip archive created and verified, transfer the archive to your system using one of the data transfer methods described in this document. In most cases, Globus is the most convenient method. Please refer to the Globus section to learn how to configure it for use on your system.
Once you transfer the zip archive to your system, open the File Explorer and navigate to the directory in which you placed the archive. Right-click on the archive and select the “Extract All…” option in the submenu. Figure 7.3 shows where to locate this option. Specify the directory into which the contents should be extracted, then select “Extract.” You may then open the archive and peruse its contents.

Globus for Microsoft OneDrive
Globus provides access to Microsoft OneDrive and SharePoint files. Connect from your computer using Globus Connect Personal or sign in with your UTK credentials to Globus File Manager.
Note: Microsoft implements performance throttling on transfers of large numbers of small files to OneDrive. This policy is applied regardless of the transfer method, meaning that Globus transfers to OneDrive are also susceptible to this issue. Consider combining large connections of small files into a single archive (zip file or similar) before attempting a transfer to or from OneDrive. If your workload requires such a file collection, Microsoft support recommends avoiding OneDrive entirely and using a more performant facility such as Azure Blob Storage instead.
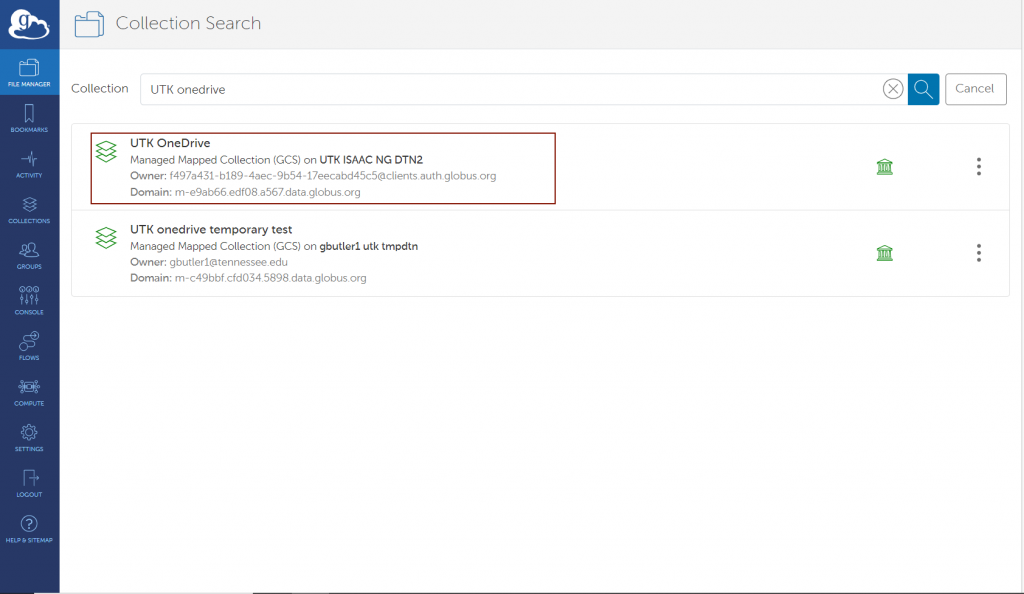
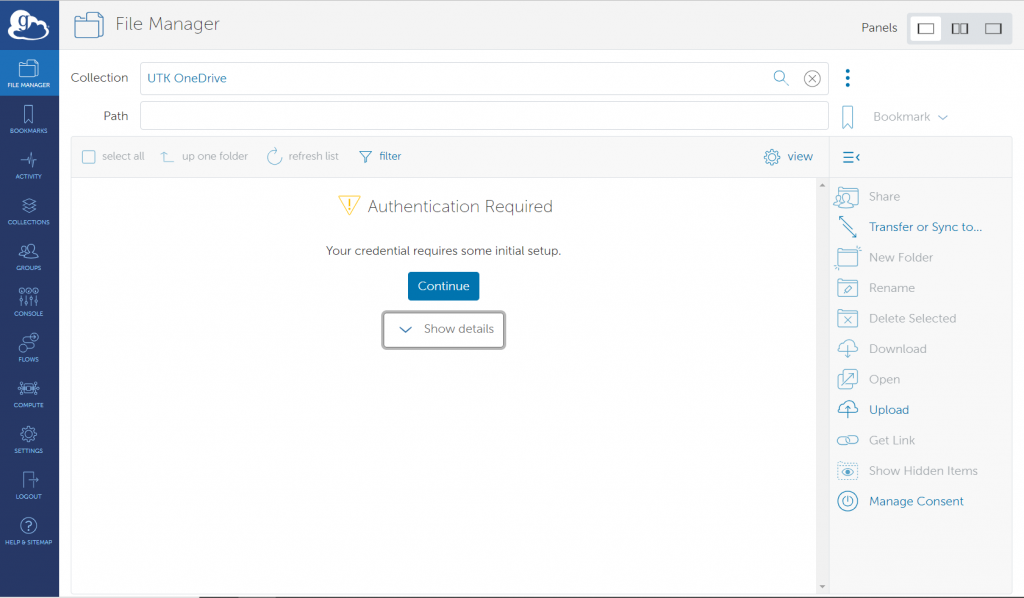
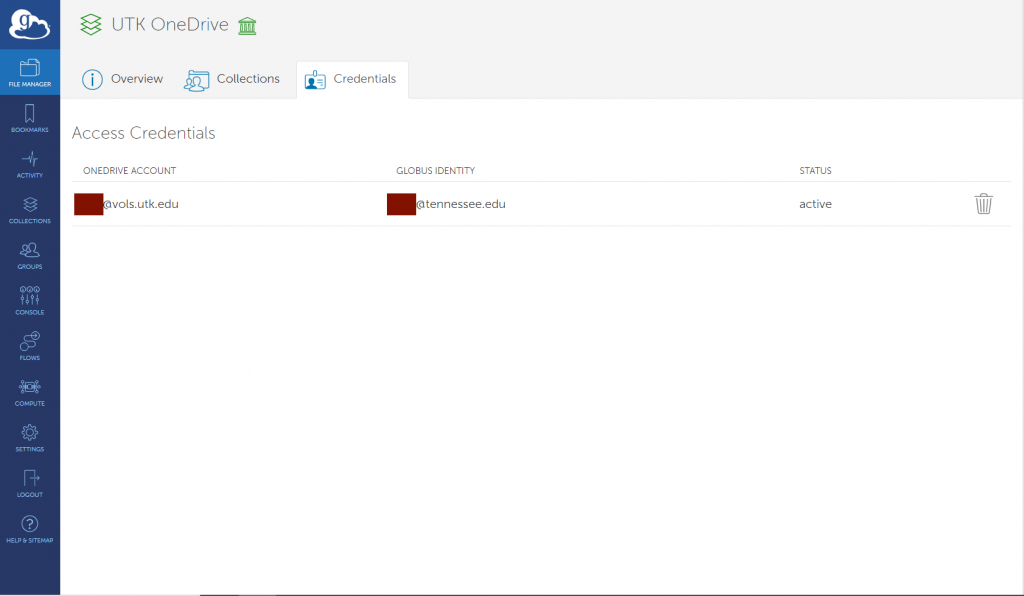
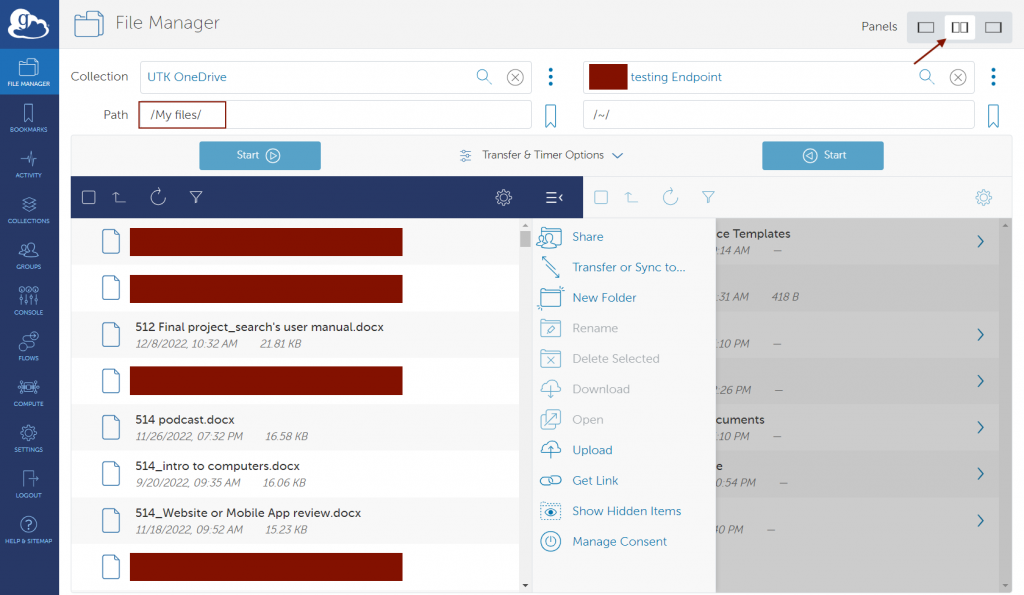
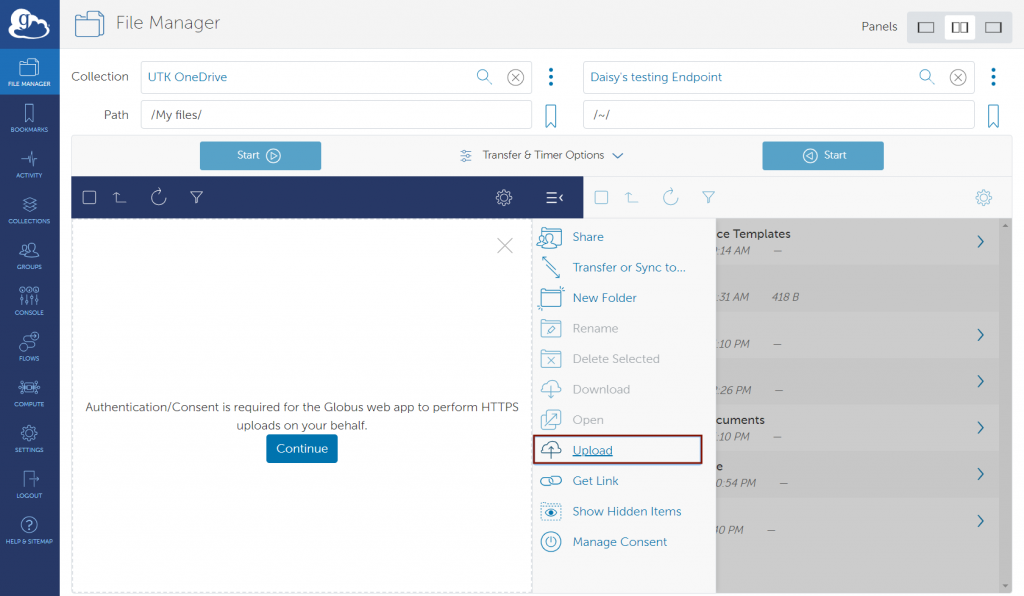
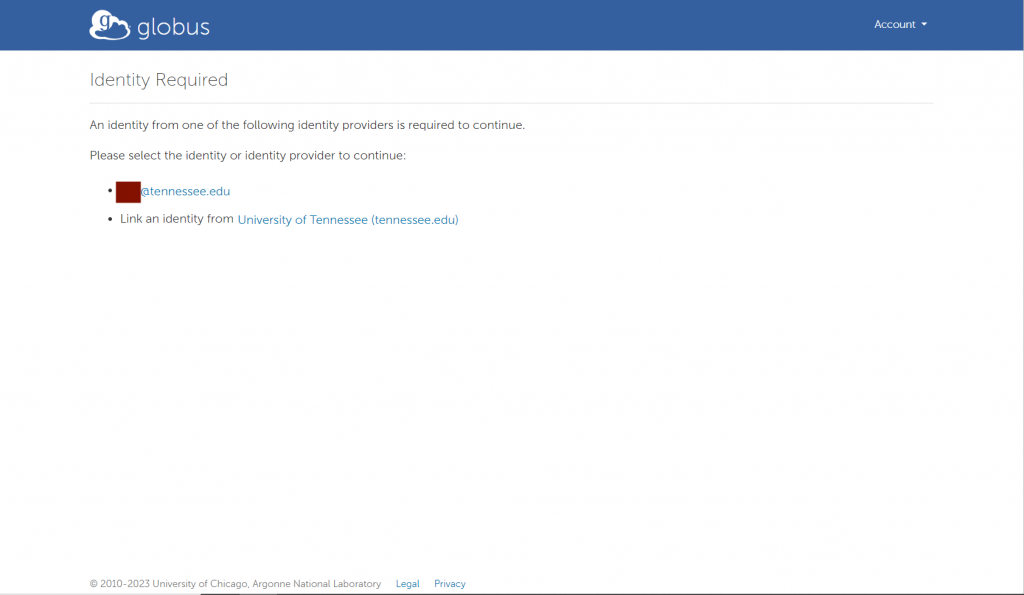
Search for the collection named “UTK OneDrive” or “UTHSC OneDrive”, depending on your campus affiliation. The first time that you access the collection, you will be prompted for credential setup. Then you will need to authenticate and link your UTK identity to Globus.
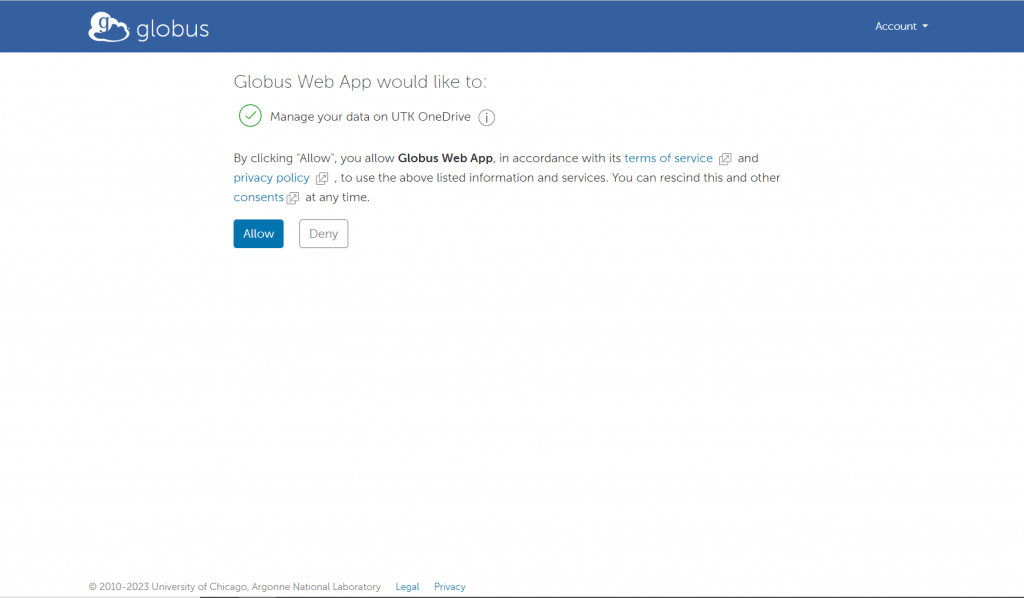
After you have been signed into your UTK account, you will be asked to confirm the permissions used by Globus to access your UTK OneDrive/UTHSC OneDrive account. Click on “Continue” to continue.
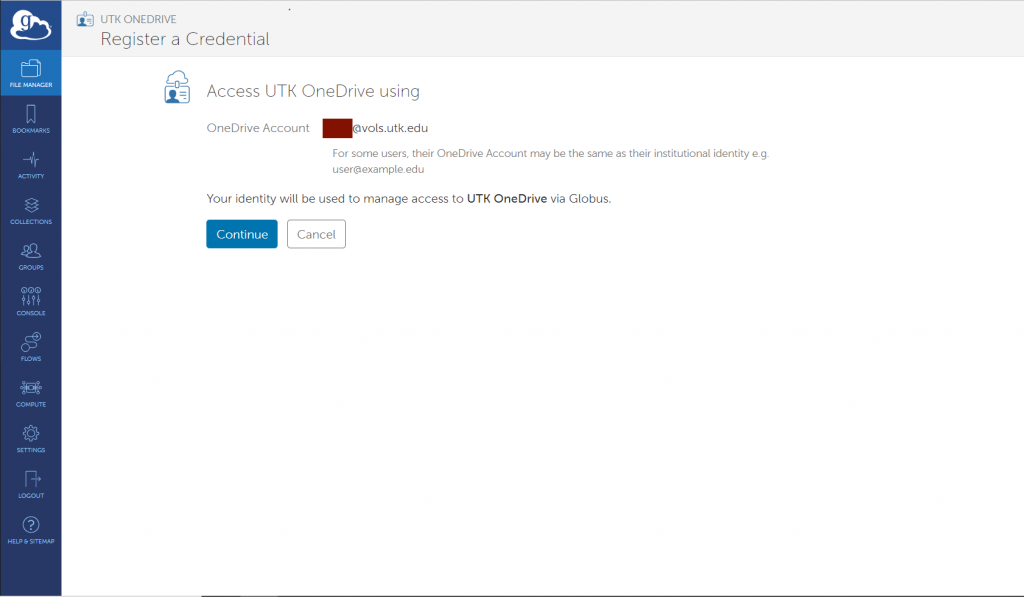
Authenticate with your UT NetID, password, and Duo MFA code
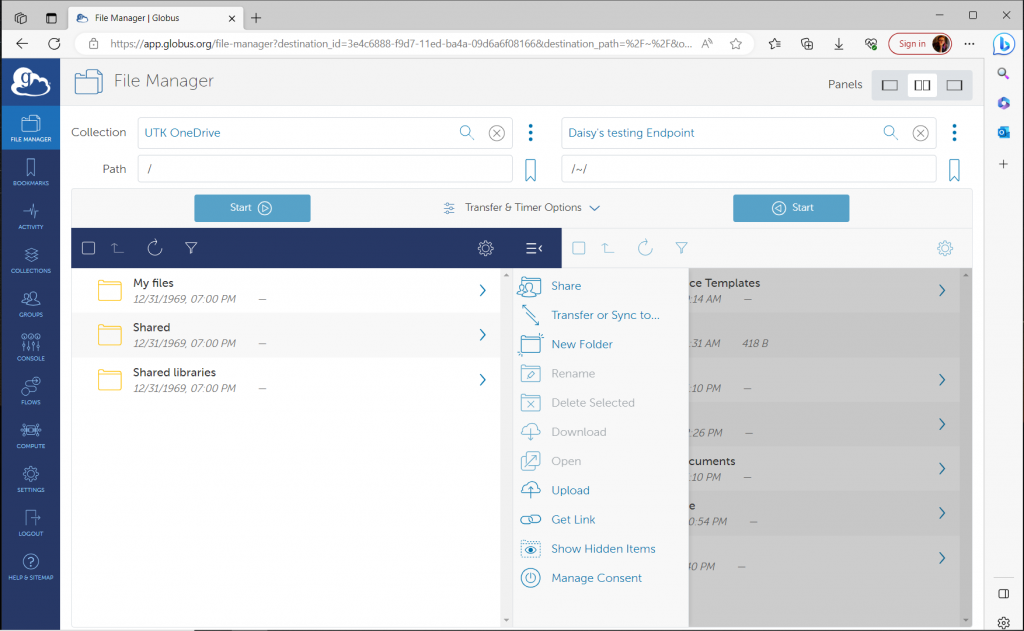
Complete that process then you will see the files within your OneDrive space and be able to copy files to or from it just like any other Globus collection. Make sure you select the double panels option in the top-right of the page. This will display the UTK OneDrive/UTHSC OneDirve and the user’s endpoint at the same time.
Your OneDrive space is shown as the path “My files” in the UTK-OneDrive/UTHSC-OneDrive collection:
Transfer data between a local computer (laptop/desktop) and OneDrive
- Select the “UTK OneDrive” or “UTHSC OneDrive” collection as described above.
- To upload data from your local computer to OneDrive, select “Upload” from the middle column menu and follow the prompts:

Using Globus to Access Sharepoint Locations
After connecting your UTK OneDrive or UTHSC OneDrive account to Globus, you can access your personal files and Sharepoint sites you associate with. Globus will initially display your own files under the /My Files path. By entering / for your path or selecting “Up one folder”, you can access your files, files shared with you, and SharePoint files.
| Path | Description |
|---|---|
| /My files/ | your documents in OneDrive |
| /Shared/ | Files shared with you in OneDrive |
| /Shared libraries/ | documents from Office365 Groups that you have followed in SharePoint |
Restrictions and limitations in OneDrive and SharePoint
OneDrive and SharePoint have limitations on what files can be stored, which may affect how you use the service. Please check the link below to learn more about the restrictions and limitations.
LNET-BASED TRANSFERS (FROM LEGACY HAVEN FILESYSTEM ONLY) (Figures 2.1-2.2)
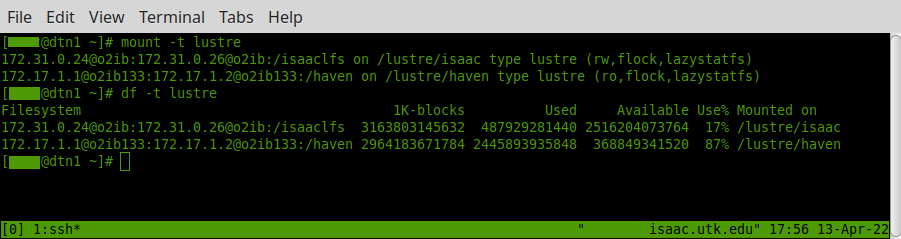
As shown in figure 2.1, the ISAAC NG DTN mounts both its local lustre filesystem via an ordinary infiniband-based mount, as well as the legacy Haven lustre filesystem via LNET, which allows lustre traffic to be routed between sites via the internet. Currently, the DTN is the only node configured in this way. The remote mount is implemented by routing the lustre traffic from the DTN through LNET routers. There are two routers at each site (KPB and ORNL), with each set being configured as a failover pair. All four LNET routers are equipped with a 40Gb/s dedicated connection to the LNET network, allowing cross-site transfer speeds more closely comparable to native infiniband speeds (100Gb/s for EDR). This is a significant improvement over traditional data transfer via the methods described in subsequent sections (which are limited to a theoretical maximum 10Gb/s, with actual transfer speeds being closer to 5.5 Gb/s).
Note that haven is mounted readonly; this allows files to be transferred from Haven to ISAAC NG using ordinary local file operations (but not the other way around). However, you should never use standard filesystem tools such as rsync/cp/mv to do this, as performance will be worse than any other means of data transfer. The preferred tool for LNET data transfers is fpsync, which provides a parallel wrapper around rsync. An example fpsync transfer is depicted in figure 2.2; the total time to transfer 1 TB of data in this example was just under 6 minutes, for an effective transfer rate of 24 Gb/s. In general, the correct usage of fpsync is:
fpsync -t /tmp/fpsync-<netid> -v -n <forks> \
          /lustre/haven/<haven-dir> /lustre/isaac/<isaac-ng-dir>
where -t /tmp/fpsync-<netid> tells fpsync to use a temp directory specific to your NetID and -n <forks> specifies the number of parallel rsync processes you want to use. Although fpsync uses rsync on the backend, performance is significantly better than an unmodified rsync, as shown in figure 2.3, which takes over 43 minutes to complete the same transfer at an effective bandwidth of only 3 Gb/s. This is due to the fact that rsync copies data serially and is hence more adversely affected by cross-site latency and per-TCP-stream bandwidth limits than a parallel copy. Note that cp and mv can be expected to have similarly poor performance to rsync.
We have empirically determined that 8 or 16 forks will provide the best performance for a copy without adversely affecting other users of the DTN; this is consistent with expectations since each fork uses 2 CPU cores and there are 48 cores on the DTN. Using more than 16 forks does not significantly improve performance while significantly harming performance for other DTN users. Continuing to increase the number of forks past 24 typically results in slower transfer speeds even when no other users are contending for resources on the DTN.


Note: fpsync has an extensive set of options for modifying how the parallel transfer is performed, including changing the backend from rsync to cpio or tar, overriding the manner in which the file system tree is partitioned prior to transfer, etc. You are welcome to experiment with these options, but due to the number of possible variables, such use will not typically be supported by HPSC staff.