
 Explore
 Write
Write Chat
Chat Call
Call
High Performance & Scientific Computing
Globus CLI
Service navigation
Introduction
Globus CLI is a tool developed by Globus which provides an interface to interact with different Globus services using the command prompt or terminal. Using CLI, users can orchestrate data transfer between two endpoints, sync directories, or manipulate directory structure in their account on ISAAC cluster without using the Globus web interface. One of the interesting points about Globus CLI is that users do not need to have CLI installed on each of the computers or clusters to use its features.
In ISAAC infrastructure, we have installed Globus CLI on ISAAC Next Gen cluster as a module. After logging in to the cluster, users can load the module for Globus CLI using the command:
module load globusCLI/3.3.0Important Note: The Globus CLI is written in python and is available as a python package on PyPI. We used anaconda3/2021.05 to load the python environment and install globus CLI. However, the users does not need to load the Anaconda module. It will get loaded automatically while loading the globusCLI module.
Data Transfer using Globus CLI
Before starting the transfer of data, let us understand and learn how to use Globus CLI and access the endpoints.
Login to Globus
Assuming you are already logged in to the ISAAC NG cluster, please follow the below steps to login to Globus using Globus CLI:
- Load the Globus environment by running the command
module load globusCLI/3.3.0- Authenticate yourself in order to use Globus. To do that, type the below command and press enter:
globus login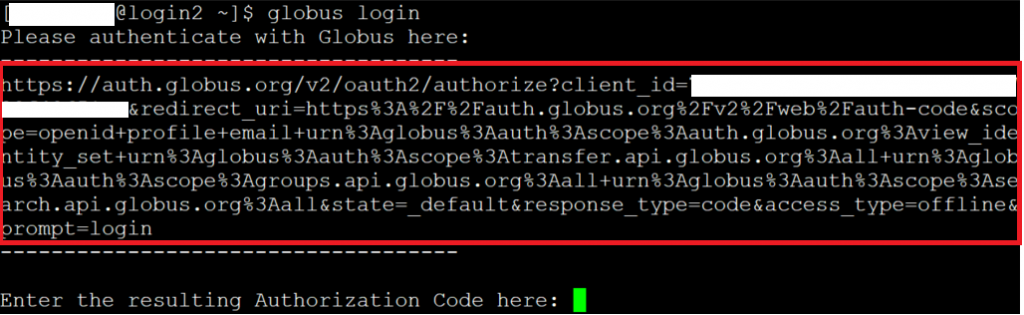
- Copy the URL from the command line, which resulted by running the above command and paste it in your favorite browser in your computer and press Enter.
- Choose University of Tennessee as your existing organization and click Continue.
- Follow the directions on the browser.

- You will be prompted to enter your University <UTNetID> and password on central authentication system as shown in figure 1.3

- Follow the two step authentication with DUO.
- You will end up on the below page (Figure 1.4) with an authorization code (redacted intentionally).
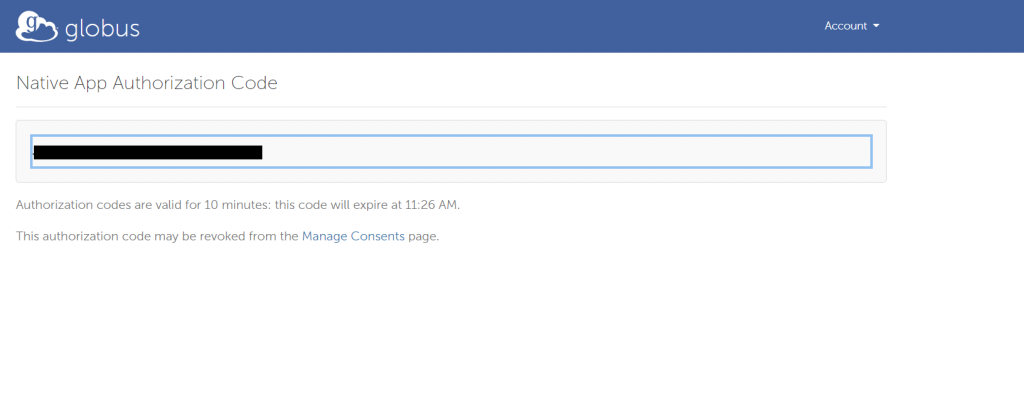
- Copy the authorization code and paste it in the command prompt.
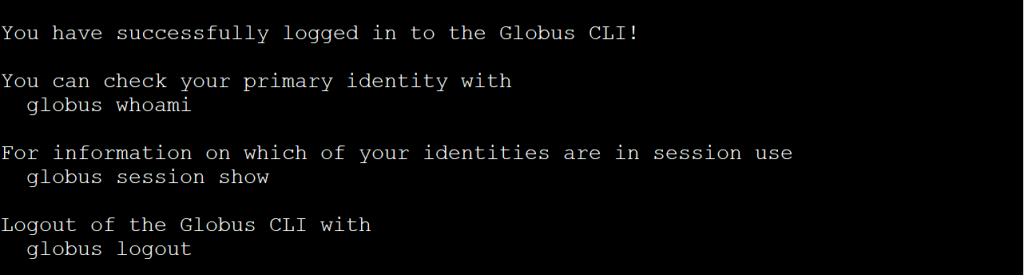
- Press Enter and you are logged in using Globus CLI.
- You should see the following output
Globus CLI commands
To find a list of different commands which work in globus CLI, type the below command:
globus --helpSearch for an endpoint
- To find the details of a particular endpoint (say ISAAC NG DTN1), use the below command:
globus endpoint search "ISAAC-NG DTN1"
- Copy the ID from the first column in the output and assign it to a variable say ep_ng. Assigning the ID to endpoint to a variable is convenient to use it later. However, it is not required.
export ep_ng="4c67cb9f-3389-4c21-962c-de780fd99d02"- To find out more information about what other flags can be used with endpoint search command, type the below command and press enter.
globus endpoint search --helpLet us say that we want to transfer data from ISAAC Legacy to ISAAC NG. We need to find the endpoint for ISAAC Legacy. We can find that out by using the same command as we used for ISAAC NG.
globus endpoint search "ISAAC Legacy"
- We got two DTNs matching with ISAAC Legacy description. Let us choose the UUID for the first one and assign it to a variable ep_legacy.
export ep_legacy=6a6cdaf4-2691-4df1-ba90-bcf94799ae45Transfer single file
To transfer a single file from one endpoint to another, we will use the below command:
globus transfer <source-endpoint>:/path/to/the/file/filename <destination-endpoint>://path/where/file/will/be/saved/filenameExample:
To transfer the file from ISAAC Legacy DTN (source) to ISAAC NG DTN (destination), the command will be written as:
globus transfer $ep_legacy:/nics/b/home/<UTNetID>/tesfile $ep_ng:/nfs/home/<UTNetID>/testfile
Transfer Directory
To copy a directory containing certain files and/or sub-directories from ISAAC Legacy (endpoint ep_legacy) to ISAAC NG, use -r flag after the globus transfer command
globus transfer -r $ep_legacy:/nics/b/home/<UTNetID>/directory_name $ep_ng:/nfs/home/<UTNetID>/directory_name
Here the flag -r stands for copying the files recursively
Sync Source Directory to Target
In order to sync the contents of the directory on the source endpoint (say ep_legacy) to destination endpoint (ep_ng) directory, use the flag -s or –sync-level followed by one of the four values
- exists
- size
- mtime
- checksum
globus transfer -s exists $ep_legacy:/nics/b/home/<UTNetID>/directory_name $ep_ng:/nfs/home/<UTNetID>/directory_nameThe above command will copy only those contents from the source directory to destination directory which are not present on the destination directory.