
 Explore
 Write
Write Chat
Chat Call
Call
High Performance & Scientific Computing
User Portal
Service navigation
Introduction
The User Portal is a web-based interface that enables self-service for several account-and project-related tasks. To access the User Portal, you must possess a valid account. If you do not have an account, please review the Requesting an Account document. If you do have an account and suspect it has been disabled, please submit a ticket to help@acf.utk.edu.
To log in to the User Portal, navigate to the webpage. Provide your NetID and NetID password, then authenticate with Duo. You should then be successfully logged in to the User Portal.
Managing Projects
The User Portal provides several options for managing projects. In general, most options apply only to staff and faculty; students and other personnel are limited to requesting access to a project.
Please note that all project requests must be manually reviewed and approved by staff. For any project-related request you make, please allow up to 24 hours for your request to be approved. If you submit your request over a weekend, please wait until the following Monday. After this period elapses, please submit a ticket to help@acf.utk.edu if you believe there was a problem with your request. Please do not submit the same request multiple times unless User Assistance explicitly asks you to resubmit a request.
Requesting Access to a Project
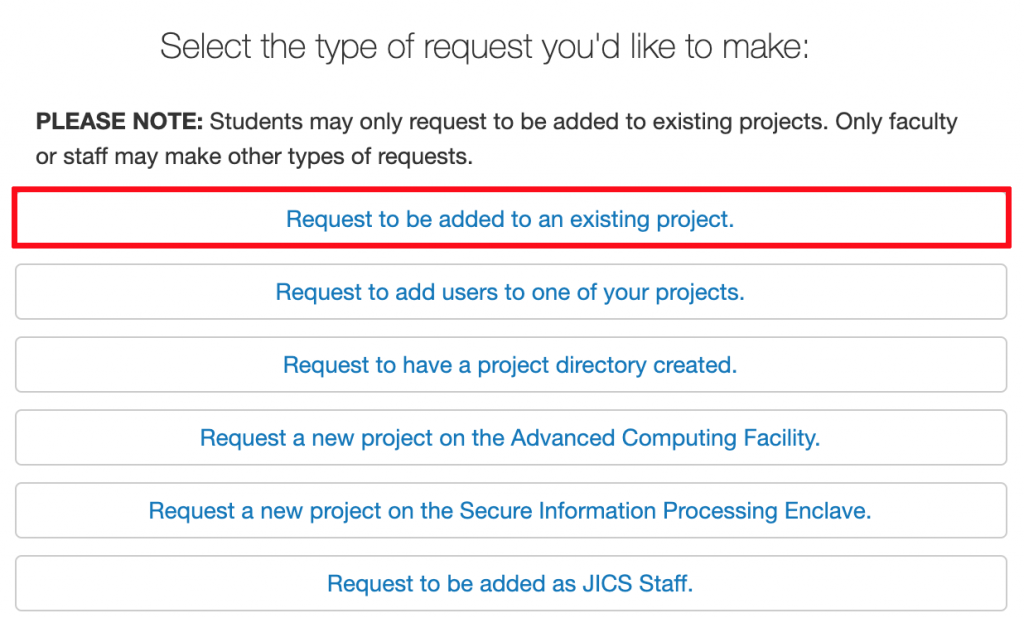
If your professor, supervisor, or colleague has a project to which you require access, navigate to the “Projects” header of the User Portal. Select the “Click here to request a new project, to be added to an existing project, or to have a project directory created” option. Figure 2.1 highlights this option in the User Portal.

From the project request menu, select the “Request to be added to an existing project” option. Figure 2.2 shows this option in the menu. Specify the project’s identifier, then select “Request Access.” The project’s identifier generally uses the format “ACF-<institution>xxxx” where <institution> is the organization to which the project belongs and “xxxx” is the project’s four-digit identification number. For example, the default project to which all UTK users belongs is “ACF-UTK0011”. On the next page, confirm the project’s information, then submit the request. The project’s principal investigator (PI) must approve your request before you can be added.
Changing the Default Project
Your default project defines your resource allocation and scheduling policy. By default, UTK users belong to the ACF-UTK0011 project and UTHSC users belong to the ACF-UTHSC0001 project. These are both opportunistic projects because your jobs receive resources as they become available. If you do not specify another project when you submit your jobs to the scheduler, it will defer to the default project specified in the User Portal. For more information on how projects influence job execution, please refer to the relevant section of the Running Jobs document. In general, a different default project will only make a difference in scheduling if you specify an investor condo.
If you belong to multiple projects and wish to specify a different one as your default project, navigate to the User Portal and identify the “Default Project” menu under the “Projects” header. Select your desired project from the dropdown menu, then select “Change.” Please note that it may take the system some time to update this information.
Requesting a New Project
In the context of the facility, a project is a standard UNIX group that, when associated with a project directory, enables data sharing between students, colleagues, researchers, and other personnel.
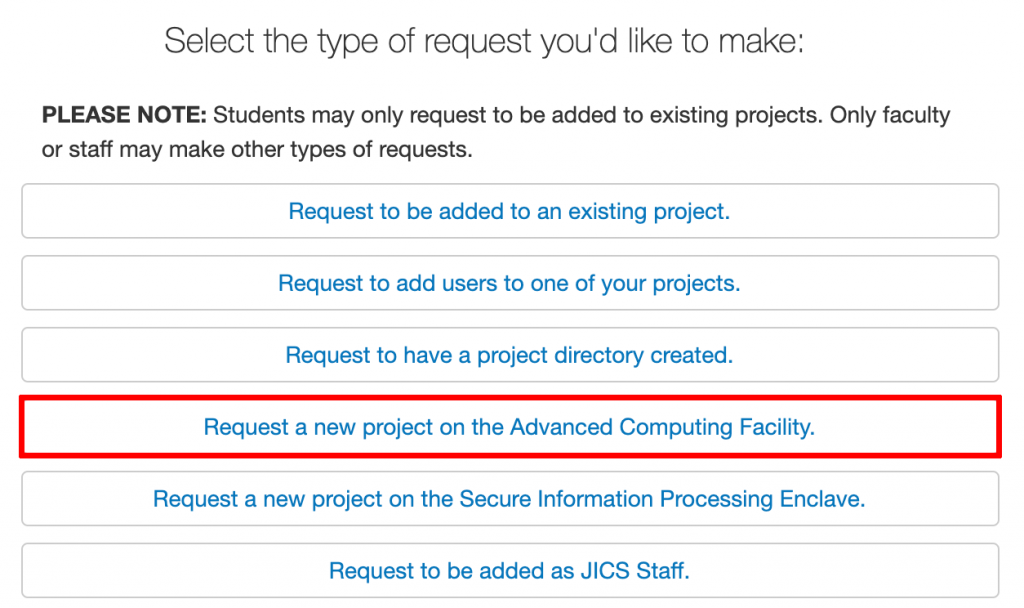
To request a new project, navigate to the project request menu from within the User Portal. You may access this menu by selecting the “Click here to request a new project, to be added to an existing project, or to have a project directory created” option under the “Projects” header. In the menu, select the “Request a new project on the Advanced Computing Facility” option. Figure 2.3 displays this option. Provide all the necessary information in the form and submit it.
Though students and other personnel can request to be added to projects, PIs may also request that users be added. Select the “Request to add users to one of your projects” option from the project request menu. Specify the project identifier and the user(s) you wish to add to the project, then submit the request. Be sure to provide the user(s) username, not their NetIDs. Additionally, separate each user with a comma if you wish to add multiple users to your project.
Changing the Default Shell
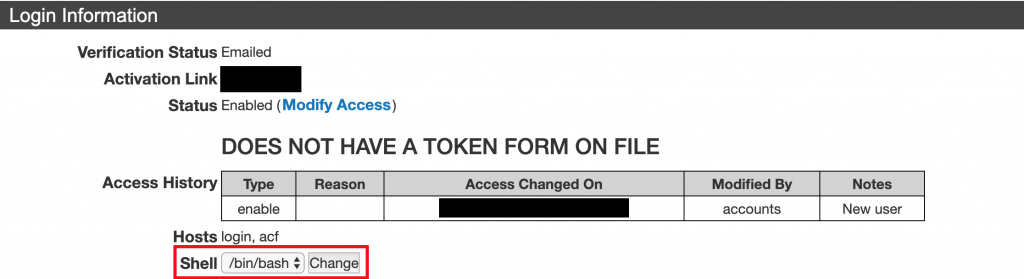
If you wish to change your default shell, navigate to the “Login Information” section. Identify the “Shell” menu and select one of the available options. At the time of this writing, sh, bash, csh, ksh, and zsh are the available shells. Click “Change” to confirm your selection. You will need to log out and log back in for changes to the default shell to take effect. Figure 3.1 highlights the shell selection menu in the User Portal.
Associating your Distinguished Name (DN) for Globus for ISAAC Legacy
The ISAAC Legacy cluster uses InCommon Credentials to provide authentication for secure data transfers to and from the data transfer nodes that are part of the ISAAC Legacy cluster. To create this credential and associate it with your account, follow these steps on the Portal.
- Navigate to the User Portal. (https://portal.acf.utk.edu)
- Under the “Login Information” header, identify the “Click here to request to associate a new DN with your account” option. Figure 4.1 shows where to locate the option.
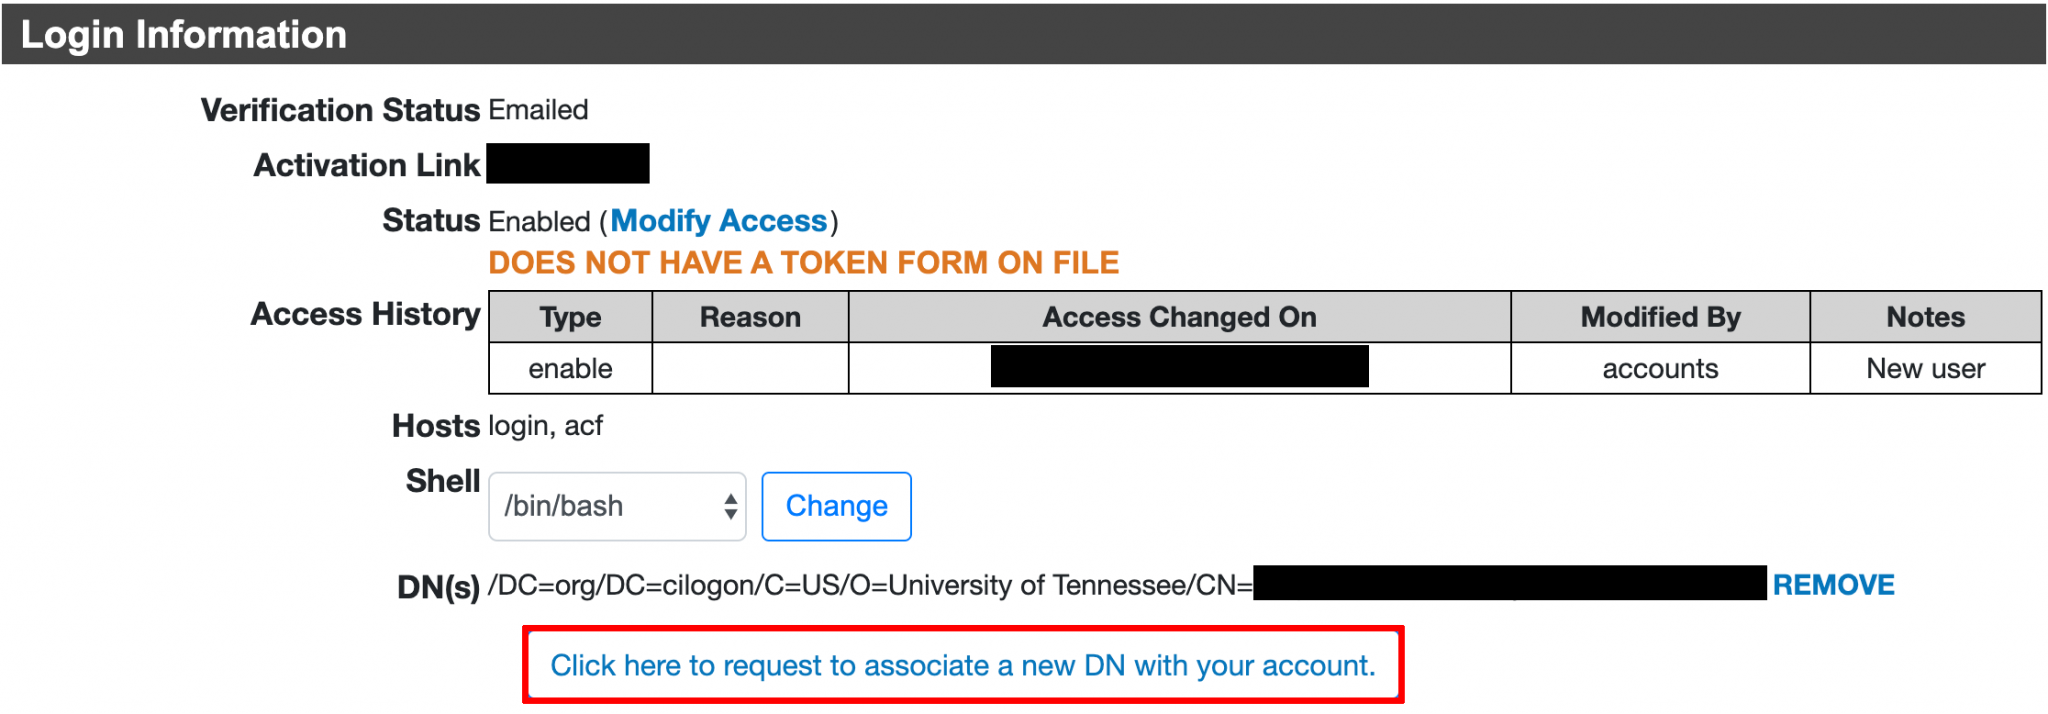
Figure 4.1 – Credential Association Option in the User Portal - You will be prompted to provide the Distinguished Name / Certificate Subject. In a separate browser tab go to https://cilogon.org or right click on CILogon in the heading of this page to open it in a new tab.
- When you reach the CILogon login page, select the University of Tennessee as the identity provider. Select “Log On” once UT has been selected as the identity provider.
- When prompted, authenticate to UT CAS (Central Authentication Service) with your NetID, NetID password, and Duo. Figure 4.2 shows an image of the UT CAS page.
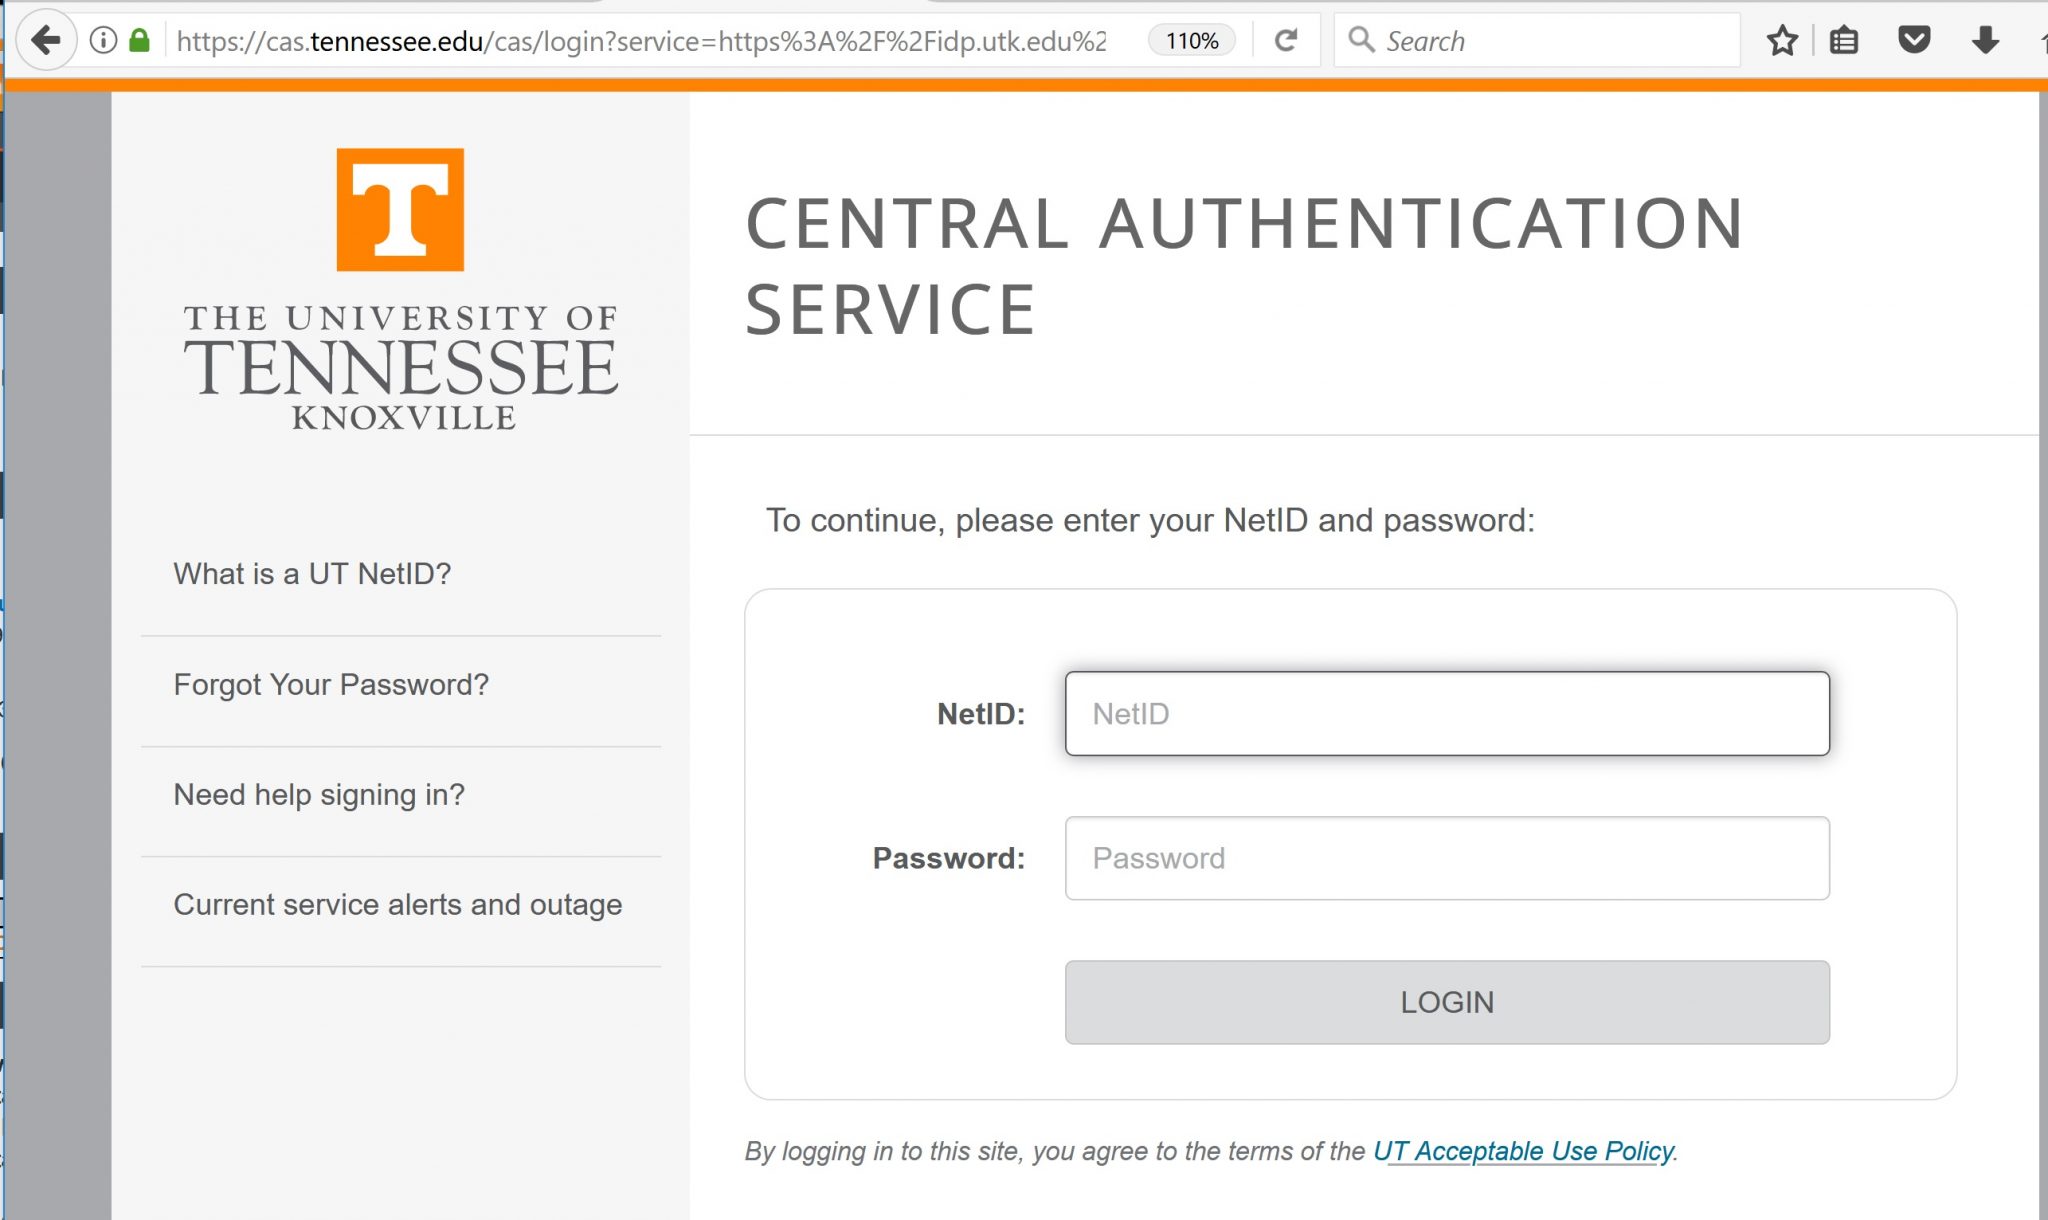
Figure 4.2 – Authentication through UT CAS - After you log in to CILogon, select the “Certificate Information” menu. Identify the “Certificate Subject” line. Copy this line. Figure 4.3 shows what to copy from this area.

Figure 4.3 – Copying the Certificate Subject from within CILogon - Paste the copied line from Step 6 into the Distinguished Name Request Form you opened in Step 3.
- Select “Submit Request” to continue.
- Select “Confirm and Submit” to associate your new DN with your account on the facility.
To perform additional actions on your InCommon Credential, navigate to the CILogon website. Select the “University of Tennessee” as your identity provider. Authenticate to UT CAS. You will then see several menus that contain information about you and your credential. You may also password protect your certificate and download it. Please note that this action is only necessary if you intend to perform unattended data transfers to and from the facility. For more information on this process, please consult the relevant section of the Data Transfer document.