Data Transfer on ISAAC ORI
Introduction
The ISAAC ORI cluster provides several ways for transferring files to/from the NFS home directories, Lustre project directories, and Lustre scratch directories. Data Transfer Nodes (DTNs) furnish this capability and are implemented with Globus and Secure Shell services. At the time of this writing, are two DTNs available to ISAAC ORI users. Table 1.1 shows these nodes.
| Data Transfer Node | Hostname (for SCP) | Globus Collection (endpoint name) |
|---|---|---|
| dtn1 | dtn1.ori.isaac.utk.edu | UTK ISAAC-ORI DTN1 |
| dtn2 | dtn2.ori.isaac.utk.edu | UTK ISAAC-ORI DTN2 |
To login and obtain command line access to these DTNs, use an SSH client to login to the Hostname listed in the table above. More information on SSH usage can be found in the Access and Login document. Replace the login node’s hostname with the DTN hostname to which you wish to connect, then authenticate with your UT NetID, password, and Duo TFA.
The ISAAC ORI cluster supports several data transfer protocols, including SCP, SFTP, GSISCP, and Globus. SCP and SFTP are SSH utilities that transfer files but perform slower than Globus. Globus offers the fastest data transfers on the ISAAC-ORI at the time of this writing. Still, SCP and SFTP are useful for small transfers. GSISCP is used for unattended data transfers.
SCP and SFTP
SCP and SFTP are both SSH commands available for transferring files to/from ISAAC ORI using these SSH client commands. Note SSH transfers are slower than Globus transfers. From our performance testing, Globus offers the fastest data transfers to/from ISAAC ORI DTNs. Still, SCP and SFTP can be useful for quick, small transfers. For larger file transfers, we recommend you use Globus.
SCP and SFTP are available to Linux and MacOS systems by default. Windows 10 users with the most recent updates can use these utilities within Command Prompt or PowerShell. Windows 7 and 8 users must use a third-party utility to use SCP and SFTP. For more information on SSH in Windows, see the Access and Login document. For Windows 7 and 8 users, the third-party utilities FileZilla and WinSCP are reviewed later in this document.
The general syntax of SCP is given below. In general, SCP is useful when transferring a file on your system to a DTN in ISAAC ORI. The <source> argument is the pathname of the file on your system that you wish to copy. The <destination> (in this case, “dtn1”) argument is the hostname of the DTN you wish to use. Additionally, the <directory> argument specifies the absolute pathname within the destination to place the file.
scp <source> <NetID>@dtn1.ori.isaac.utk.edu:<directory>
If you wanted to copy a file from your system and place it on ISAAC ORI, you could use scp ~/<filename> <NetID>@dtn1.ori.isaac.utk.edu:~/Documents
For SFTP, you specify the hostname of the system to which you intend to connect. For example, to securely transfer files between your local system and a DTN in ISAAC ORI, use the syntax below in a terminal on your local system. Ensure that you enter SFTP from the directory that contains the file(s) you wish to copy to a DTN in ISAAC ORI. You can use the pwd command to determine your current directory before entering SFTP.
sftp <NetID>@dtn1.ori.isaac
Once you authenticate with your UT NetID, password, and Duo TFA, you will enter SFTP’s interactive mode. Use the put <file> command to upload a file to ISAAC ORI. For example, to upload a file named “JobScript.sh” to a DTN from your local machine, use put JobScript.sh. This syntax assumes that the “JobScript.sh” file is in the directory from which you entered SFTP.
To retrieve files from a DTN, use the get <file> command. To download a file named “ResearchResults.txt” from the DTN to your local machine, use get ResearchResults.txt. SFTP will place the file in the directory from which you entered the utility. To change directories on the DTN, use the cd <directory> command. Use the lcd <directory> command to change the directory on your local system. Once you are done with SFTP, use the bye or exit commands to exit it. Other commands are available with the SFTP utility. Type help within SFTP to read more about them.
Globus Overview
The Globus web interface allows you to perform data transfers to and from ISAAC ORI DTNs conveniently. All DTNs use regular UTK Central Authentication Service (CAS) for authentication.
In addition, the High Performance & Scientific Computing group provides quick Globus tutorials on our workshops and tutorials webpage under Overview on the left menu. Please visit the link for Workshops and Tutorials and read the introduction about Installation Globus Connect Personal guide and transfer files.
Users should also review the official Globus documentation for more information on how to use the Globus tool.
s. Figure 3.12 shows what the Globus interface should look like when both endpoints are selected.
Using FileZilla to Transfer Files
FileZilla will work with file transfers to ISAAC-ORI. Please only use the DTNs listed in Table 1.1 at the beginning of this document.
To use the FileZilla client with your NetID, password, and Duo TFA, follow these steps.
- Open the FileZilla client.
- Select File, then Site Manager.
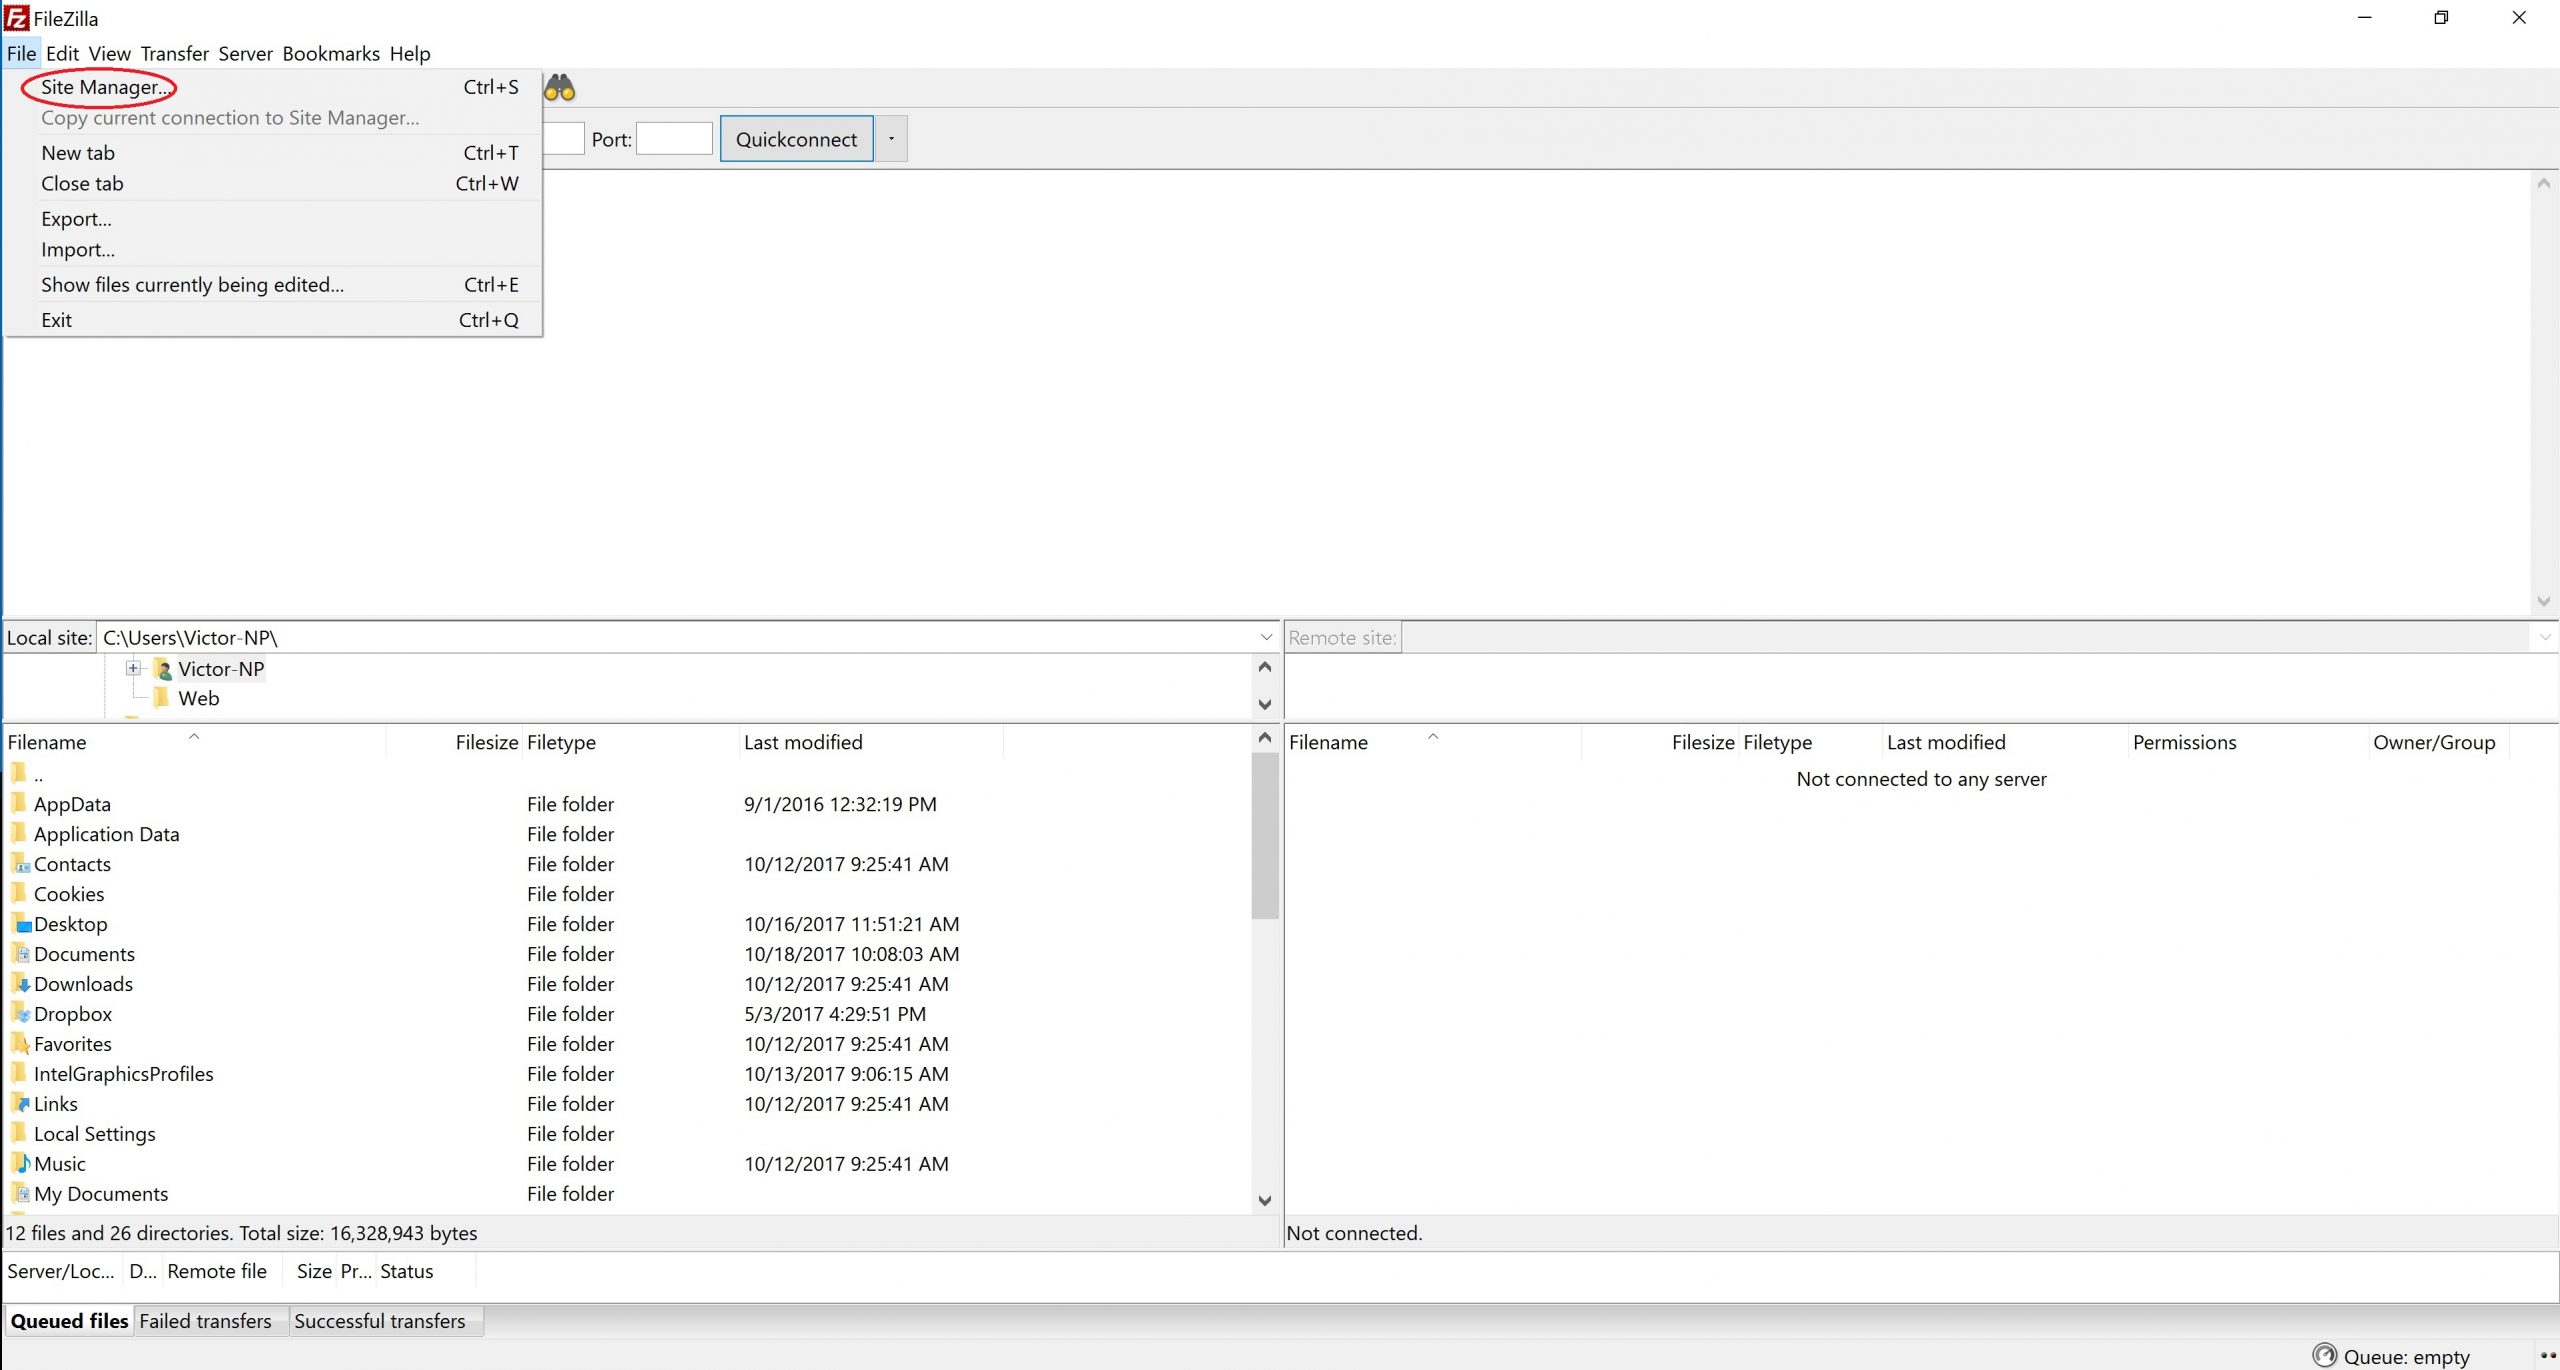
Figure 5.1 – FileZilla’s Site Manager Option - Select “New Site,” then provide the necessary information. For the host, select one of the DTNs listed in Table 1.1. For protocol, select SFTP – SSH File Transfer Protocol. For Logon Type, select Interactive. For User, type your UT NetID. Finally, rename the entry under sites from “New Site” to something more memorable, such as the name of the DTN you chose to use. Refer to Figures 5.2 and 5.3 to identify where to find these options.
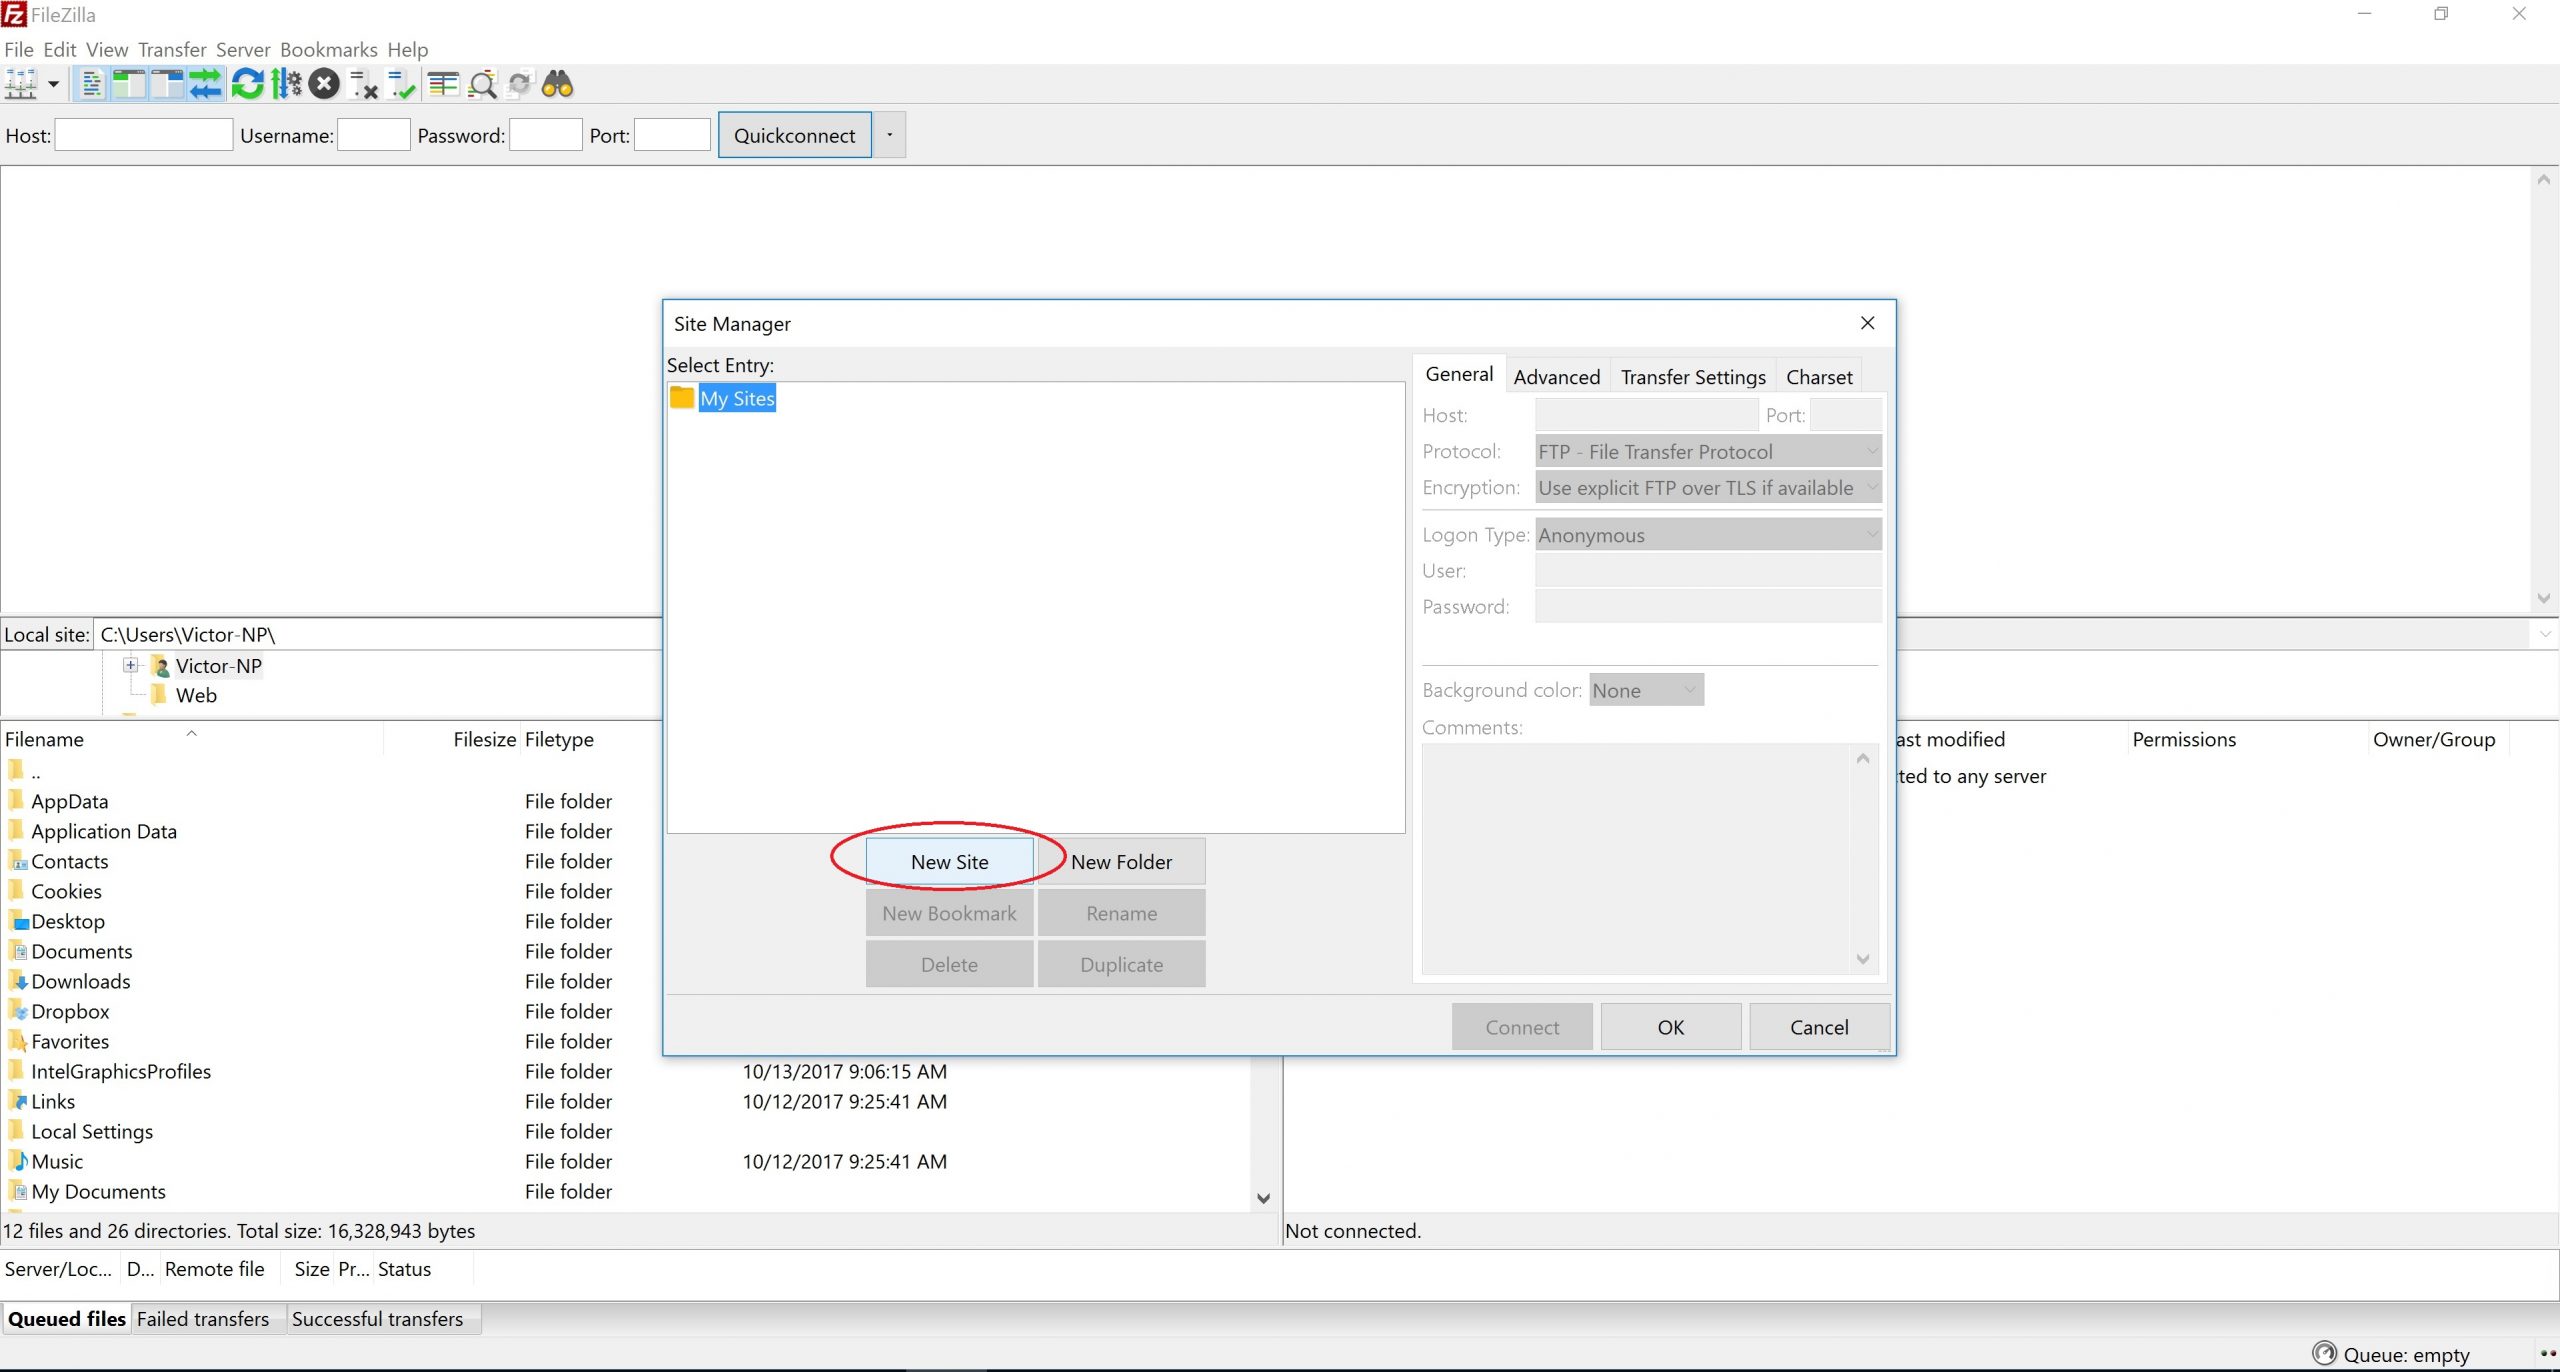
Figure 5.2 – New Site in FileZillaFigure 5.3 – FileZilla Site Options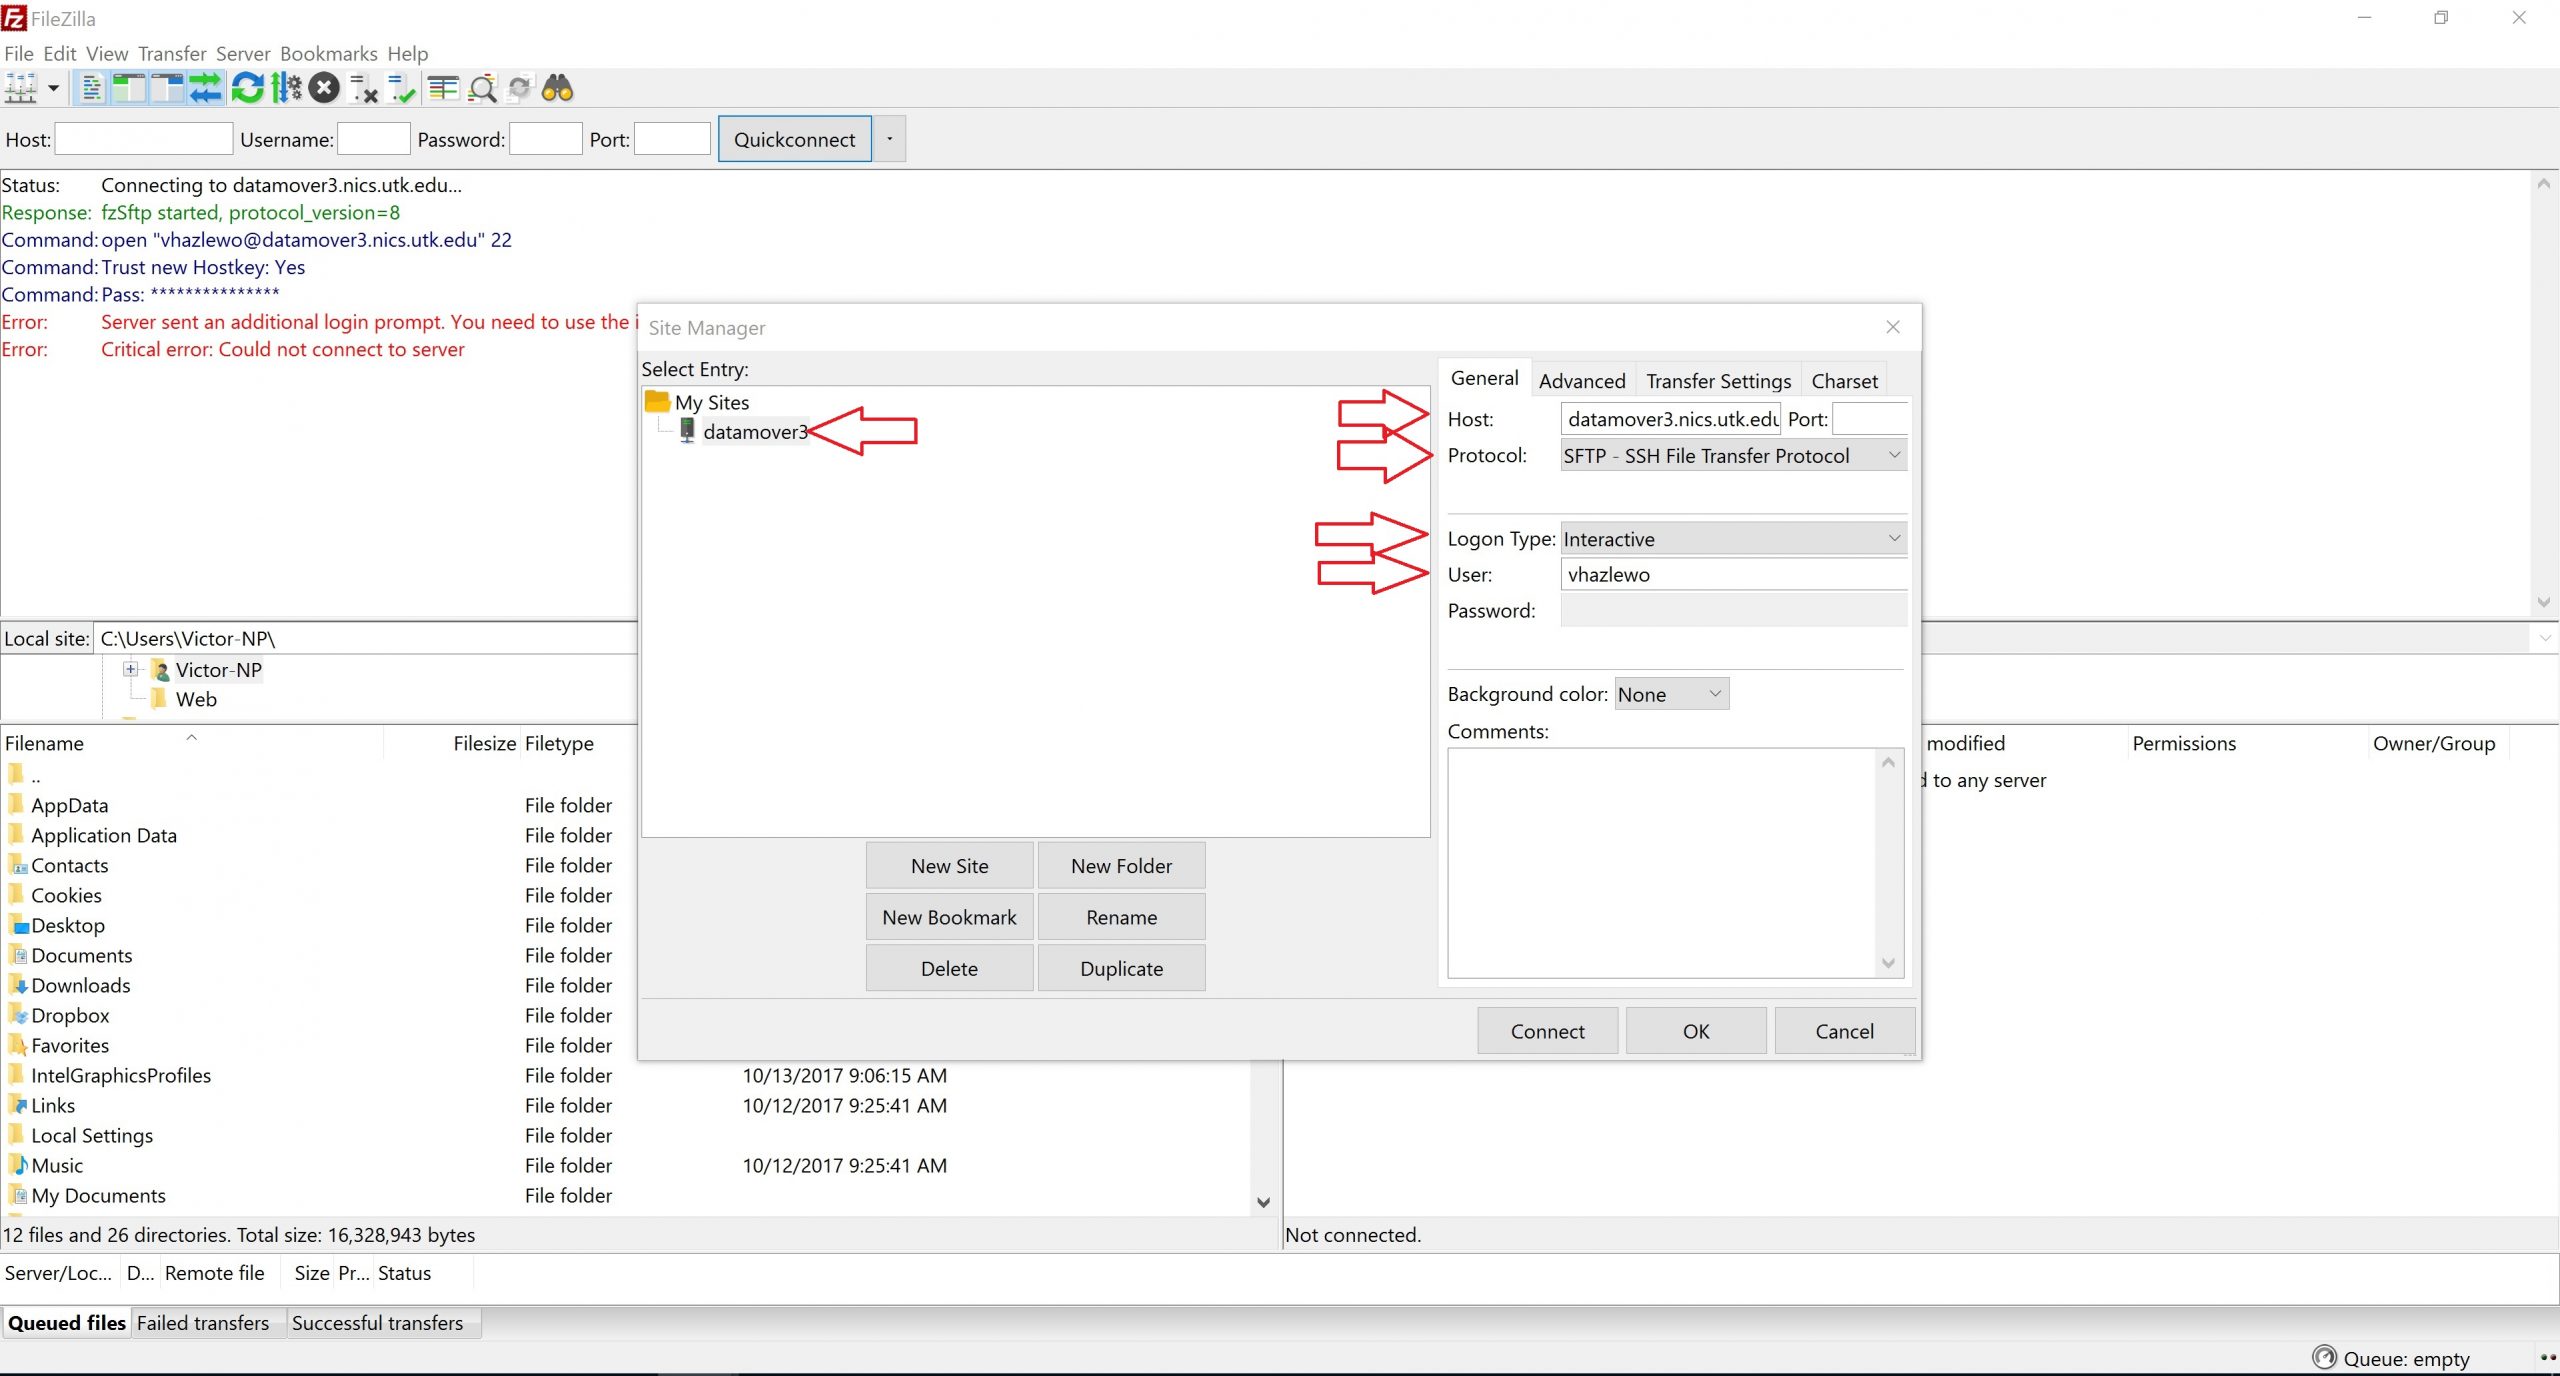
- Select Transfer Settings, then check the box for Limit the number of simultaneous connections. Make sure the value beneath this checkbox is 1.
- Select “Connect” in the Site Manager window.
- When prompted, enter your password.
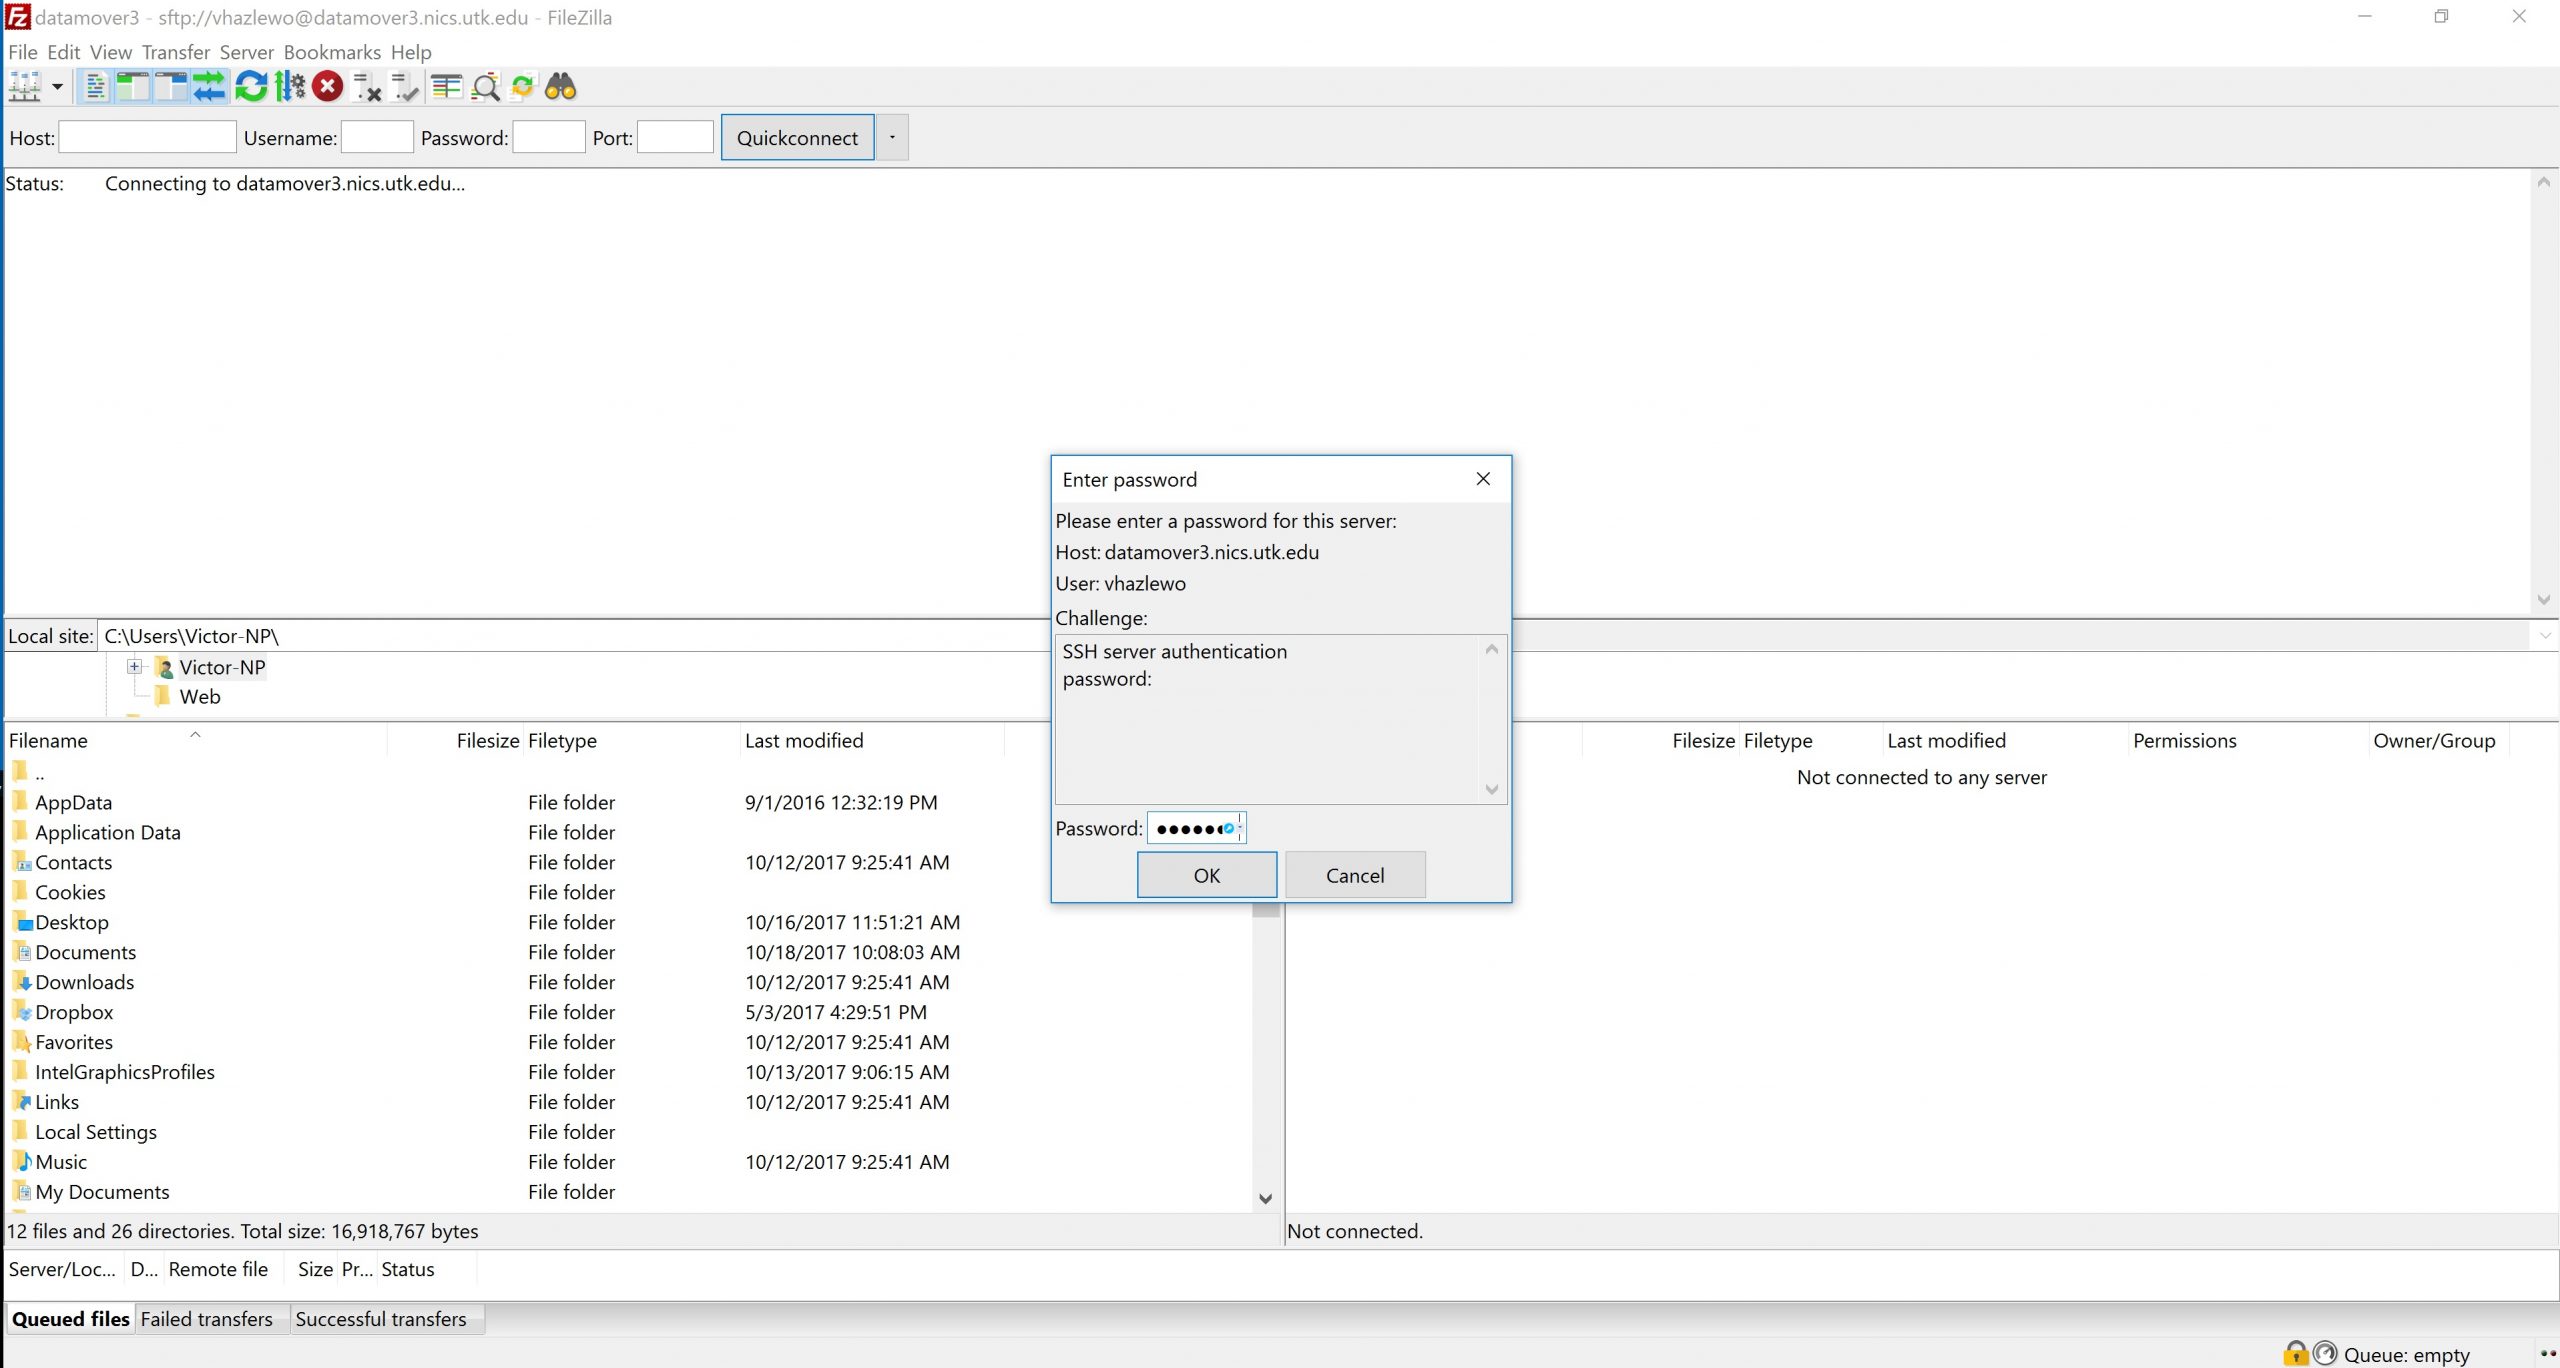
- Figure 5.4 – FileZilla Password Prompt
- When prompted, type a “1” to send a Duo Push to your mobile device, then authenticate with Duo TFA. Upon successful authentication, you will be logged in to the DTN through FileZilla.
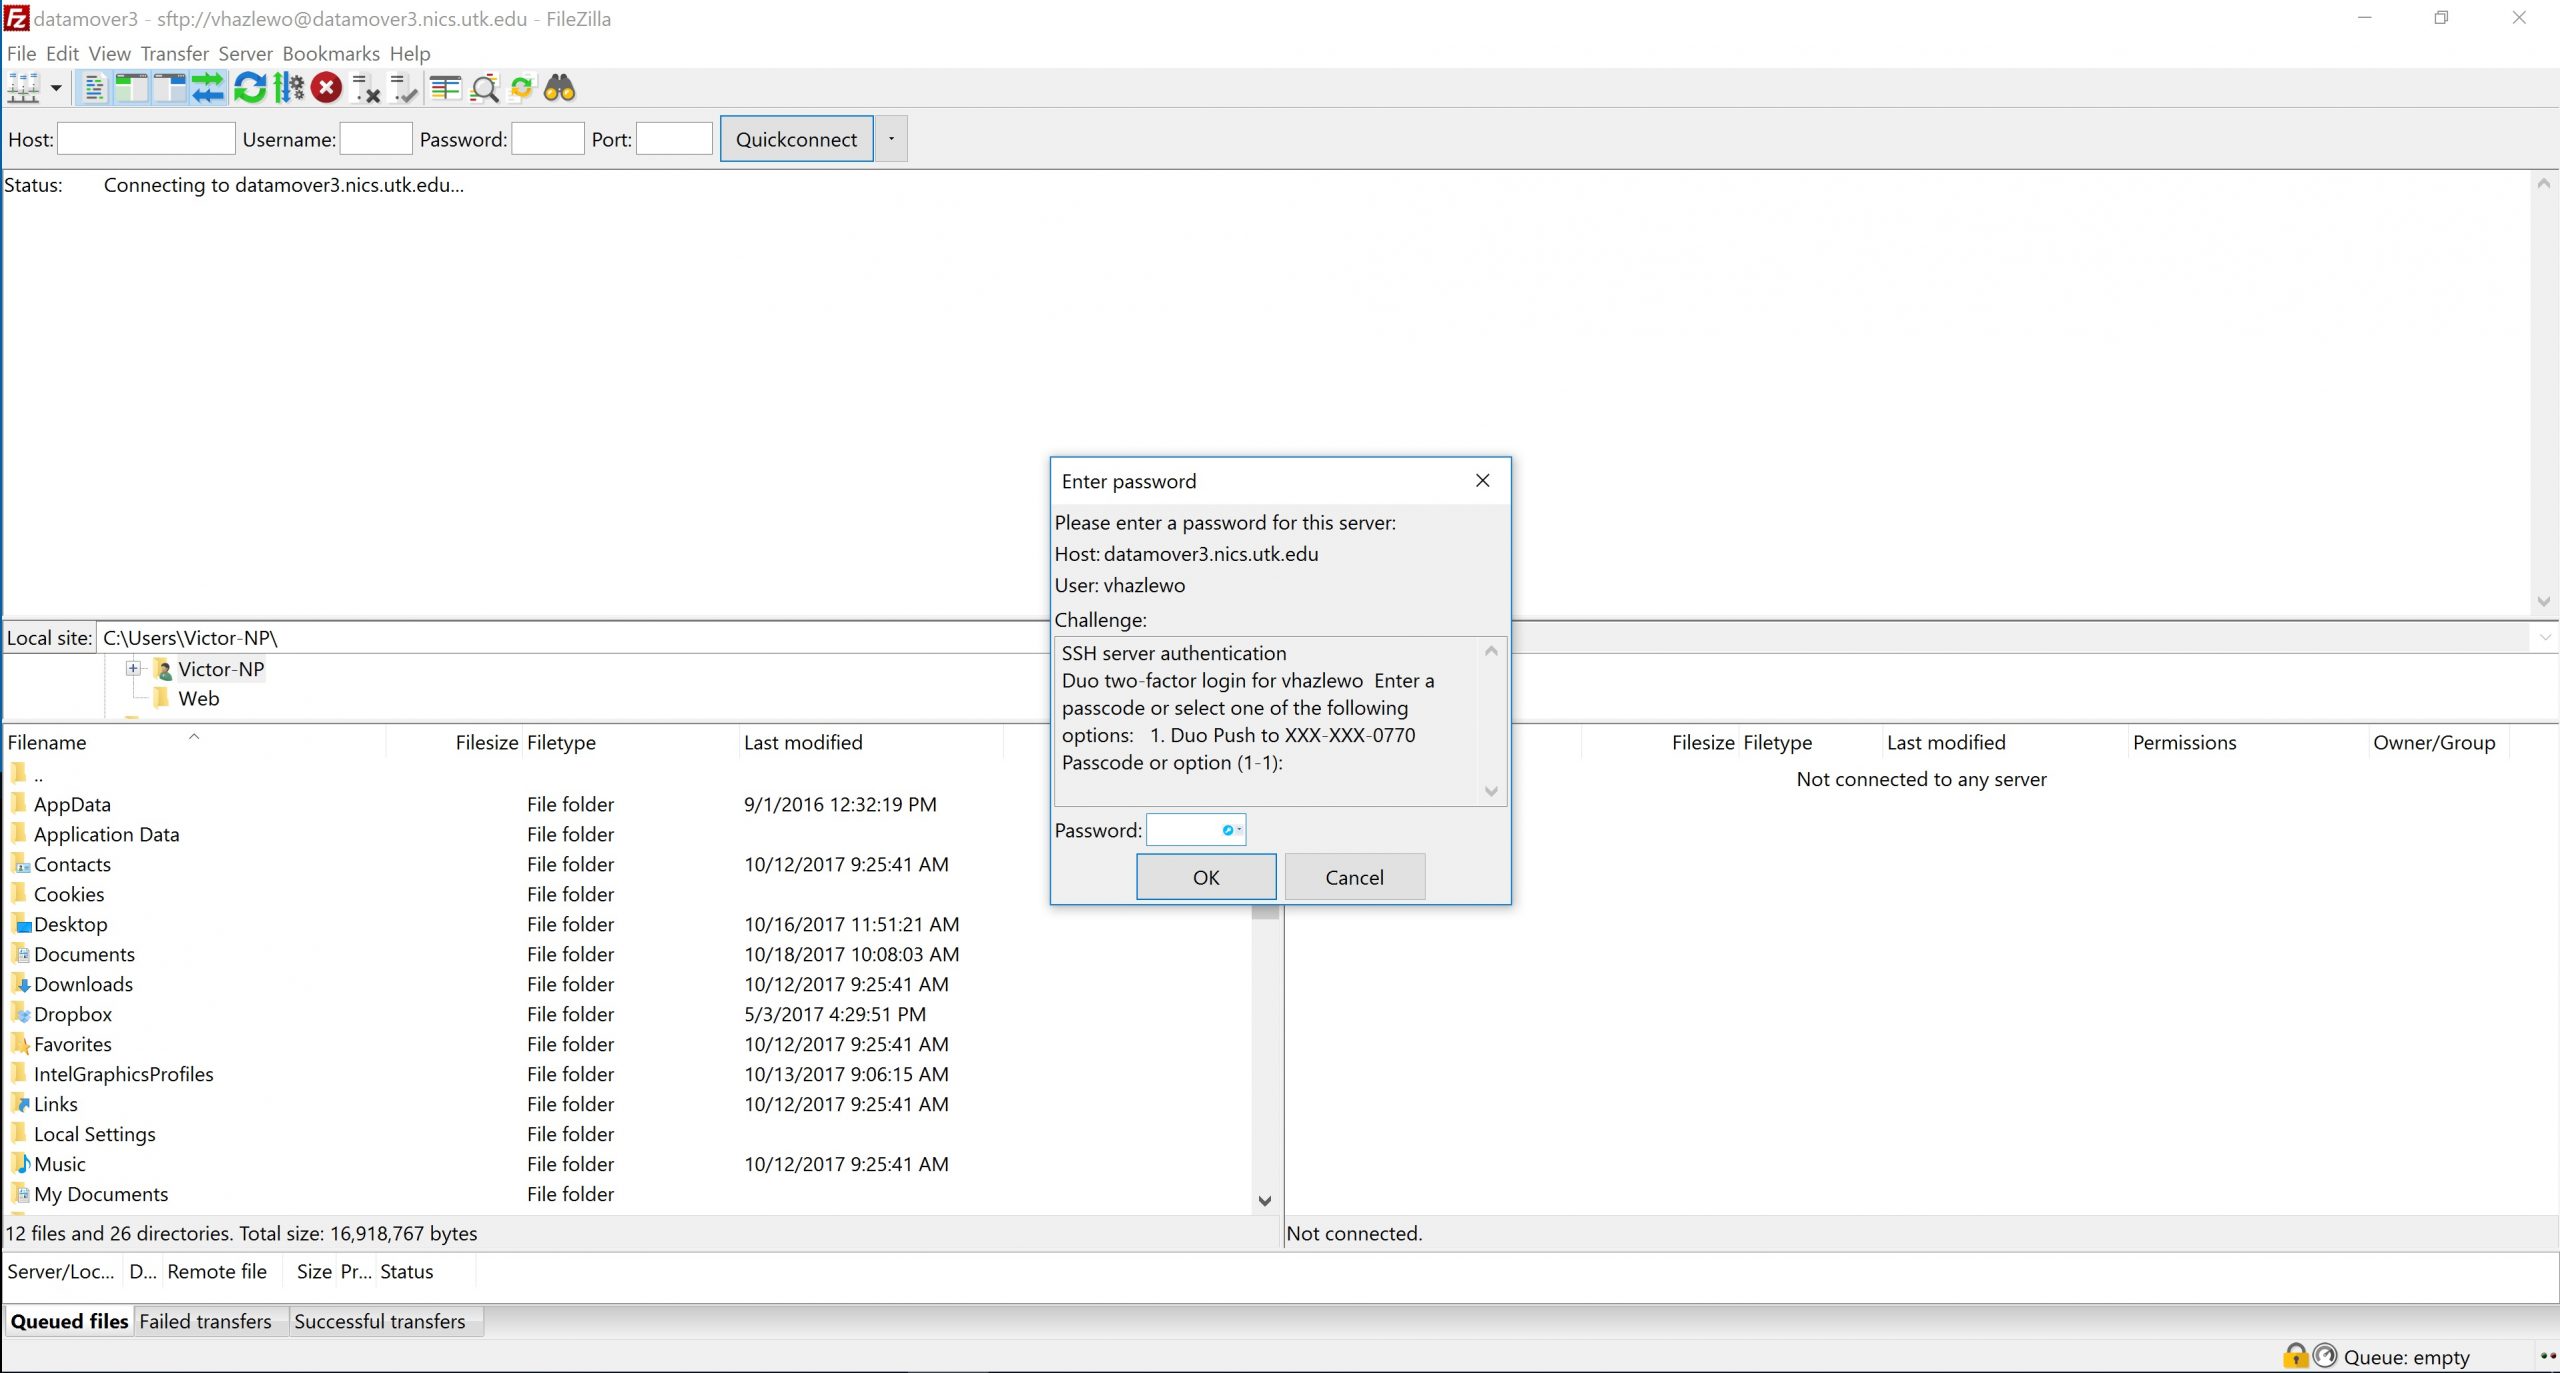
Figure 5.5 – FileZilla Duo Prompt
Using WinSCP to Transfer Files
WinSCP can perform file transfers to and from the DTNs. Please use the DTNs listed in Table 1.1 at the beginning of this document.
To use the WinSCP client with your NetID, password, and Duo TFA, follow these steps.
- Open WinSCP, then click on “New Site.”
- Provide the hostname of the DTN for “Host name,” your UT NetID for “User name,” and your password. Leave the port number as 22.
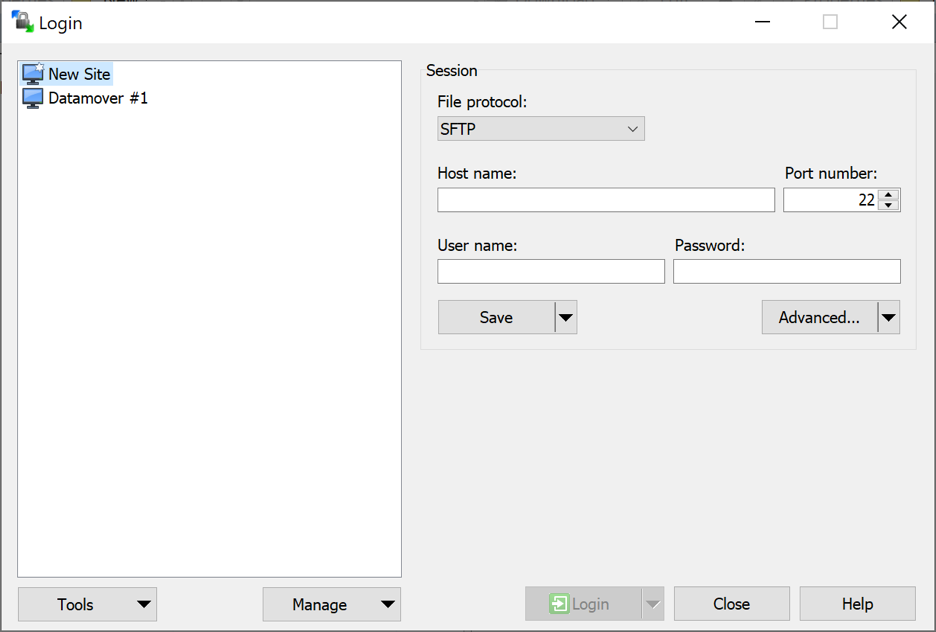
Figure 6.1 – WinSCP New Site Creation - When warned about an unknown server, select “Yes.”
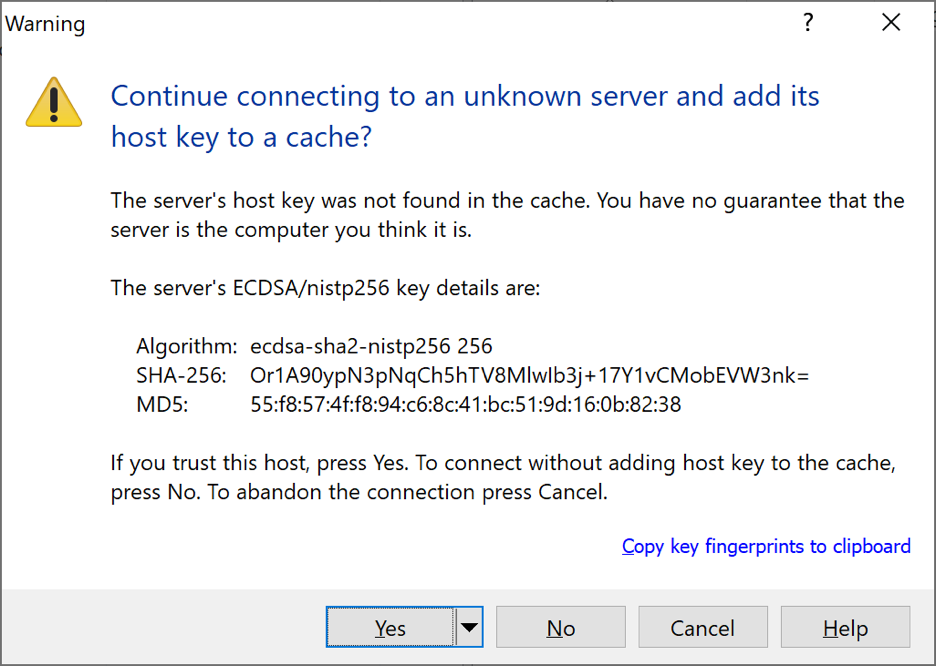
Figure 6.2 – Initial WinSCP Key Warning - The authentication banner will appear. Select “Continue.”
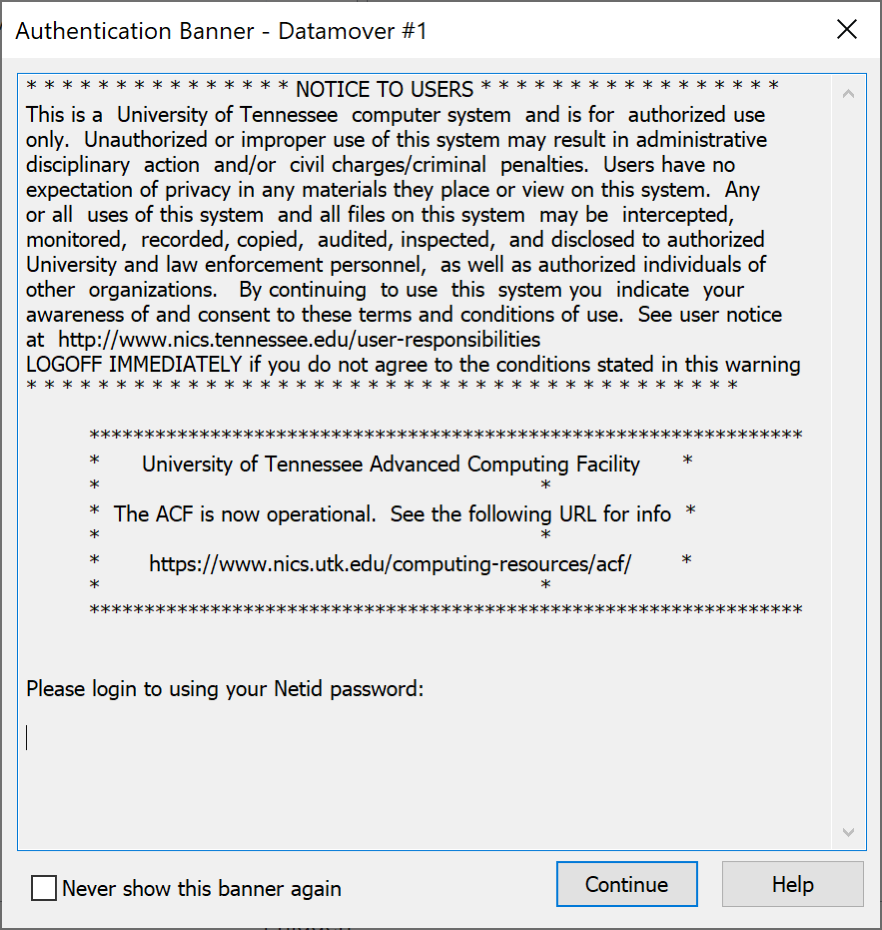
Figure 6.3- WinSCP Authentication Banner - When prompted, type “1” to receive a Duo Push on your mobile device. Authenticate with Duo. You will then be logged in.
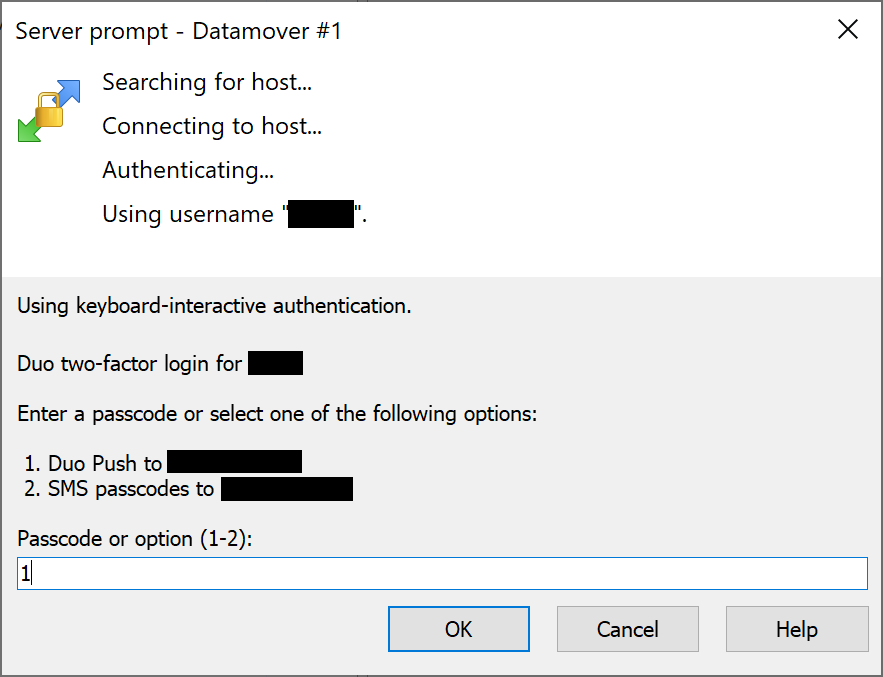
Figure 6.4 – Duo Prompt in WinSCP - Once you authenticate, you will get the WinSCP application screen. On the left side of the screen, you see your local machine. On the right side of the screen, you see the remote system into which you are logged.
Globus for Microsoft OneDrive
Globus provides access to Microsoft OneDrive and SharePoint files. Connect from your computer using Globus Connect Personal or sign in with your UTK credentials to Globus File Manager.
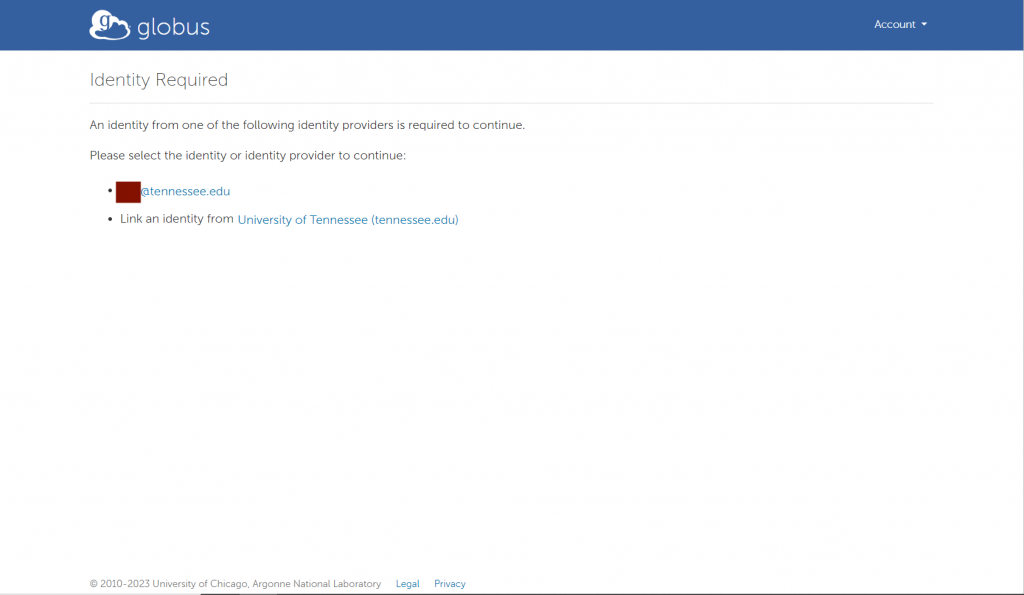
Search for the collection named “UTK OneDrive” or “UTHSC OneDrive”, depending on your campus affiliation. The first time that you access the collection, you will be prompted for credential setup. Then you will need to authenticate and link your UTK/UTHSC identity to Globus.
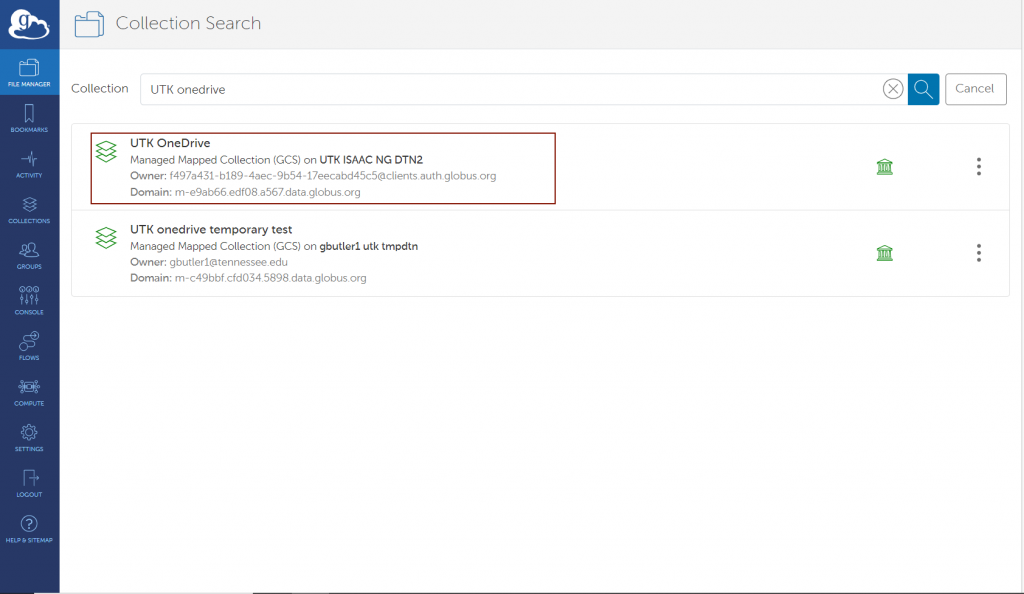
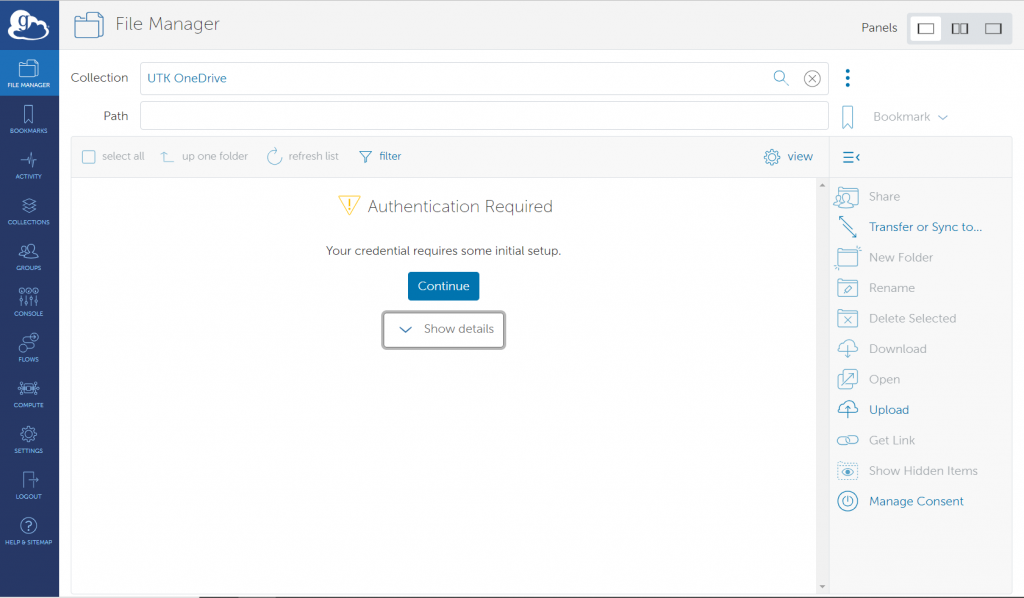
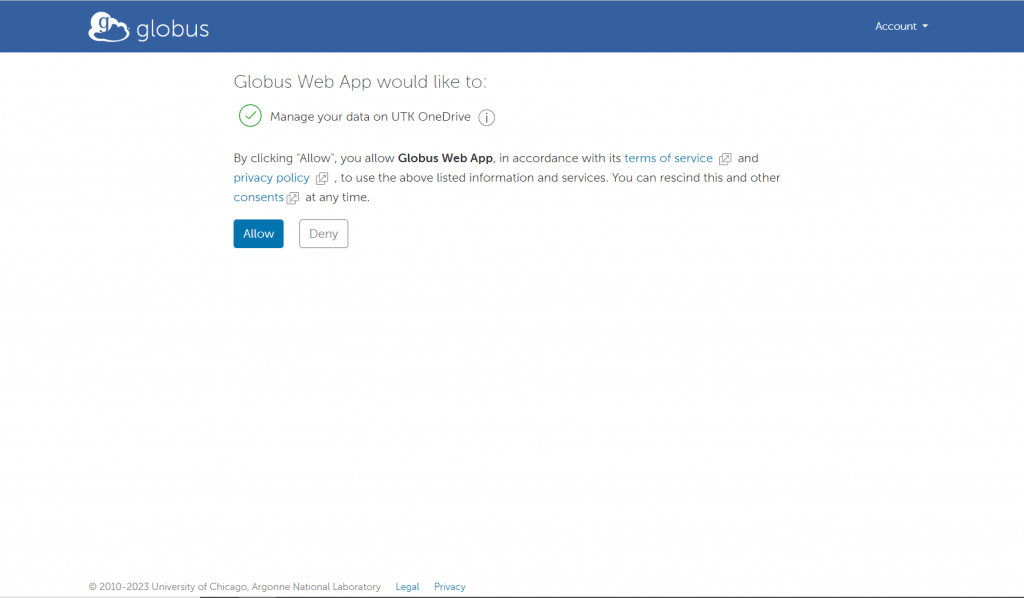
After you have been signed into your UTK/UTHSC account, you will be asked to confirm the permissions used by Globus to access your UTK OneDrive/UTHSC OneDrive account. Click on “Continue” to continue.
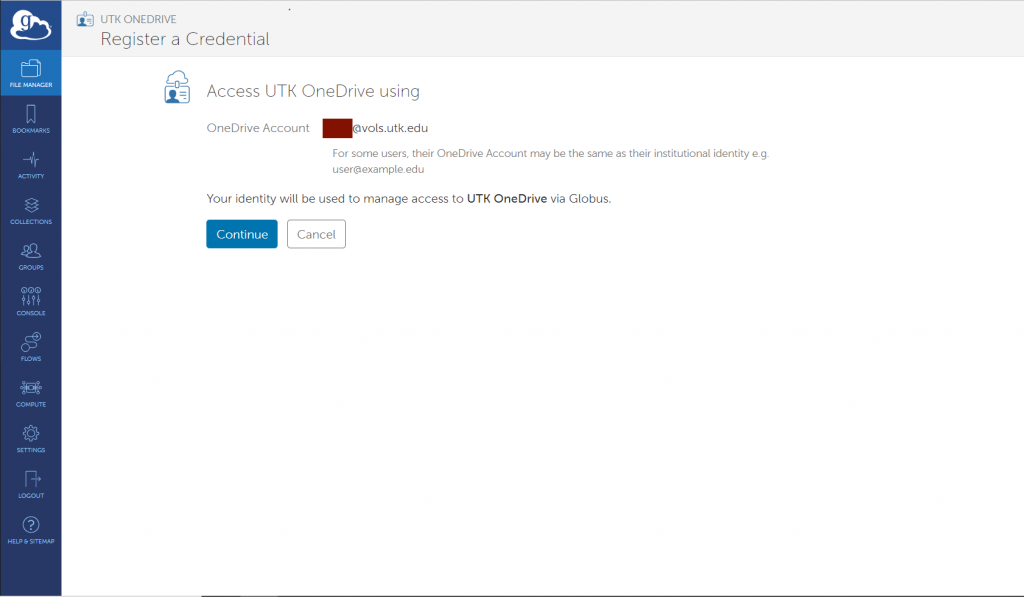
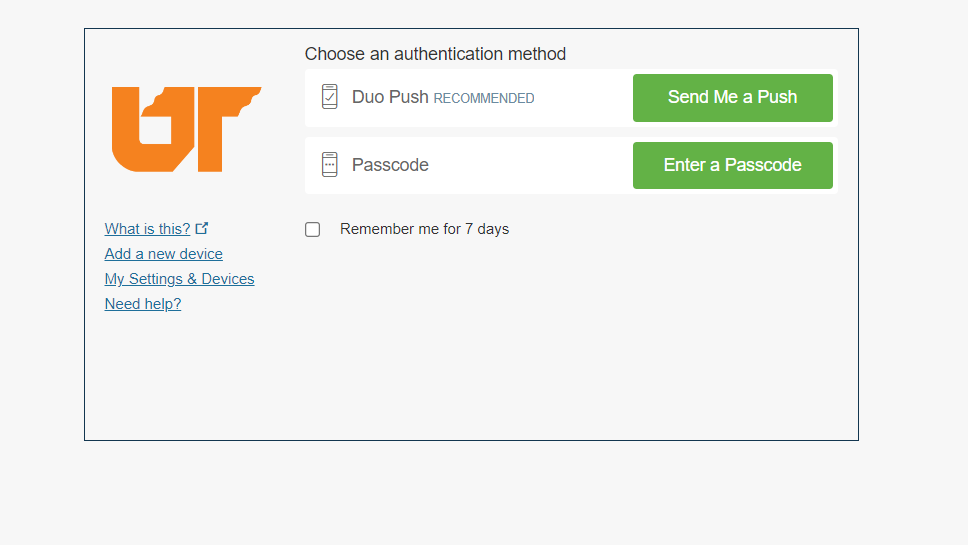
Authenticate with your UT NetID, password, and Duo MFA code
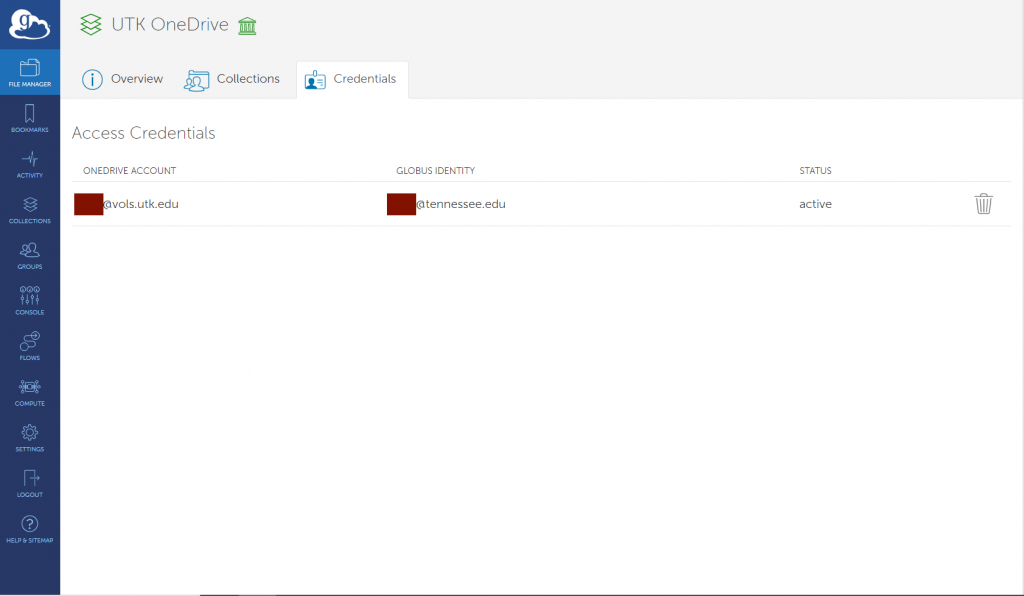
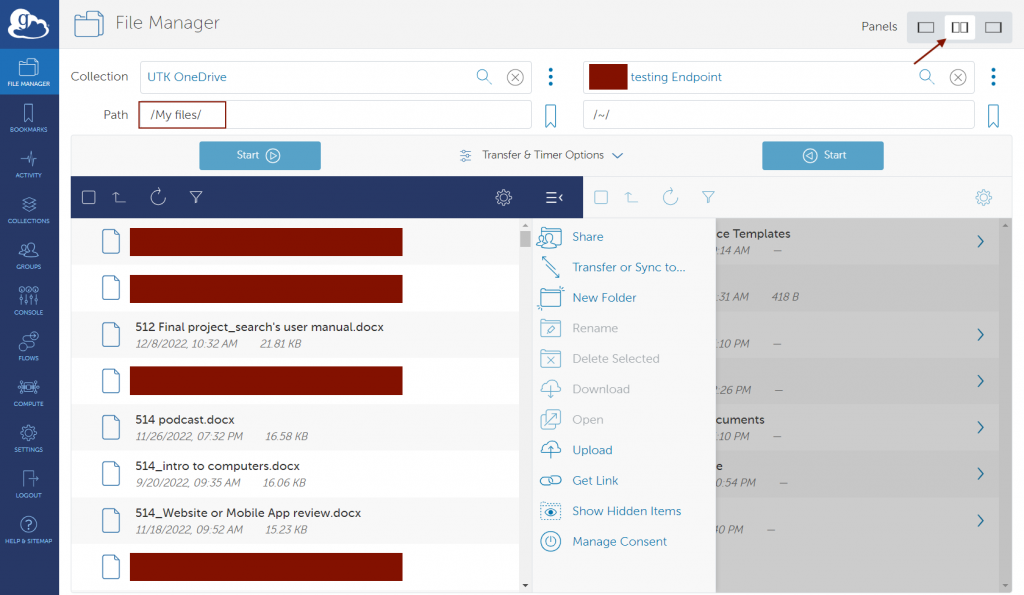
Complete that process then you will see the files within your OneDrive space and be able to copy files to or from it just like any other Globus collection. Make sure you select the double panels option in the top-right of the page. This will display the UTK OneDrive/UTHSC OneDrive and the user’s endpoint at the same time.
Your OneDrive space is shown as the path “My files” in the UTK-OneDrive/UTHSC-OneDrive collection:
Transfer data between a local computer (laptop/desktop) and OneDrive
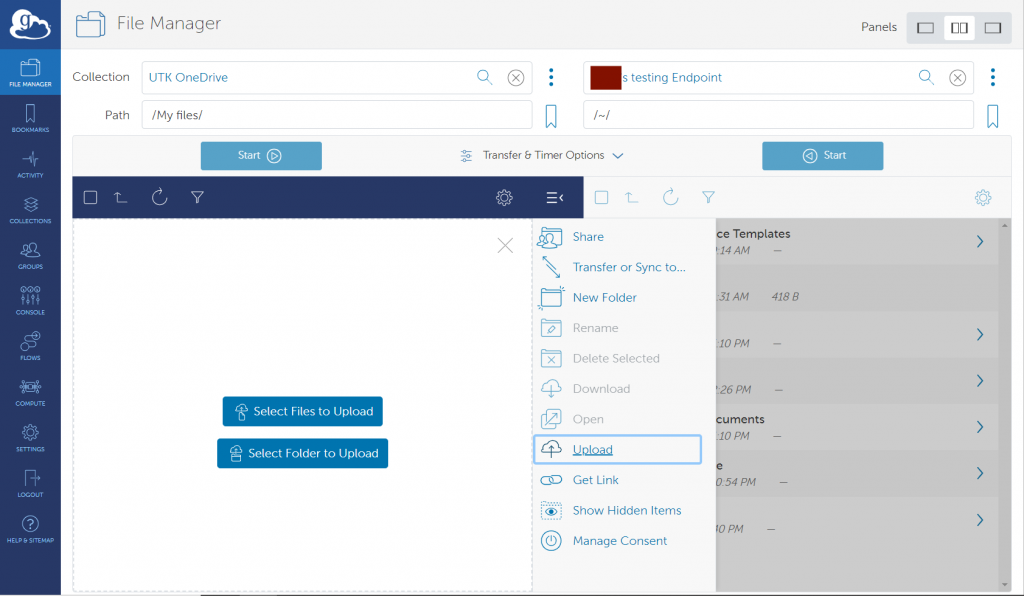
- Select the “UTK OneDrive” or “UTHSC OneDrive” collection as described above.
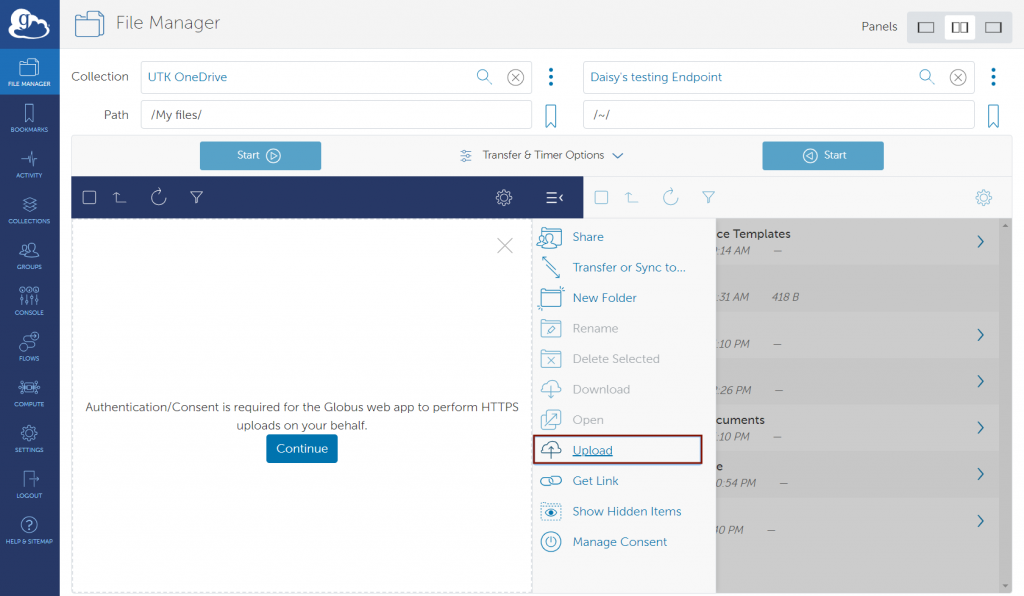
- To upload data from your local computer to OneDrive, select “Upload” from the middle column menu and follow the prompts:
Using Globus to Access Sharepoint Locations
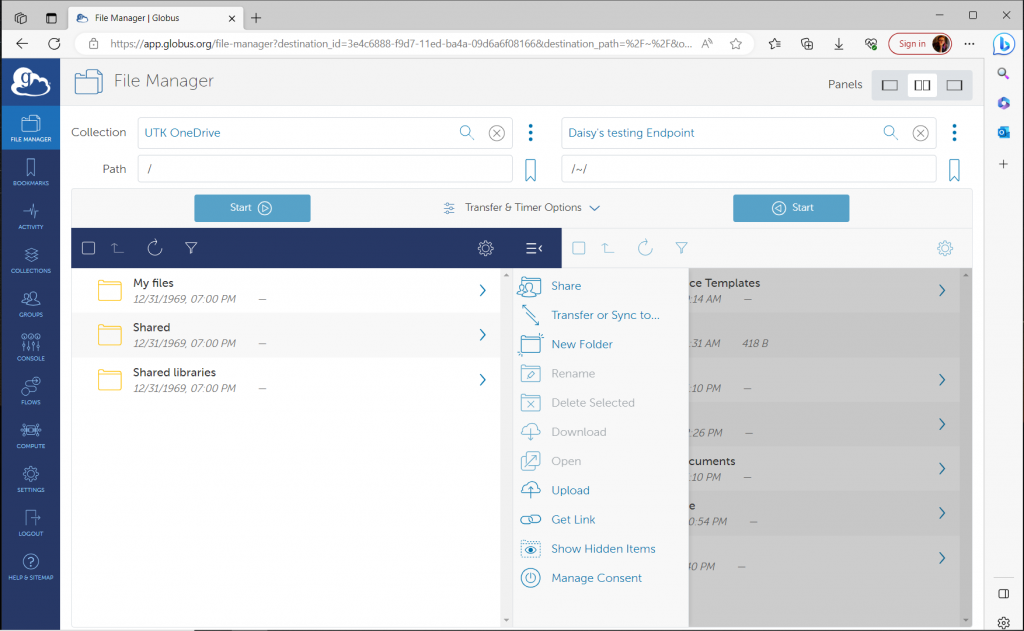
After connecting your UTK OneDrive or UTHSC OneDrive account to Globus, you can access your personal files and Sharepoint sites you associate with. Globus will initially display your own files under the /My Files path. By entering / for your path or selecting “Up one folder”, you can access your files, files shared with you, and SharePoint files.
| Path | Description |
|---|---|
| /My files/ | your documents in OneDrive |
| /Shared/ | Files shared with you in OneDrive |
| /Shared libraries/ | documents from Office365 Groups that you have followed in SharePoint |
Restrictions and limitations in OneDrive and SharePoint
OneDrive and SharePoint have limitations on what files can be stored, which may affect how you use the service. Please check the link below to learn more about the restrictions and limitations.
Using the Globus Web-based Interface to Transfer
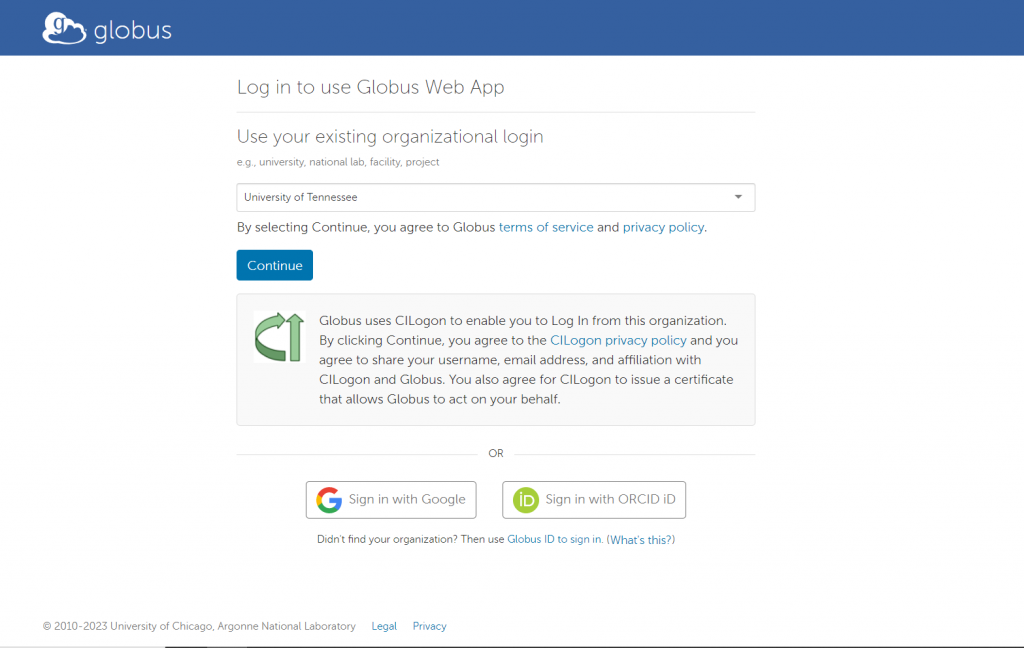
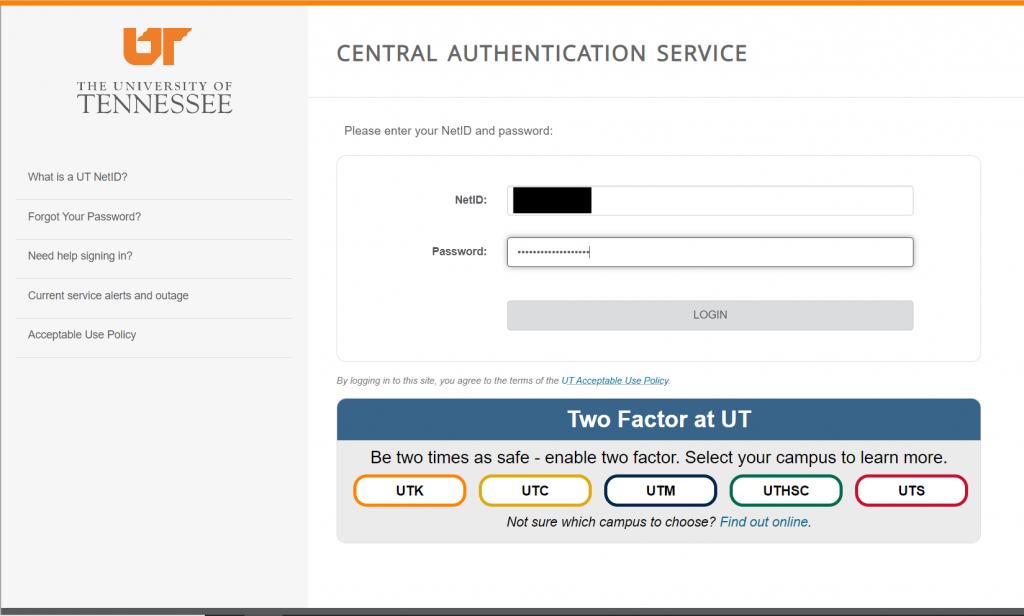
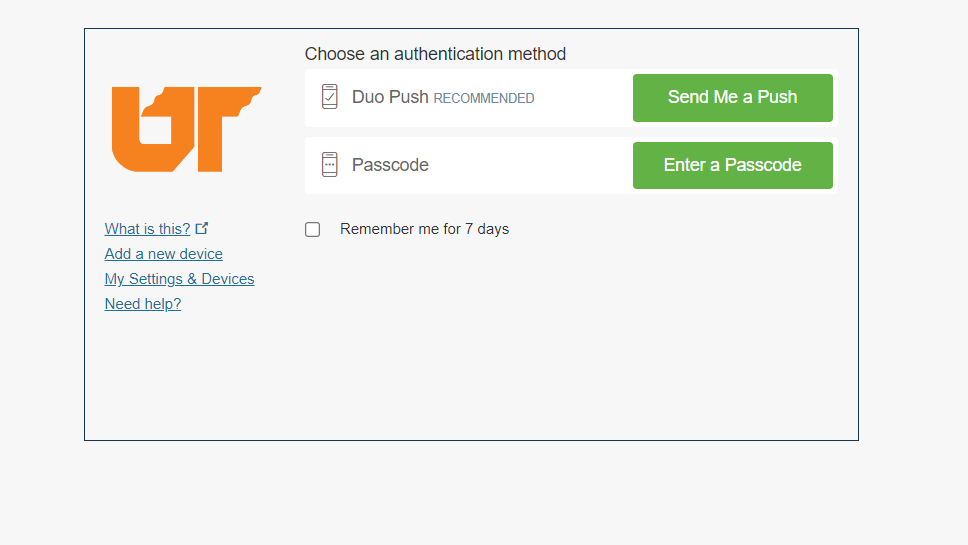
To access the Globus interface in your browser, navigate to the Globus website. Login using the existing organizational login option. Verify that the University of Tennessee is selected, then select “Continue.” Authenticate with your UT NetID, password, and Duo MFA code. You will then see the interface depicted in Figure 3.4
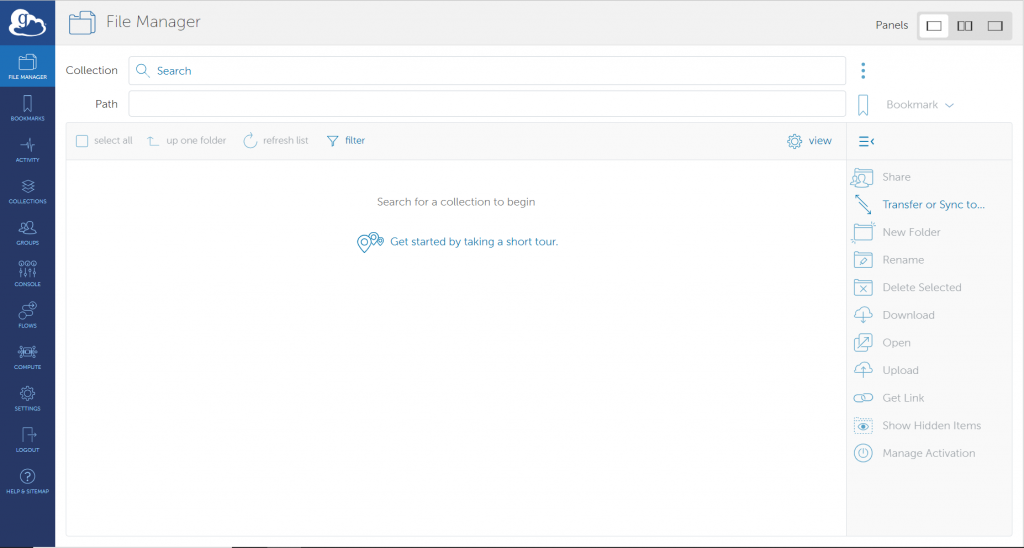
You must configure endpoints before initiating file transfers between your local machine and the DTN. One endpoint will reference your local system, while the other will reference one of the DTNs. Further instructions on these endpoints will be provided below.
Key Concept: Endpoint
An endpoint is a server that hosts collections. If you want to be able to access, share, transfer, or manage data using Globus, the first step is to create an endpoint on the system where the data is (or will be) stored.
Globus Connect is used to create endpoints. An endpoint can be a laptop, a personal desktop system, a laboratory server, a campus data storage service, a cloud service, or an HPC cluster. As explained below, it’s easy to set up your own Globus endpoint on a laptop or other personal system using Globus Connect Personal. Administrators of shared services (like campus storage servers) can set up multi-user endpoints using Globus Connect Server. You can use endpoints set up by others as long as authorized by the endpoint administrator or a collection manager.
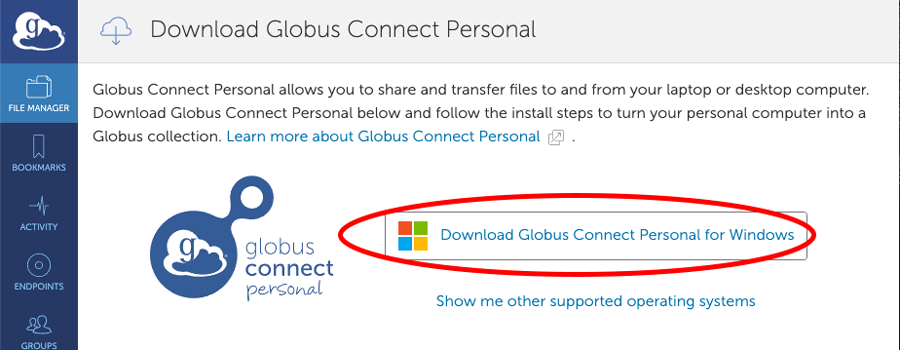
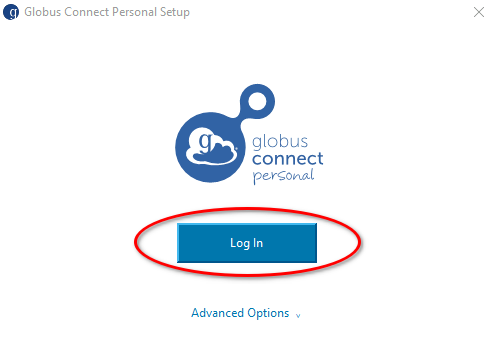
After installation has been completed, GCP will launch. Click on ‘Log In’ to authenticate with Globus and begin the Collection Setup process.

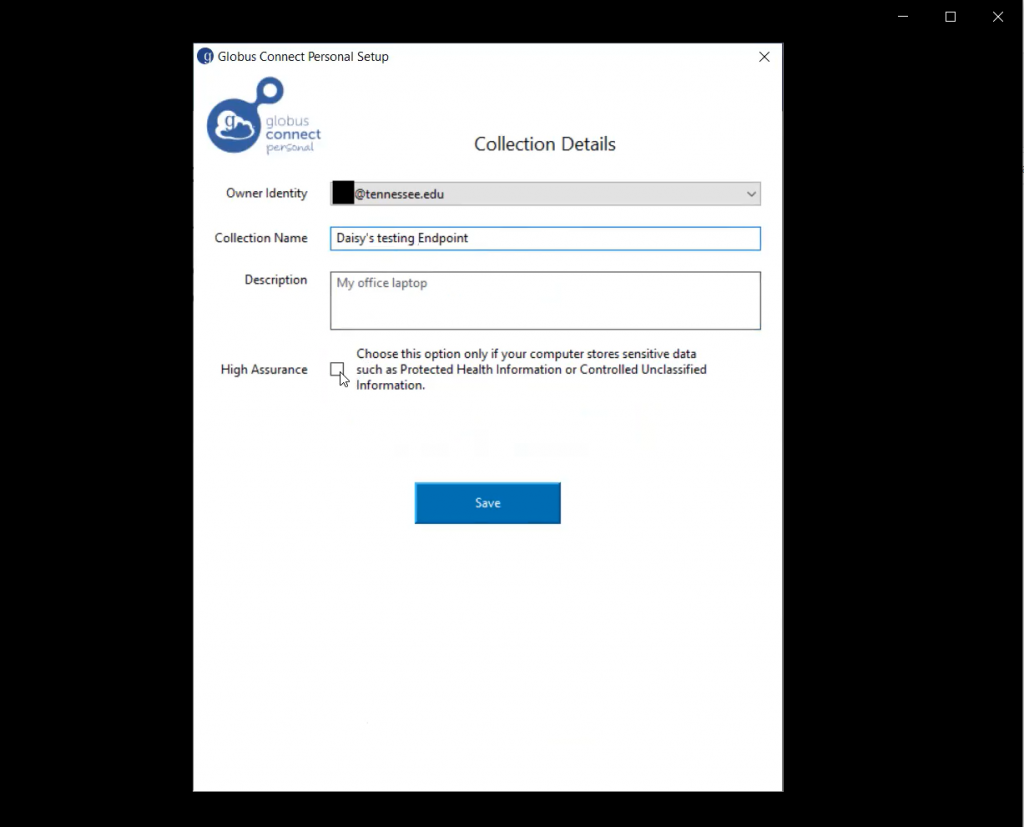
If the endpoint for the computer is not already set up, users will see the window as shown in Figure 3.8. Enter the collection Name. This name will be the user’s local machine name. The name users choose unimportantly; however, it should be memorable (e.g., JaneSmithLocalEndpoint, etc.). Exit the setup upon successful completion.
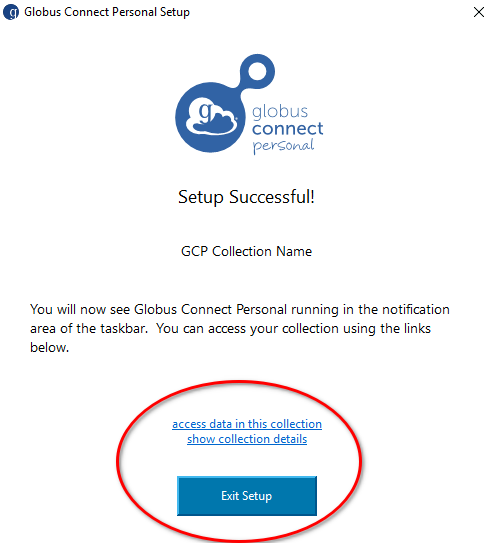

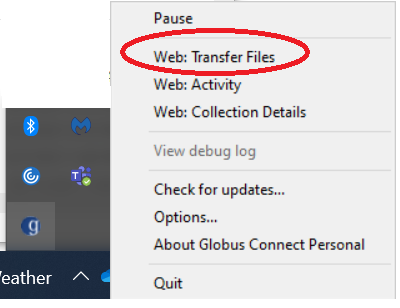
At the end of the installation, you will see an icon in the menu bar at the bottom of your screen, indicating that Globus Connect Personal is running and your new collection is ready to be used.
Once you configure your local machine as a Globus endpoint, return to the “File Manager” tab on the page’s left side. Make sure you select the double panels option in the top-right of the page (Figure 3.12 highlights this option). This will display your local machine’s filesystem and the DTN’s. Once both panels are displayed, click “Collection” in the left panel. Type the name of your endpoint in the search bar or find it under “My Collections.”
After selecting your endpoint, you will return to the File Manager. In the right panel, click on “Collection.” Search for one of the two DTNs. The endpoint names of these DTNs are given below.
- UTK ISAAC-ORI DTN1
- UTK ISAAC-ORI DTN2
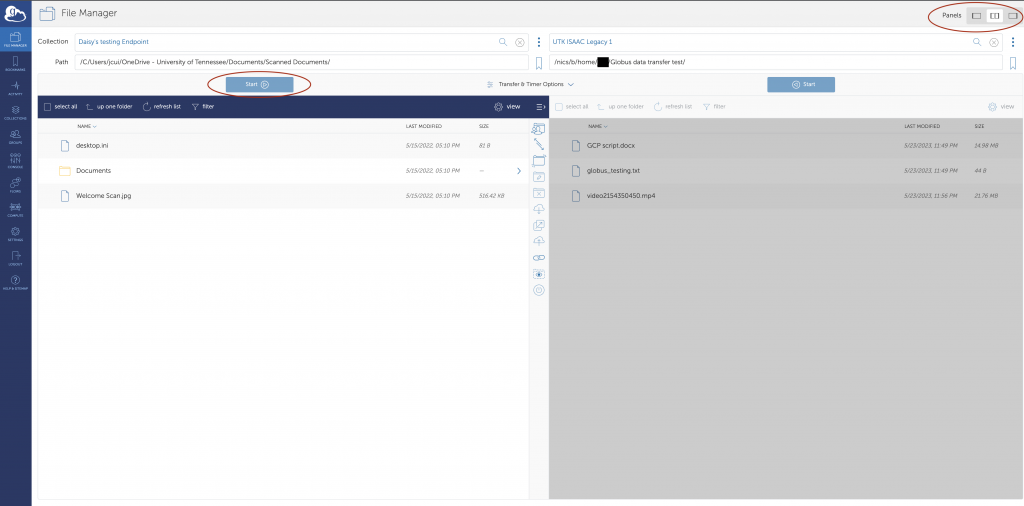
Once both endpoints are configured, you can transfer data between the two. You can select individual files and directories for these transfers. When you choose the data you wish to transfer, press the “Start” button below the endpoint from which you will transfer data. You can also navigate the filesystem hierarchy in either endpoint using the Globus interface. Other options are available for your transfers but are usually unnecessary for most transfers. Figure 3.12 shows what the Globus interface should look like when both endpoints are selected.

 Explore
 Write
Write Chat
Chat Call
Call