
 Explore
 Write
Write Chat
Chat Call
Call
Recording a Zoom Meeting to the Zoom Cloud
The Zoom Cloud Recording option allows you to record a meeting and have it stored in the cloud, from where you can make it available to students.
- Start the meeting as the host.
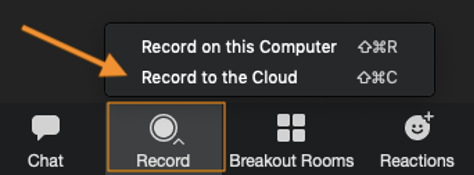
- Select the Record button at the bottom of the Zoom meeting window.
- Select Record to the Cloud to begin recording.
- End the meeting when your class concludes. Zoom Cloud will begin processing the file.
- After Zoom has finished processing your recording, you will receive an email notification. The processing time will vary depending on the length of your meeting and the number of other meetings being processed.
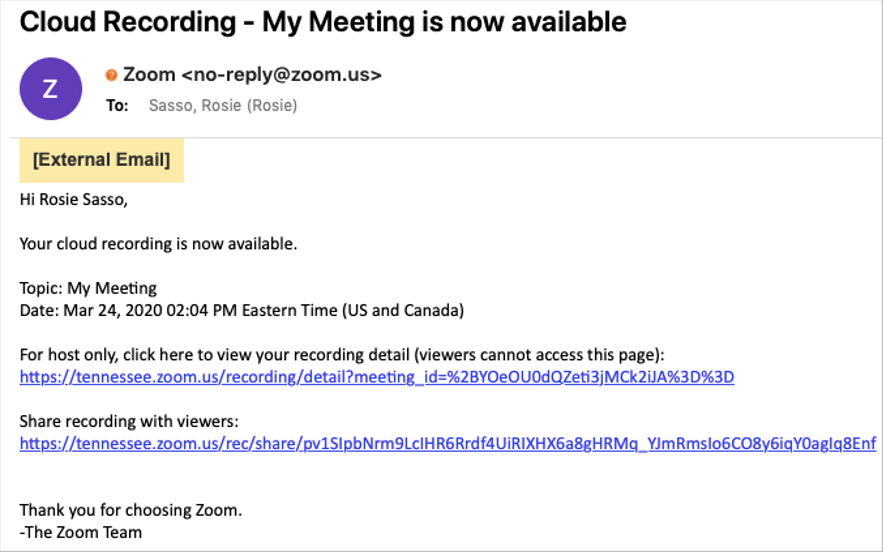
- While the email contains a link to your recording details and a shareable link to your recording, we recommend instead following the steps below to share your Cloud Recording.
Accessing & Sharing Cloud Recordings
On Your Canvas Site
If you scheduled your meeting from within your Canvas course site (using the Zoom option in the course navigation menu), students will be able to access the recording from that same tab. You do not need to take any action to make the recording available, but you may need to guide students as to where to find it. They will not automatically receive a notification of the recording’s availability.
Students will need to:
- Access the Canvas course.
- Select the Zoom link in the course navigation menu.
- Select the Cloud Recordings tab.
- Select the title of the desired recording.
- Select either the video or audio-only recording to open it in a
new tab.
Additional Options for an Instructor
As an instructor, you also have a few additional options for recordings of meetings that you scheduled via your Canvas course site. From the Zoom link in the course navigation menu, on the Cloud Recordings tab, you can:
- Play the video: Click the video to open it in a new tab and play it.
- Share the video with your students as a link: If you want to send students a direct link to the recording, select the Share link to display suggested text and a link to your recording. You can select Copy and paste this text into another location, such as an email, Canvas page, etc.
- Download the video to your computer: Select the Download button to save both the video and an audio-only file to your computer. You do not need to do this to make the cloud recording available to your students. However, the Zoom Cloud is not considered long term storage. Recordings are set to automatically delete after 120 days. If you need to retain your recordings for longer than that time frame, it is highly recommended that you download a copy and store it on a local device or drive.
- Delete the Recording: If you would like to delete this cloud recording, just click on the Delete button for that respective recording in the Cloud Recordings tab in your course site. Recordings will be moved to the trash for 30 days. They can be moved out of the trash and recovered at any time during that 30 days, but after that, recordings are permanently deleted.
From Your Zoom Account
If you did not schedule your meeting from within your Canvas course site, you will need to access your cloud recording directly from the Zoom website:
- Go to https://tennessee.zoom.us.
- Select Create or Edit Account and sign in using your NetID and password, if prompted.
- Select Recordings along the left.
- On the Cloud Recordings tab, select the title of your recording.
- This displays the recording details. From here, you can:
- Play the video: Select the title of the recording, select the video, and then play the video in the new tab that opens. Close the tab to return to the video details.
- Share the video with your students: Select the Copy shareable link button. This copies a link to the recording to your clipboard, which you can then paste into an email, Canvas page or announcement, etc.
- Download the video to your computer: Select the Download button to save both the video and an audio-only file to your computer. You do not need to do this to make the cloud recording available to your students. However, the Zoom Cloud is not considered long term storage. Recordings are set to automatically delete after 120 days. If you need to retain your recordings for longer than that time frame, it is highly recommended that you download a copy and store it on a local device or drive.
- Delete the Recording: If you would like to delete this cloud recording from your account, just click on the Trashcan icon next to the Download and Copy shareable link buttons. Recordings will be moved to the trash for 30 days. They can be moved out of the trash and recovered at any time during that 30 days, but after that, recordings are permanently deleted.