Skip to content Skip to main navigation Report an accessibility issue
High Performance & Scientific Computing

Data Transfer on ISAAC Secure Enclave


Introduction

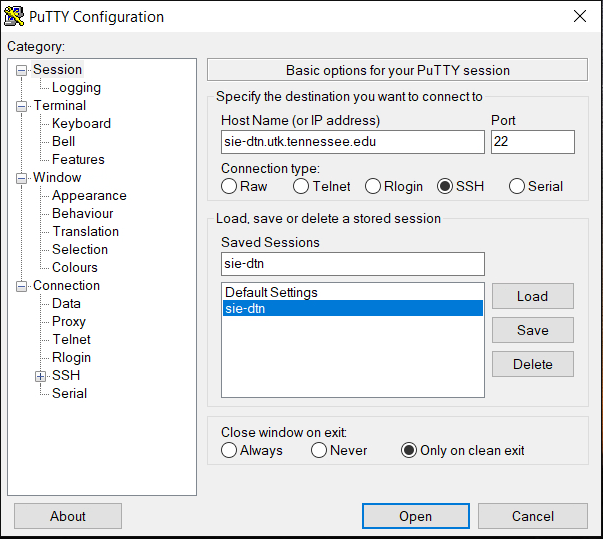
The ISAAC Secure Enclave offers services for three types of systems to support sensitive research and data: (i) Windows Virtual machines (VMs) (ii) HPSC cluster, and (iii) Virtual Datacenter Work Stations (vDWS). The data in/out of these Secure Enclave systems can be transferred using Globus. The Data Transfer Nodes (DTNs) furnish this work very efficiently using Globus. At the time of writing this document, there are two DTNs available to ISAAC Secure Enclave users, which are listed in table 3.1

Data Transfer NodeHostnameGlobus Collection
(endpoint name)
Description
sie-dtnsie-dtn.utk.tennessee.edu UTK Secure EnclaveTransfer data to/from Windows VM or Windows based vDWS
dtn1dtn1-se.utk.tennessee.edu SIP ENCLAVE STORAGETransfer data to/from Secure Enclave HPC cluster or Linux based vDWS
Table 3.1: Different data transfer nodes in Secure Enclave environment

In this section we will learn how to transfer data from Secure Enclave to any other machine authorized by the Office of Research and OIT Security.

Data transfer on the Secure Enclave is performed with the Globus, a data transfer service that uses GridFTP protocol, an extension of FTP (File Transfer Protocol). GridFTP is a protocol defined by Global Grid Forum Recommendation GFD.020 and the following IETF standards (in RFC documents): RFC 959 (ftp), RFC 2228 (ftp security extensions), RFC 2389 (feature negotiation), RFC 3659 (Extensions), and RFC 4217 (TLS). Key features of GridFTP are:

  • Performance – the Globus protocol supports parallel transfer streams and multi-node transfers to achieve high performance.
  • Checkpointing – the Globus protocol requires that the server send restart markers to support checkpoints of files to improve performance over marginal network connections.
  • Third-party transfers – The FTP protocol that Globus is based separates control and data channels, enabling third-party transfers which is the transfer of data between endpoints, controlled by a third control host host.
  • Security – Provides strong security on both control and data channels. Control channel is encrypted by default. Data channel is authenticated by default with optional integrity protection and encryption which is required for the Secure Enclave and enforced by our Globus subscription.

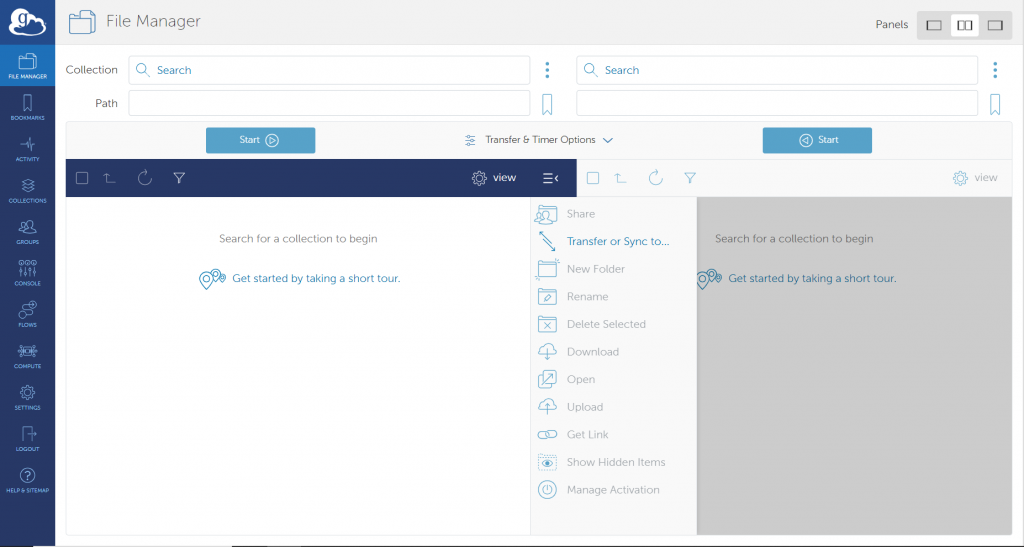
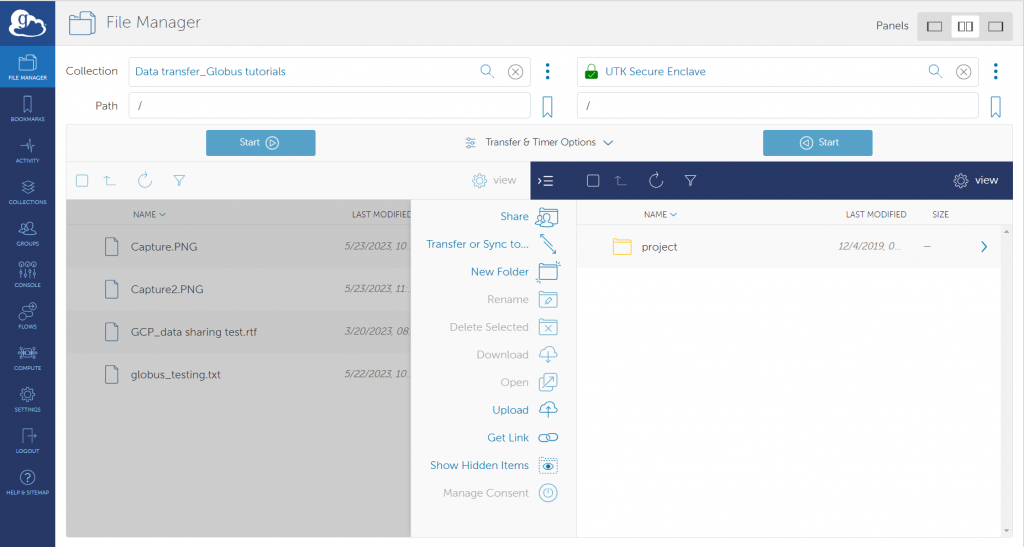
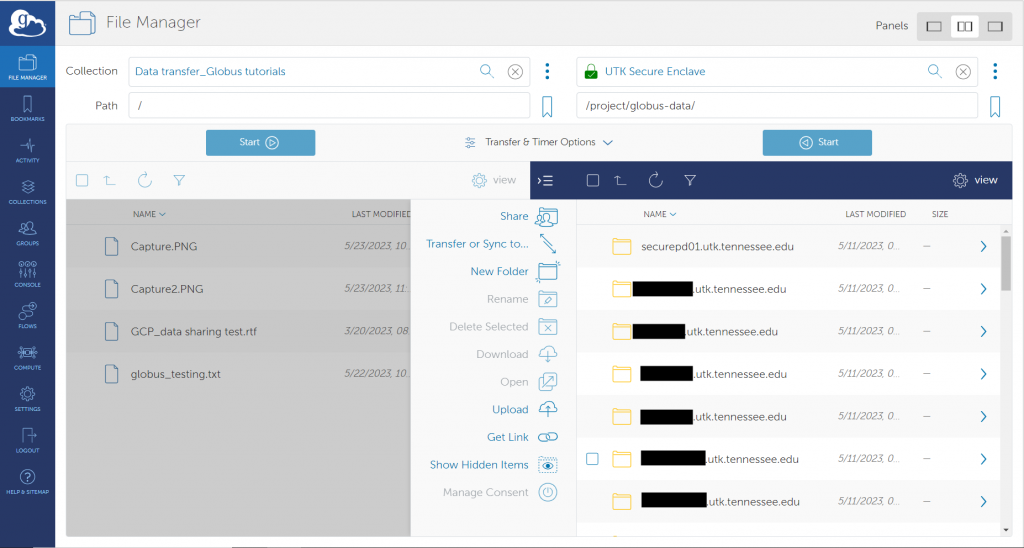
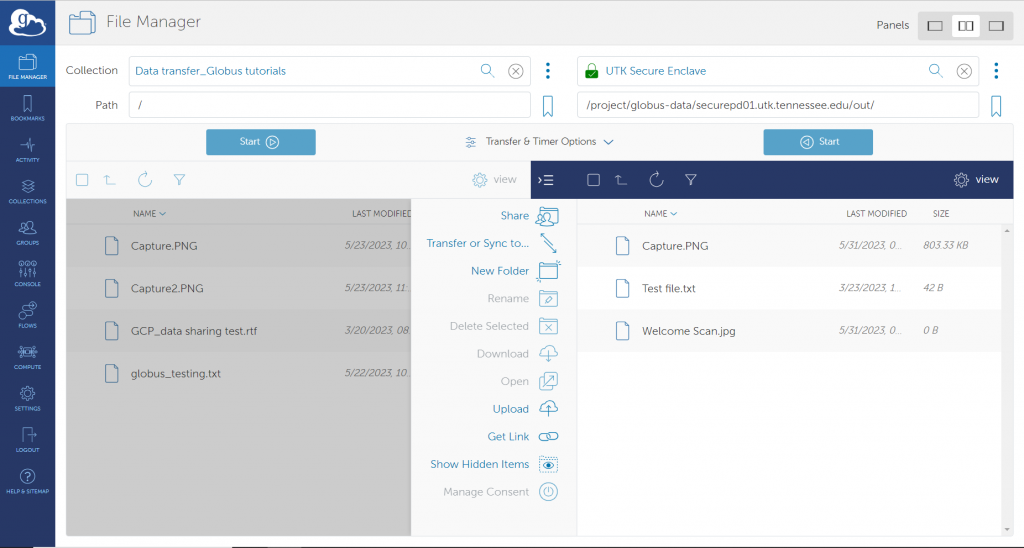
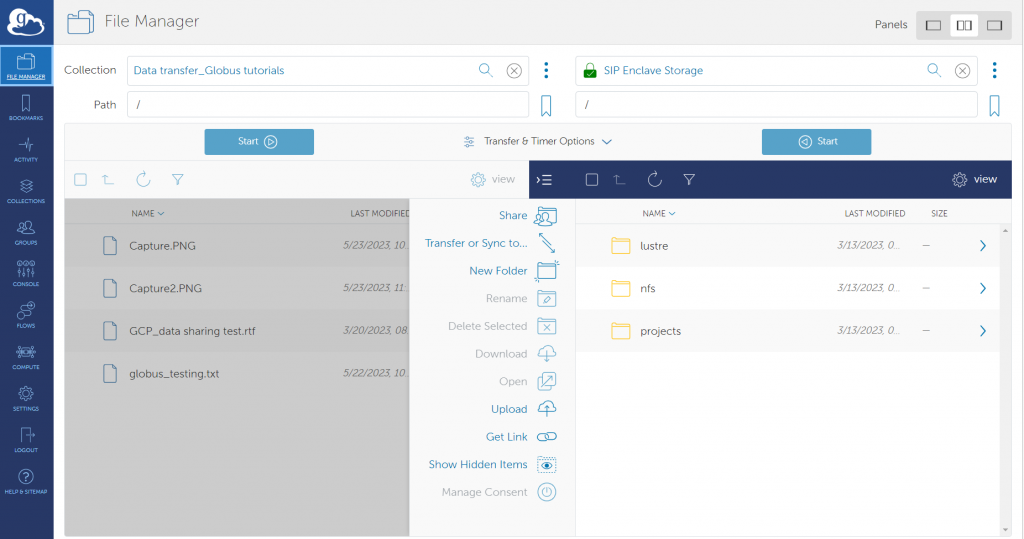
The data transfer command and control mechanism uses the Globus cloud-based services to communicate with Globus endpoints (also called collections) to provide authentication and access control, get file listings, manage files (delete, rename, etc.), and transfer files between endpoints. The traditional file transfer tools such as SFTP, SCP or other utilities are not the preferred, approved, and documented way of transferring files and should not be used on the Secure Enclave. Please be aware that all data transfer operations should be done on the Secure Enclave Data Transfer Nodes (DTN). There are two DTNs: one for the Secure Enclave VMs and one for the HPSC cluster. The Globus endpoint names for these DTNs are given below:

  • For Windows VM: UTK Secure Enclave
  • For HPSC cluster: SIP ENCLAVE STORAGE

GLOBUS OVERVIEW AND NETWORK REQUIREMENTS FOR DATA TRANSFER

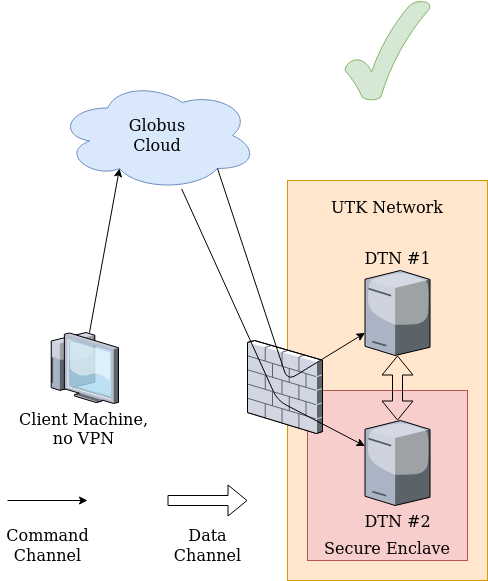
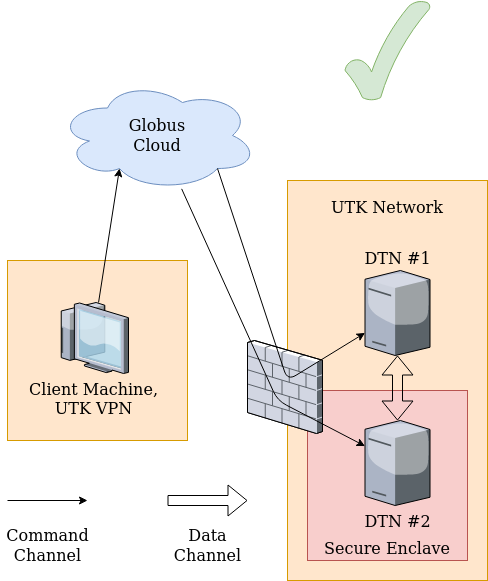
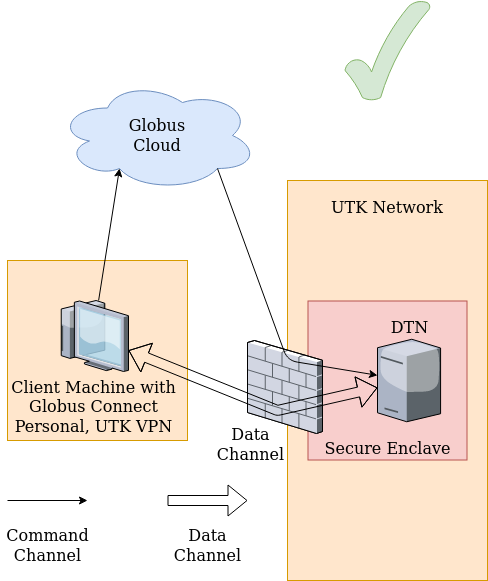
The computers to (from) which the data needs to be transferred from (to) Secure Enclave are required to be in the University of Tennessee Knoxville’s (UTK) network. For the computers outside of the UTK network, please use Secure pulse VPN and connect to UTK network prior to access the Secure Enclave or get authorization to transfer data to (from) computer/server outside the University network by submitting a Service request and approval from the concerned authorities.

As Globus is a web-based data transfer application, which uses the location of computers (source or destination), also called as endpoints to transfer data, therefore, the users do not need to connect to VPN as long as the location of the systems to (from) which data to be transferred from (to) Secure Enclave are inside the UTK’s network. For example: users are not required to connect to Secure pulse VPN if they intend to transfer data from ISAAC Open Enclave HPSC cluster or Secure Enclave VM to Secure Enclave HPSC cluster or vice versa because all these systems are already in the UTK’s network.

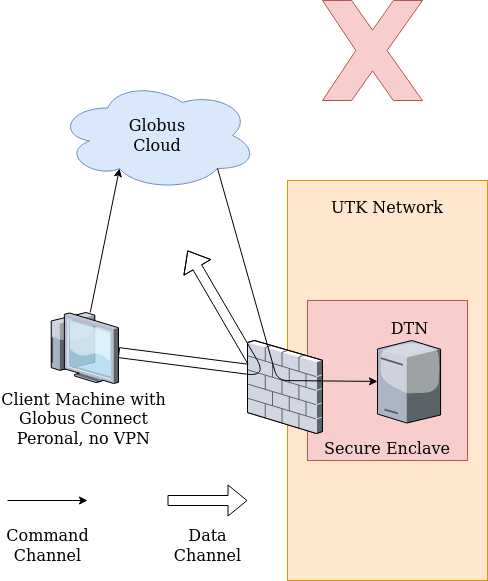
However, if a user intend to transfer data to (from) a computer outside UTK’s network from (to) one of the Secure Enclaves and is not connected to VPN, then initiating a transfer of data to (from) the Secure Enclave using Globus will create the corresponding file/folder and it will look like it was successful. However, the file will be empty and have a size of 0 kB. This is because the access for the command protocol to the Globus cloud is open but the connections to the Globus endpoint file transfer ports are only allowed from approved external endpoints and the endpoints from University IP addresses including the VPN.

To learn how to set up and configure the VPN on your device, please review OIT’s VPN User Guide.

Important Note: Please make sure that you restart the Globus application on your computer after connecting to the University’s network through VPN.

Note that selected data transfer nodes may be blocked from the Secure Enclave even if they are on campus. For example, dtn2.isaac.utk.edu in the ISAAC-NG cluster is blocked from the Secure Enclave, because it hosts the Google Drive and OneDrive connectors, which effectively allow users to transfer data to the cloud using an on-campus DTN as an intermediary.

USING THE GLOBUS WEB-BASED INTERFACE TO TRANSFER

As discussed above, there are two separate endpoints to transfer data to/from Secure Enclave Windows VM and HPSC cluster. The step by step process of data transfer for each of these systems is given below:

Windows Virtual Machines

Windows Virtual Machines

The process of transferring data to/from Windows VM can be divided into two parts:

Part 1:

The first part involves the authentication on the data transfer node (sie-dtn) and grants access to the directory from where the data in the Secure Enclave VM will be transferred. The steps to grant access to this data directory are given below:

  • Go to HPSC main webpage, then click Secure Enclave on the left menu to log in to Citrix.
Figure 3.1 – Secure Enclave option
  • Use your University credentials and choose the appropriate Domain. Press enter or click on the Log on button.
Figure 3.2 – Initial login interface of Citrix
  • After clicking the Login button, the window below will appear. Authenticate with DUO push or request a passcode.
Figure 3.3 – Two-step verification window to login in to Secure Enclave
  • Once logged in, click on the APPS menu and Open Putty Secure Enclave.
Figure 3.4 – The different applications in the Citrix environment
  • Through Putty, login into Secure Enclave DTN with a hostname of sie-dtn. Click open and enter the requested credentials.
Figure 3.5 – SSH to Secure Enclave DTN
Figure 3.6 – Authorize the transfer of data from Windows VM
  • After successfully logging in to Secure Enclave DTN, type kinit command and press enter. This command authorizes access to the directory in Windows VM from (to) where the files can be transferred.
  • For UTHSC users, it will usually be necessary to explicitly specify your NetID and the domain name in the kinit command: 
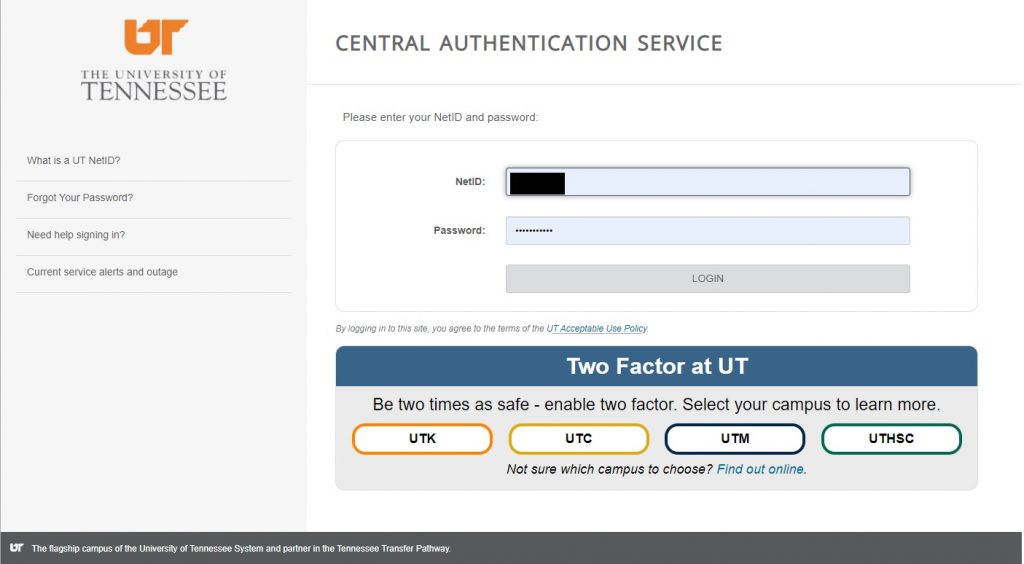
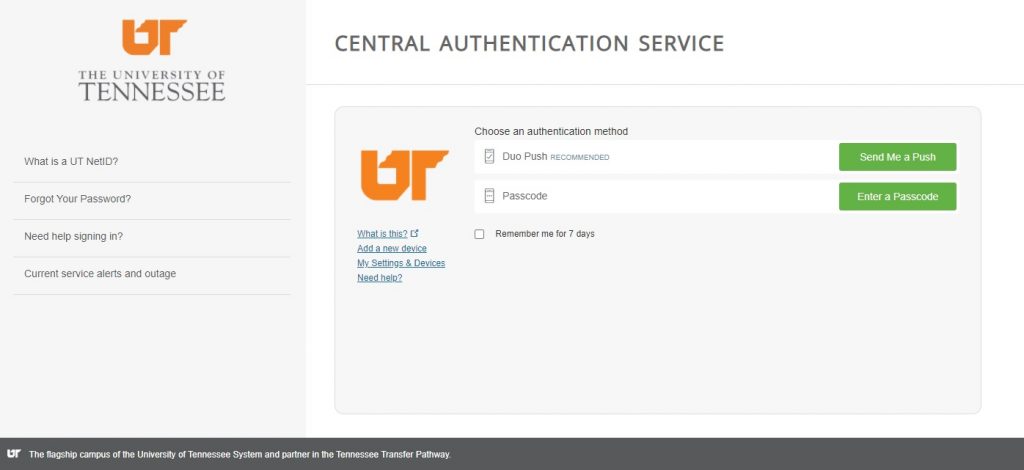
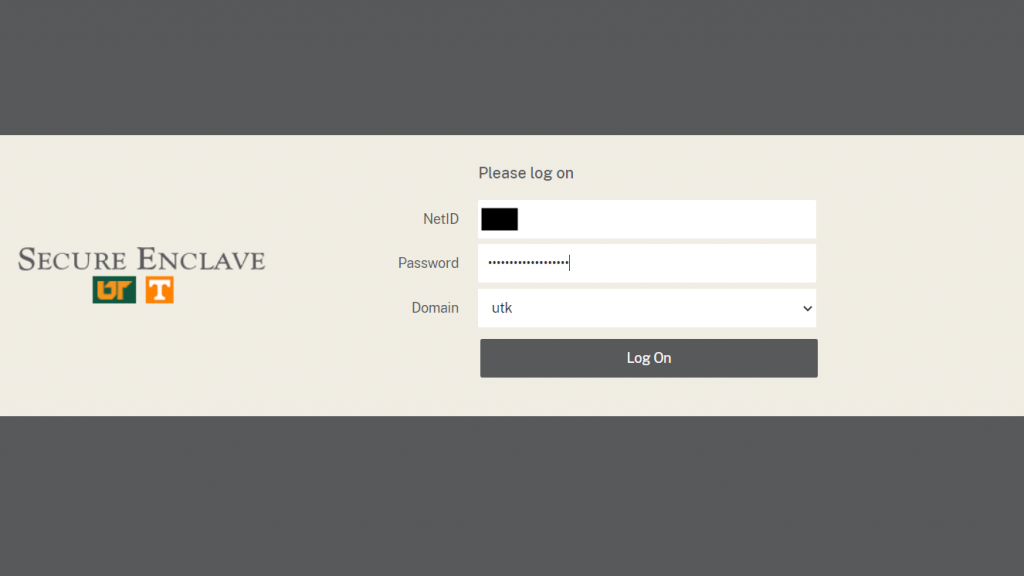
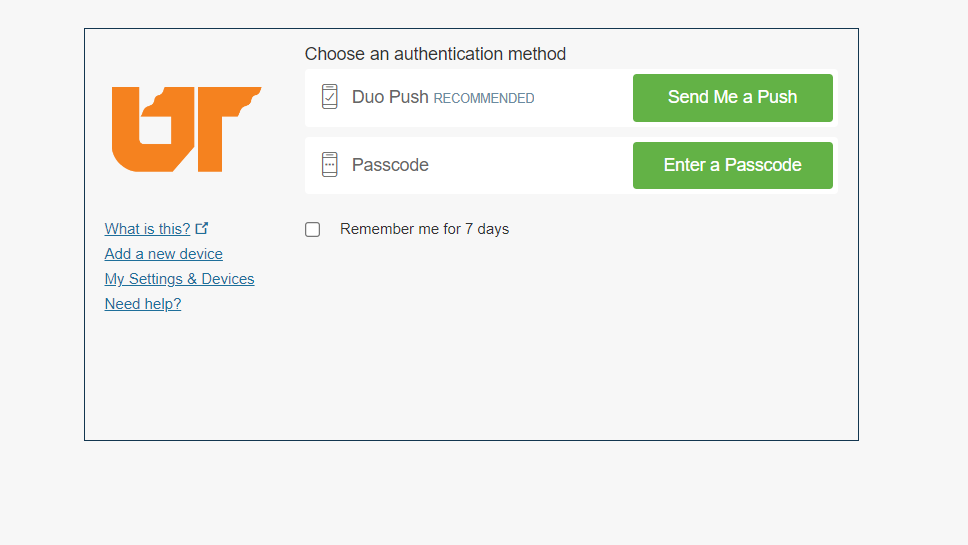
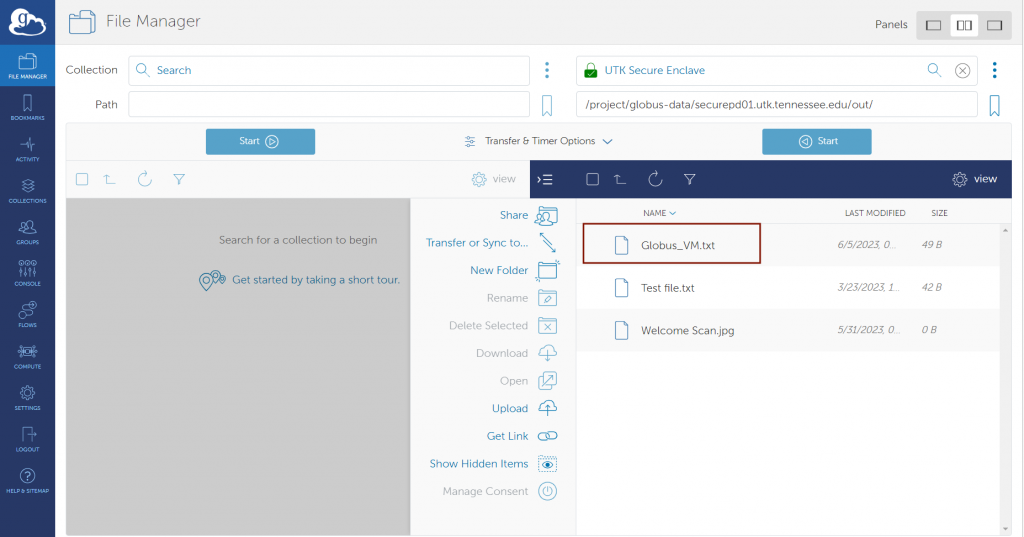
kinit netid@UTHSC.TENNESSEE.EDU. You must set your NetID in all lowercase and the domain name in all caps.

Part 2:

After authorizing data transfer on DTN, the next step is to log in to Globus web-based interface using your organizational credentials. Below are the essential steps:

  • Navigate to Globus website and click the Login button on the top right corner of the page. Find “University of Tennessee” from the drop-down menu under the organizational login and click Continue
Figure 3.7 – Organizational login window of Globus web interface
  • You will be prompted to a familiar authentication page requesting your University netID and password. Enter your credentials and click LOGIN
Figure 3.8 – Central Authentication Service page to authenticate the credentials
  • Select one of the options in the below window for the two step verification of your University credentials.
Figure 3.9 – Two-step verification step
  • After the successful authentication, you will be prompted to the Globus File Manager page. There are three small panel options on the top right corner of the page. Click on the middle two panels to set the view of the file manager to two panels, as we would be exchanging files between two computers.
Figure 3.10 – Globus File Manager
  • Before initiating any transfer, endpoints must be configured on your machine or any other machine to/from which you want to transfer the data from/to the HPSC cluster. The ISAAC Open Enclave Data transfer page provides a step-by-step guide to configure the endpoint on any machine. Please note that Secure Enclave VM already has a configured endpoint named UTK Secure Enclave.
Figure 3.11 – Collections are shown on the right and left panels.
  • In the collection box on the left pane, search for the endpoint name of your machine, which you may have given while installing Globus and creating the endpoint as mentioned above. In the right panel, search the UTK Secure Enclave. Note that due to security reasons, you will be asked to authenticate. You should see both the endpoints and the corresponding folder/files in each panel, as shown in Figure 3.10.
Figure 3.12 – different folders in UTK Secure Enclave.
  • After the successful authentication, you will see a bunch of folders under the endpoint UTK Secure Enclave. Each folder corresponds to a separate Windows VM owned by different users, as shown in Figure 3.11. The trailing end of each VM is “utk.tennessee.edu”.
Figure 3.13 – Choose the correct folder on the right panel to transfer data.

Part 3:

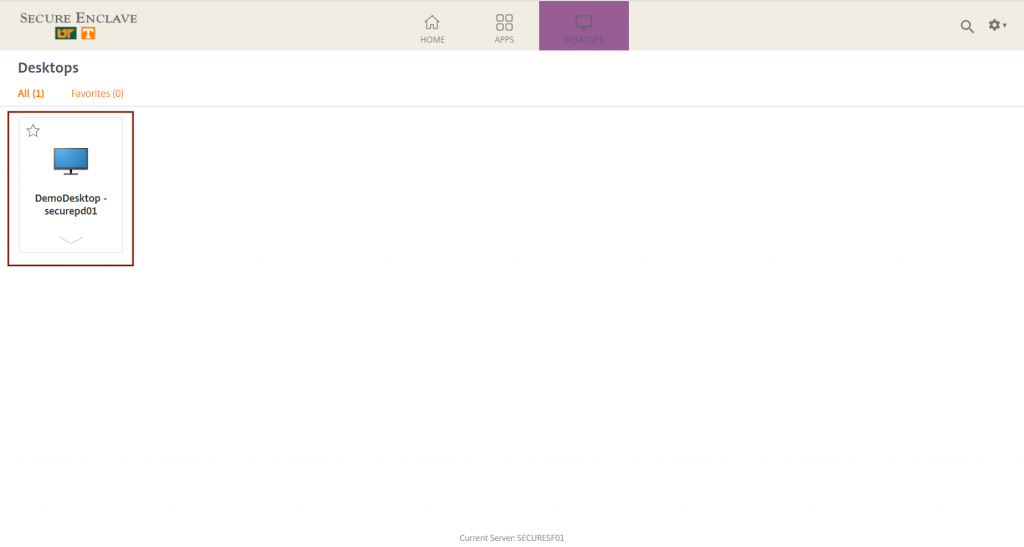
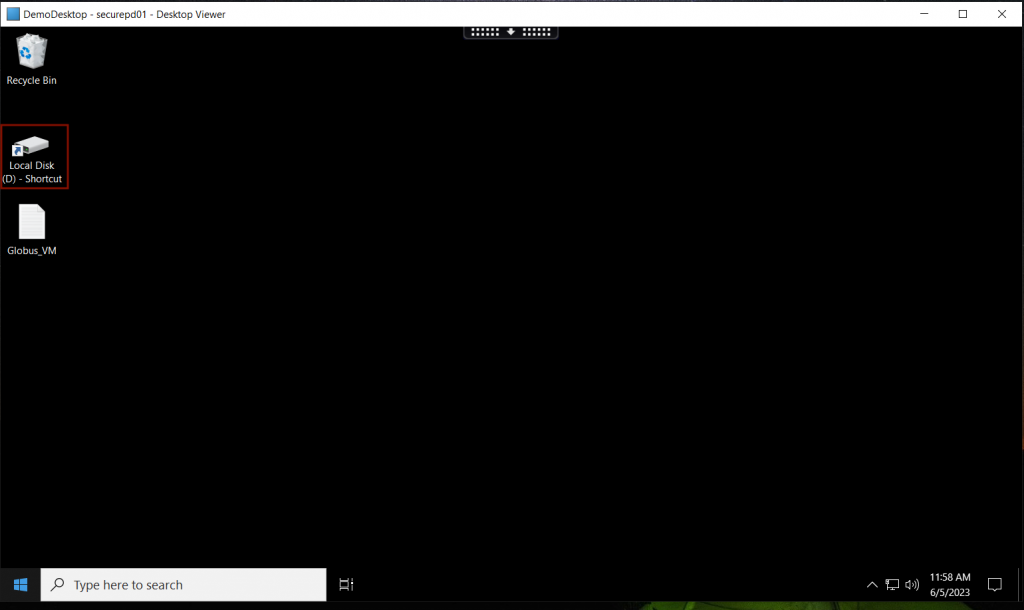
This session includes transferring files in your Windows VM to Globus Connect Personal. The contents of this directory are mapped to the ones in the D:\Globus in Windows VM. You can verify this by logging into your Windows VM and going to D:\Globus.

The first part involves the authentication on the data transfer node (sie-dtn) and grants access to the directory from where the data in the Secure Enclave VM will be transferred. The steps to grant access to this data directory are given below:

  • Go to HPSC main webpage, then click Secure Enclave on the left menu to log in to Citrix.
Figure 3.14 – Secure Enclave option
Figure 3.15 – Initial login interface of Citrix
Figure 3.16 – Two-step verification window to login in to Secure Enclave
Figure 3.17 – Desktop-Windows VM option
  • To transfer data from any authorized machine (your local machine or a server) to your Windows VM, select the name of the file/folder in your local machine/server (left endpoint) and click the blue “Start”. We have encircled this “Start” button as shown below.
Figure 3.18 – Windows VM local desktop.
Figure 3.19 – D:\Globus folder content
Figure 3.20 – Transfering data from Windows VM to Globus Endpoint folder
Figure 3.21 – The specified file was transferred from Windows VM desktop to Globus

Important Note

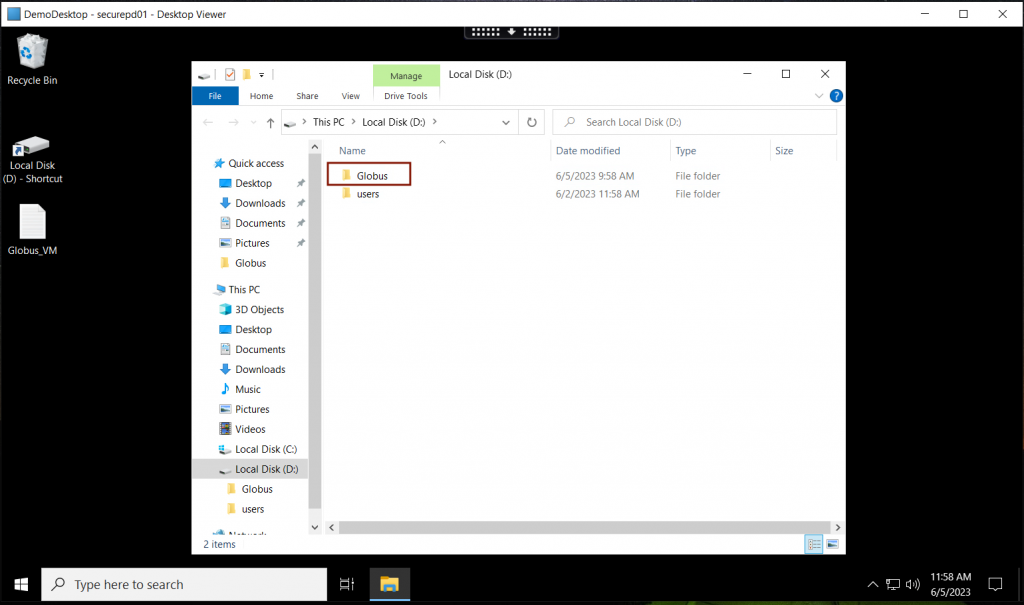
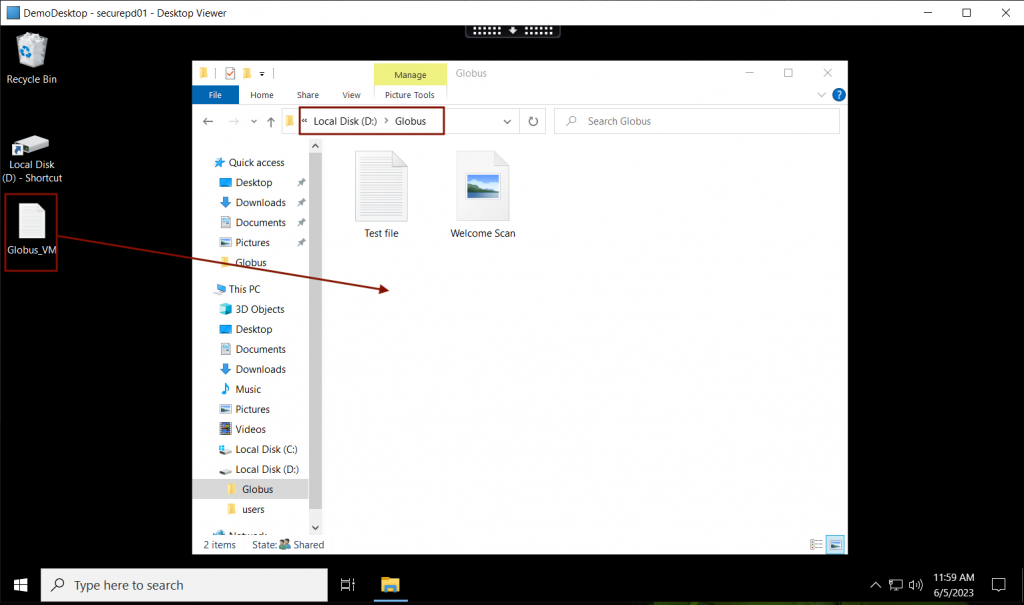
Please note that the files in the D:\Globus folder on Windows VM should not be kept permanently. After exchanging the files, please move/remove them from the D:\Globus folder.

HPSC Cluster

HPSC Cluster

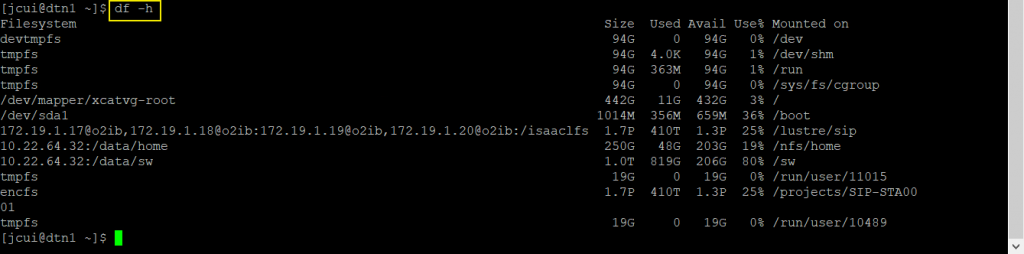
As discussed in File Systems, data on the Secure Enclave HPSC cluster is stored in encrypted and unencrypted modes. The data transfer process from each of these storage spaces is discussed individually.

Transferring Data in Unencrypted Space

The data in the unencrypted storage space can be transferred to any authorized local machine or server by following the below steps:

  • Start with the initial steps of logging in to Globus through your University credentials, as explained in Part 2 of the data transfer from Windows Virtual Machine section. Follow the steps until you see Figure 3.7.
  • To transfer data from (to) your local machine to (from) the HPSC cluster, search for the endpoint of your local machine in the left pane of Globus File Manager (Make sure that Globus is running on your machine). In the right pane, search the endpoint SIP ENCLAVE STORAGE. Note that you may need to authenticate with your University credentials. The resulting interface should look like Figure 3.14.

Figure 3.22 – Globus File Manager panels after connecting to different endpoints
  • In the right pane of Figure 3.14, there are two directories lustre and nics, which are unencrypted storage spaces of the Secure Enclave cluster, and the third one projects is encrypted, which we will discuss in the next section.
  • To transfer data from (to) your unencrypted Lustre storage space, you must change to the directory where you are granted permission to alter the files. Usually, it is /lustre/sip/proj/<project_account>/NetID.
  • To transfer data to (from) your local machine to (from) HPSC cluster, click the file/folder on your local machine (in Globus endpoint) and click the encircled blue “Start” button or “Transfer or Sync to..” button as shown in Figure 3.13.
Figure 3.23 – File transfer using Globus web interface

Transferring Data in Encrypted Space

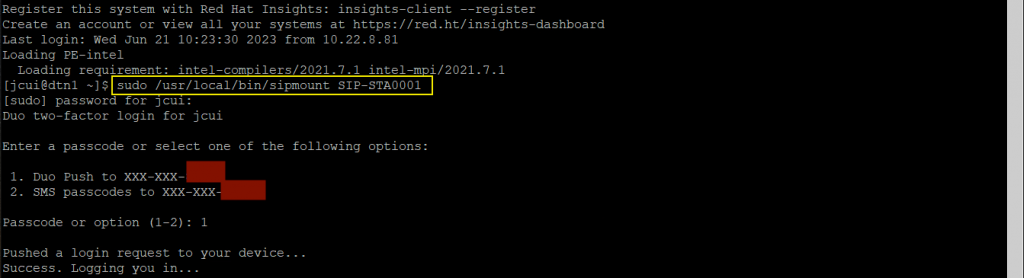
To transfer data stored in the encrypted storage space, we need to perform a few additional steps to decrypt the data before using Globus to start the data transfer. These steps are outlined below:

  • Repeat the steps described in Figure 3.1 to Figure 3.4 and open the Putty Secure Enclave application.
  • Login to Secure Enclave HPSC cluster using the hostname dtn1-se.utk.tennessee.edu in the field Host Name and click Open.
Figure 3.24 – Login to Secure Enclave cluster using Putty application in Citrix
  • Enter the University NetID and password. Authenticate with Duo/Passcode two-step authentication process as described in Part 1 of Data Transfer in Windows Virtual Machines.
  • Execute sipmount command on the Secure Enclave data transfer node as described below:
 $ sudo /usr/local/bin/sipmount <project_account>
  • Replace the <project_account> argument with your project identifier, such as UTK-9999. You can determine the name of the projects you belong to in the User Portal. More information is available in the Navigating the User Portal document.
  • Enter your University credentials, followed by a Duo push to authenticate the mounting of encrypted storage space.
Figure 3.25 – login with your NetID and password to dtn1
Figure 3.26 – login with your project name by sudo command
  • Verify if the encrypted space is mounted successfully using the “df -h” command. You should see the one extra line for encrypted space at the end of the output of “df -h” as shown below.
Figure 3.27 – df -h command
Figure 3.28 – login with the Globus icon on the bottom bar
  • Return to the Globus File Manager and navigate to the /projects/<project_account> directory. Its contents should be visible. If not, wait a few minutes, then refresh the directory.
Figure 3.29 – Globus two-pane file manager window to transfer data between two endpoints.
  • Transfer data between the computers as described in Figure 3.23.

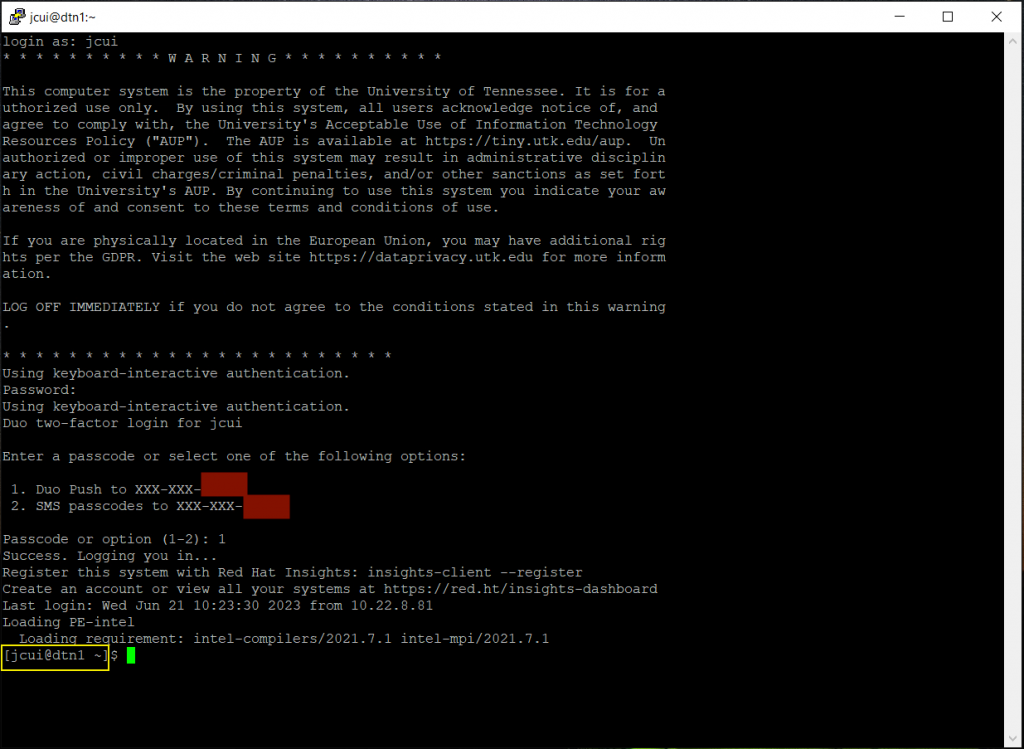
After you complete your data transfers, you may unmount the encrypted space on the Secure Enclave cluster. Use the sipunmount command to unmount this space as described below

 $ sudo /usr/local/bin/sipunmount <project_account>

Its syntax and usage is the same as the sipmount command. If you do not unmount the encrypted space, it will automatically be unmounted after 15 minutes. For more information, please refer to the File Systems document.

Virtual Datacenter Work Stations (VDWS)

Virtual Datacenter Work Stations (VDWS)

VDWS Nodes provide a hybrid environment with a VM-like desktop interface to a physical compute node in the cluster. For data transfer to VDWS nodes, you should use the “Windows Virtual Machine” procedures for a Windows VDWS and the “HPSC Cluster” procedure for the Linux VDWS.

Transferring Data to External Globus Endpoints

Data transfer from the Secure Enclave to external non-UT Globus endpoints is only allowed after authorization. These external endpoints must be authorized before they can be used. If you have an external Globus endpoint that you would like to be allowed to transfer data to/from the Secure Enclave, please submit a service request to the OIT Help Desk for the HPSC service with the request details (hostname, IP address, external Globus administrator contact, and external organization security contact).

Preparing and Organizing Data for Transfer

Globus can manage transfers of collections of files within subdirectories automatically. You may want to try using this capability by asking Globus to transfer an entire directory as a test to get familiar with it, then make use of this capability to transfer large data collections of large numbers of files on the Secure Enclave file systems.

Before you initiate data transfers to or from the Secure Enclave endpoints, you could consider preparing the data you wish to transfer by aggregating multiple files with tar and compressing it. When you aggregate data, several files and directories can be added to the same file. When you compress data, you reduce its total size. Both methods reduce the total amount of data that must be sent across the network and make it easier for you to organize the data you wish to transfer. At the time of this writing, the tar and zip utilities are the best methods for data archiving and compression for Secure Enclave users across Linux, MacOS, and Windows.

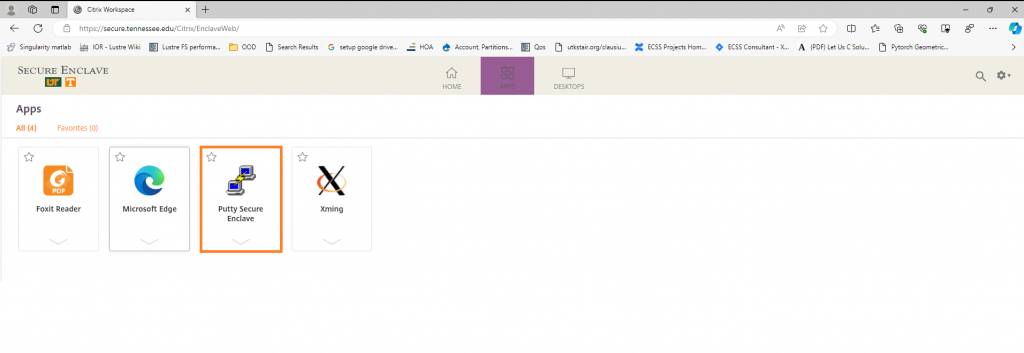
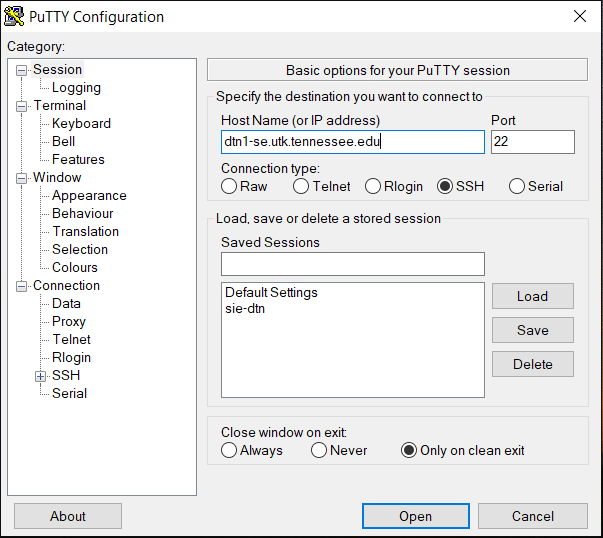
When you prepare your data, please avoid using a login node. Instead, use the SIP’s DTN (data transfer node). Figure 1.1 in the Introduction shows how to access the DTN.

Using the tar Utility

The tar (tape archiver) utility uses simple command syntax and allows large amounts of data to be aggregated into the same archive. Linux, MacOS, and updated Windows 10 systems can use tar. Older Windows systems will be limited to the zip utility.

To create a tar archive, execute tar czvf <archive-name> <dir-to-archive>. Replace the <archive-name> argument with the name of the new archive. Be sure to follow the name with the .tar.gz extension, as in my_archive.tar.gz. Replace the <dir-to-archive> argument with the directory you wish to place within the archive. If the directory you intend to archive is not within your working directory, specify its relative or absolute path. By default, tar will recursively place the directory and its contents into the new archive as shown below.

[user@sip-dtn1 ~]$ tar czvf new_archive.tar.gz Documents
Documents/
Documents/IntroUnix.pdf
Documents/JobSubData.zip
Documents/MATLAB/
Documents/Scripts.zip
Documents/PyLists.py

After the archive is created, execute ls -l to verify that the archive exists. You can view its contents with the tar tvf <archive-name> command. You may then transfer the archive using Globus. Please refer to the Configuring Globus section to learn how to configure it for your system.

On the remote system, execute tar xvf <archive-name> to extract the contents of the archive. The files will be extracted into your working directory.

Using the zip Utility

On older Windows systems, the zip utility should be used to archive and compress your data on the SIP.

To create a zip archive on the SIP, execute zip -r <archive-name>.zip <dir-to-archive>. Be sure that the directory you wish to archive is in your working directory. Otherwise, specify the relative or absolute path to the directory you wish to archive. Replace the <archive-name> argument with the name of the new zip archive. You may or may not include the .zip file extension to the archive’s name; if you do not, the zip utility will add it automatically. Replace the <dir-to-archive> argument with the directory you wish to place in the zip archive. The -r option ensures that the directory and its contents are archived and compressed as described below

[user@sip-dtn1 ~]$ zip -r Documents Documents
  adding: Documents/ (stored 0%)
  adding: Documents/IntroUnix.pdf (deflated 4%)
  adding: Documents/MATLAB/ (stored 0%)
  adding: Documents/PyLists.py (deflated 61%)

After the zip archive has been created, execute ls -l in the directory from which you created it to ensure the archive exists. It will appear with the name you gave to the archive followed by the .zip extension.

With the zip archive created and verified, transfer it to your system using Globus. Please refer to the Configuring Globus section to learn how to use it on your system. Once you transfer the zip archive to your system, open the File Explorer and navigate to the directory in which you placed the archive. Right-click on the archive and select the “Extract All…” option in the submenu. Figure 2.3 shows where to locate this option. Specify the directory in which the contents should be extracted, then select “Extract.” You may then open the archive and peruse its contents.

Globus Connect Personal

Globus Connect Personal Installation

The following video demonstrates how to install the Globus Connect Personal application on your computer system.

Globus Connect Personal Installation Tutorial

Globus Connect Personal and the Secure Enclave

  • The UTK Globus subscription supports high-assurance features for managing sensitive data. The University of Tennessee, Knoxville, is an Institution with a Secure Enclave where researchers can store and analyze data with higher security requirements. Joining your GCP endpoint to the UTK Globus subscription provides many benefits that are especially important for secure enclave users.
  • The subscription allows the use of Globus with data that requires additional protection, including Personally Identifiable Information (PII), Protected Health Information (PHI), and Controlled Unclassified Information (CUI). Subscribers may identify storage systems with sensitive data that require higher levels of assurance, and Globus will ensure that stricter access policies are enforced as required by the institution. 
  • Choosing the University of Tennessee, Knoxville, as the organizational login name will associate access to that endpoint with your UTK CAS authentication when installing the GCP application. To access the High Assurance features, Secure Enclave users should also Submit HPSC Service Request requesting that the new endpoint (identified by UUID) be added to the UTK High Assurance subscription. 

The following screenshots demonstrate how to check for a few required steps after installation.

  • Please click the three dots on the right after typing the NetID in the Collection.

Figure 3.29 – Adding GCP endpoint to UTK High Assurance subscription – step 1
  • Then click Edit Attributes as circled on the right.
Figure 3.30 – Adding GCP endpoint to UTK High Assurance subscription – step 2
  • The Visible To section can be changed from private to public at any time, but the secure enclave users should set it to “Public – Visible to all users” before submitting the ticket to add the GCP endpoint to the UTK subscription.
  • The Authentication Timeout needs to be changed from 0 to 30 minutes. This also has been mentioned in the installation tutorial.
  • The highlight section of Legacy name is users’ UUID. PLEASE DO NOT MAKE A CHANGE.
Figure 3.31 – Adding GCP endpoint to UTK High Assurance subscription – step 3
  • For the final step, the secure enclave users must Submit HPSC Service Request that includes the UUID to request a new endpoint be added to the UTK High Assurance subscription. 
Figure 3.32 – Adding GCP endpoint to UTK High Assurance subscription – step 4